1. Pendahuluan
This manual provides essential information for the proper setup, operation, and maintenance of your Sony SLV-FT5 VHS Video Cassette Recorder (VCR). Please read these instructions thoroughly before using the unit to ensure optimal performance and safety.
2. Informasi Keselamatan
Selalu ikuti tindakan pencegahan keselamatan dasar saat menggunakan produk ini untuk mengurangi risiko kebakaran, sengatan listrik, dan cedera.
- Jangan biarkan unit terkena hujan atau kelembapan.
- Jangan buka kabinet. Rujuk servis hanya kepada personel yang berkualifikasi.
- Pastikan ventilasi yang baik; jangan halangi lubang ventilasi.
- Gunakan hanya catu daya yang ditentukan untuk unit ini.
- Jauhkan unit dari sumber panas dan sinar matahari langsung.
3. Pengaturan
3.1 Membongkar
Carefully remove the VCR and all accessories from the packaging. Verify that all components are present: the SLV-FT5 VCR unit, remote control, and necessary connection cables (e.g., RCA audio/video cables).
3.2 Menghubungkan ke Televisi
To connect the VCR to your television, use the provided RCA audio/video cables. Match the colored plugs to the corresponding colored jacks on both the VCR and your TV (Yellow for Video, White for Left Audio, Red for Right Audio).

Gambar 1: Rear panel of the Sony SLV-FT5 VCR. This image displays the various input and output ports, including RCA jacks for audio and video, and the power input. The product label with model number SLV-FT5 and power specifications (100V 18W 50/60Hz) is also visible.
3.3 Sambungan Daya
Plug the VCR's power cord into a standard electrical outlet (AC 100V, 50/60Hz). Ensure the power outlet is easily accessible.
3.4 Pengaturan Kontrol Jarak Jauh
Open the battery compartment on the back of the remote control and insert two AA batteries, observing the correct polarity (+/-). Close the compartment securely.

Gambar 2: The Sony RMT-V219 remote control, designed for the SLV-FT5 VCR. This image also shows the included RCA audio/video cables, which are typically used for connecting the VCR to a television.
4. Operating the VCR
4.1 Menghidupkan/Mematikan
Tekan tombol KEKUATAN button on the VCR's front panel or the remote control to turn the unit on or off.
4.2 Loading and Unloading a VHS Tape
- Memuat: Insert a VHS cassette into the tape slot on the front of the VCR with the tape window facing forward. The VCR will automatically pull the tape in.
- Bongkar: Tekan tombol MENGELUARKAN button on the VCR or remote control. The tape will be ejected.
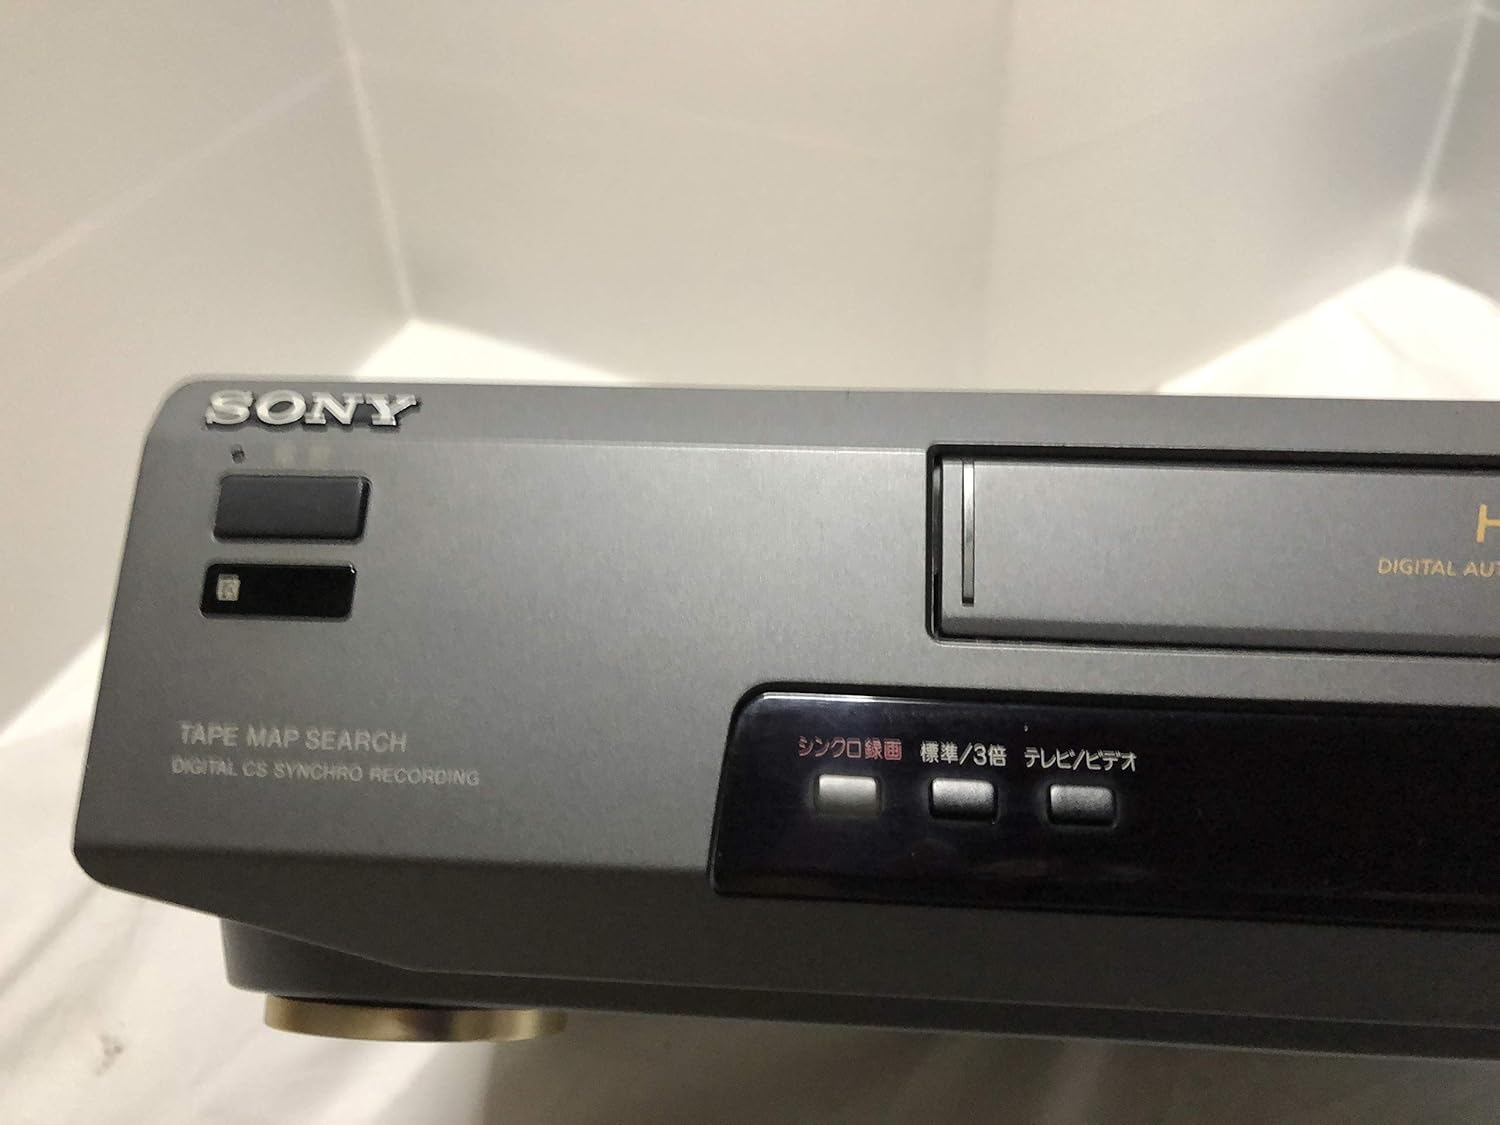
Gambar 3: Front left section of the Sony SLV-FT5 VCR. This view highlights the tape loading slot and the 'TAPE MAP SEARCH' feature, which assists in navigating recorded content on a tape.
4.3 Pemutaran ulang
After loading a tape, press the BERMAIN button (►) on the VCR or remote control to begin playback. Use the BERHENTI SEBENTAR (∥), BERHENTI (■), MEMUTAR ULANG (◀◀), and MAJU CEPAT (►►) buttons to control playback.

Gambar 4: Front right section of the Sony SLV-FT5 VCR. This image displays the main playback controls (Play, Stop, Rewind, Fast Forward, Pause) and additional buttons for 'Quick Timer' and 'Tracking' adjustments.
4.4 Perekaman
To record, ensure a blank or recordable tape is inserted. Select the desired input source (e.g., TV channel). Press the REKAM (●) button on the VCR or remote control. Press BERHENTI (■) untuk mengakhiri rekaman.
4.5 Tracking Adjustment
If the picture quality during playback is poor (e.g., horizontal lines or noise), use the PELACAKAN buttons on the front panel or remote control to fine-tune the tape's alignment with the VCR's heads.
5. Pemeliharaan
5.1 Membersihkan Unit
Wipe the exterior of the VCR with a soft, dry cloth. For stubborn stains, use a cloth lightly dampBilas dengan larutan deterjen ringan, lalu lap hingga kering. Jangan gunakan pembersih atau pelarut abrasif.
Pembersihan 5.2 Kepala
Over time, VCR heads can accumulate dirt, leading to poor picture and sound quality. Use a commercially available dry-type VHS head cleaning cassette according to its instructions. Avoid wet-type cleaners as they can damage the heads.
5.3 Penyimpanan
When not in use for extended periods, disconnect the VCR from the power outlet. Store the unit in a cool, dry place, away from dust and direct sunlight.
6. Penyelesaian masalah
If you encounter issues with your VCR, refer to the following common problems and solutions before seeking professional service.
| Masalah | Kemungkinan Penyebab | Larutan |
|---|---|---|
| Tidak ada daya | Kabel daya terputus; masalah pada stopkontak | Periksa sambungan kabel daya; coba stopkontak lain. |
| Tidak ada gambar/suara | Incorrect TV input; loose A/V cables | Select correct TV input (e.g., Video 1, AV); ensure A/V cables are securely connected. |
| Poor picture quality (snowy, lines) | Dirty VCR heads; tracking issue; old/damaged tape | Clean VCR heads; adjust tracking; try a different tape. |
| Pita kaset tidak mau keluar | Power issue; mechanical malfunction | Ensure power is on; try pressing EJECT multiple times. If issue persists, seek service. |
| Kontrol jarak jauh tidak berfungsi | Dead batteries; obstructed sensor | Replace batteries; ensure no obstacles between remote and VCR sensor. |
7. Spesifikasi
| Fitur | Spesifikasi |
|---|---|
| Merek | Sony |
| Nomor Model | SLV-FT5 |
| Jenis Media | Videografi |
| Resolusi | 720 x 480 piksel |
| Berat Produk | 4160 gram |
| Mode Keluaran Audio | Stereo |
| Format Audio yang Didukung | Monaural, Stereo |
| Pengkodean Video | Analog |
| Perangkat yang Kompatibel | Televisi |
| Input Video Compatibility | NTSC |
| Persyaratan Daya | 100V, 18W, 50/60Hz |
8. Garansi dan Dukungan
For warranty information and customer support, please refer to the documentation included with your purchase or visit the official Sony websitus. Simpan bukti pembelian Anda untuk klaim garansi.