RAWLINK 36021
RAWLINK 36021 Pompa Sepeda Mini dengan Manometer Panduan Pengguna
Model: 36021 | Merek: LINK RAW
Perkenalan
Thank you for choosing the RAWLINK 36021 Bicycle Pump Mini with Manometer. This compact and efficient pump is designed for convenient inflation of bicycle tires, featuring an integrated manometer for accurate pressure readings and versatile valve adaptors. Its durable construction and Danish design ensure reliable performance for your cycling needs.
Informasi Keselamatan
- Always read and understand these instructions before using the pump.
- Jauhkan pompa dari jangkauan anak-anak.
- Do not overinflate tires. Refer to your tire's sidewall for recommended pressure (PSI/BAR).
- Ensure the pump head is securely attached to the valve before inflating to prevent injury or damage.
- Use only the appropriate valve adaptors for your tire type.
- Avoid exposing the pump to extreme temperatures or direct sunlight for prolonged periods.
Isi Paket
Silakan periksa paket untuk memastikan semua item ada:
- 1 x RAWLINK 36021 Bicycle Pump Mini with Manometer
- Mounting brackets for bicycle frame attachment
- 3 x Valve adaptors (for various valve types)
Produk Selesaiview
Familiarize yourself with the components of your RAWLINK bicycle pump:
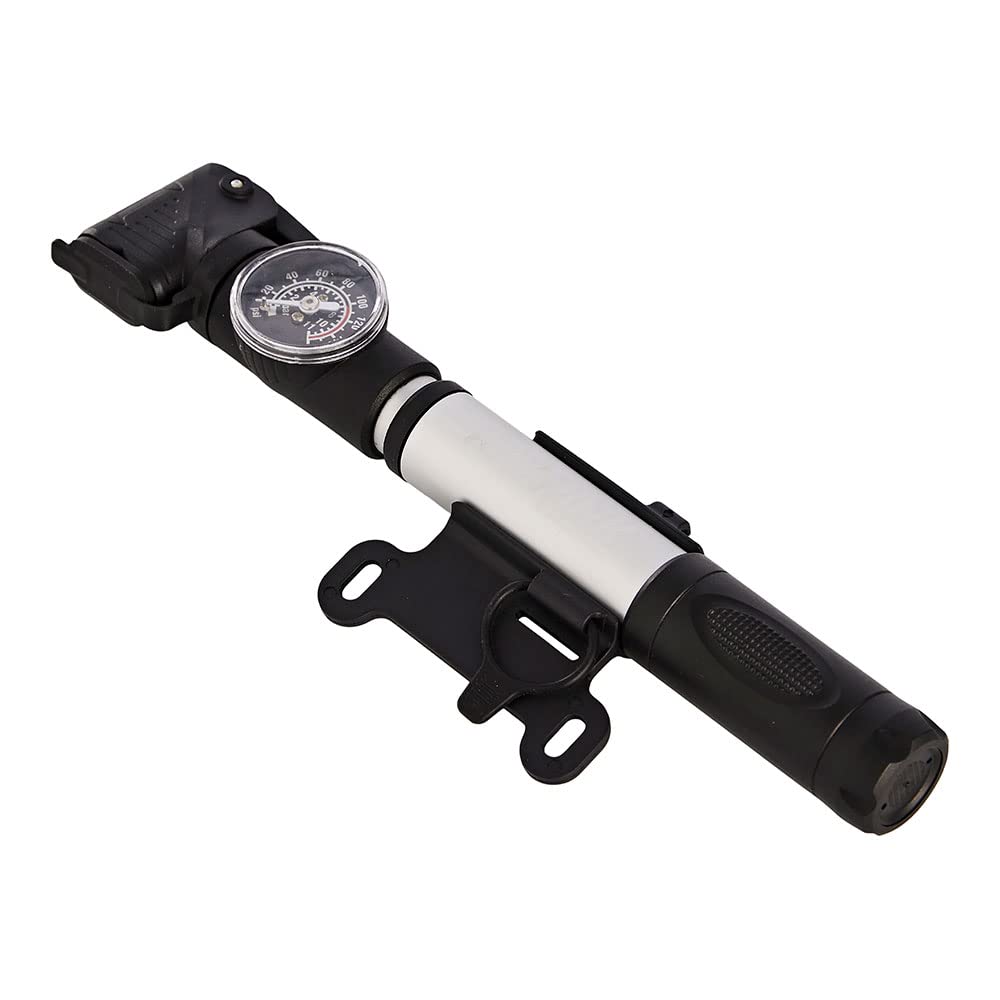
Gambar 1: The RAWLINK 36021 Bicycle Pump Mini, highlighting its compact design and integrated manometer for pressure readings. The pump features a durable body, a comfortable handle, and a flexible hose for easy valve connection.

Gambar 2: The RAWLINK 36021 Bicycle Pump Mini displayed with its full set of accessories. This includes the bicycle frame mounting brackets for convenient transport and a selection of three valve adaptors to ensure compatibility with different tire valve types.
- Tubuh pompa: The main cylinder where air is compressed.
- Menangani: Ergonomically designed for comfortable pumping.
- Manometer (Pressure Gauge): Displays the current air pressure in the tire.
- Valve Head: Connects to the tire valve.
- Braket pemasangan: For attaching the pump to your bicycle frame.
- Valve Adaptors: Small attachments for different valve types (e.g., Presta, Schrader, Dunlop).
Pengaturan
Attaching Mounting Brackets to Bicycle Frame
- Identify suitable mounting points on your bicycle frame, typically near the water bottle cage bosses.
- Use the provided screws (if applicable, or your bicycle's existing screws) to secure the mounting brackets to the frame. Ensure they are tightened securely.
- Once the brackets are installed, the pump can be clipped into place for secure transport.
Petunjuk Pengoperasian
1. Prepare the Tire Valve
- Schrader Valve (Car-type valve): Buka tutup katup.
- Presta Valve (French valve): Unscrew the valve cap, then unscrew the small knurled nut at the top of the valve stem until it is loose. Press down briefly on the valve stem to release any trapped air.
- Dunlop Valve (Woods valve): Buka tutup katup.
- Select the appropriate valve adaptor from the included set if your pump head does not directly fit your valve type.
2. Attach the Pump to the Valve
- Firmly push the pump's valve head onto the tire valve. For some pump heads, you may need to flip a lever to lock it in place. Ensure a tight seal to prevent air leakage.
3. Inflate the Tire
- Hold the pump body steady with one hand and push and pull the handle smoothly and consistently.
- Monitor the manometer (pressure gauge) to ensure you are inflating to the recommended pressure for your tire. This information is usually printed on the tire's sidewall.
4. Detach the Pump
- Once the desired pressure is reached, quickly and firmly pull the pump head off the valve. If your pump head has a locking lever, release it first.
- For Presta valves, remember to tighten the small knurled nut at the top of the valve stem and replace the valve cap. Replace valve caps on all valve types.
Pemeliharaan
- Pembersihan: Wipe the pump body with a damp Gunakan kain untuk menghilangkan kotoran dan noda. Hindari penggunaan bahan kimia keras atau pembersih abrasif.
- Penyimpanan: Store the pump in a dry place, away from direct sunlight and extreme temperatures. Utilizing the included mounting brackets on your bicycle is an ideal storage solution during rides.
- Inspeksi: Periodically check the pump for any signs of wear, damage, or loose parts. Ensure the valve head and adaptors are clean and free of debris.
Penyelesaian Masalah
- Pump not inflating tire / Air leaking from valve connection:
Ensure the pump head is securely and correctly attached to the tire valve. Check if the valve adaptor (if used) is properly seated. For Presta valves, ensure the small nut is unscrewed before attaching the pump.
- Manometer not showing pressure:
Ensure the pump is firmly attached and there is no air leakage. The manometer will only register pressure once air starts flowing into the tire and pressure builds up.
- Difficulty pumping:
Check for any obstructions in the pump's air path. Ensure the pump is clean and free of debris. If the pump feels unusually stiff, it may require internal lubrication (consult manufacturer if persistent).
Spesifikasi
| Nomor Model | 36021 |
| Merek | LINK RAW |
| Dimensi Produk | Ukuran 5x5x5 cm |
| Berat Barang | 8.1 kg (Note: This weight is as provided in product data and may be a data entry error for a mini bicycle pump.) |
| Bahan | Plastik Aluminium |
| Komponen yang Termasuk | 1 x Bicycle Pump mini with manometer |
| Mode Operasi | Buku petunjuk |
| Nomor Identifikasi Perdagangan Global (GTIN) | 05709386360214 |
Garansi dan Dukungan
For warranty information or technical support, please refer to the retailer or manufacturer's official website. Keep your purchase receipt as proof of purchase. For general inquiries, you may contact RAWLINK customer service through their official channels.
Ask a question about this manual
Ask about setup, troubleshooting, compatibility, parts, safety, or missing instructions. Manuals+ will review the question and use this page’s manual context to help answer it.