MTX Audio JH15001
MTX Audio JH15001 Jackhammer Series 1500W Monoblock Class-D Car Audio Amppengangkat
Manual Instruksi Resmi
Perkenalan
This manual provides detailed instructions for the installation, operation, and maintenance of your MTX Audio JH15001 Jackhammer Series 1500W Monoblock Class-D Car Audio Amplifier. The JH15001 is a high-performance monoblock amplifier designed to deliver powerful and clear audio to your car's subwoofer system. It features a Class-D design for efficiency, robust power output, and a range of adjustable controls to fine-tune your sound.
Fitur utama meliputi:
- 1500W Monoblock Class-D Amppengangkat
- Flexible power output: 650 watts x 1 ch. at 4 Ohm, 1100 watts x 1 ch. at 2 Ohm, 1650 watts x 1 ch. at 1 Ohm
- Wide frequency response: 20Hz - 250Hz
- Variable Low Pass Filter (40Hz - 250Hz, 12dB/Oct)
- Variable Subsonic Filter (20Hz - 50Hz, 12dB/Oct)
- Adjustable Bass Boost (0 - 12dB) at 45Hz
- Includes Remote Bass Knob for convenient control
Informasi Keselamatan
Harap baca semua petunjuk dengan saksama sebelum memasang dan mengoperasikan perangkat Anda. amppenguat. Kegagalan mengikuti pedoman ini dapat mengakibatkan kerusakan pada amplifier, your vehicle, or personal injury. Keep this manual for future reference.
- Sumber Daya: Always disconnect the vehicle's battery negative terminal before making any power connections to prevent electrical shorts.
- Pengkabelan: Use appropriate gauge wiring for power, ground, and speaker connections as recommended in the installation section. Improper wiring can lead to overheating and fire.
- Pemasangan: Pasang amplifier securely in a dry, well-ventilated area away from direct sunlight, heat sources, and moisture. Ensure adequate airflow around the amppenguat untuk pendinginan yang tepat.
- Tingkat Volume: Paparan volume tinggi dalam waktu lama dapat menyebabkan kerusakan pendengaran. Atur volume dengan bijak.
- Instalasi Profesional: If you are unsure about any aspect of the installation, seek assistance from a qualified car audio professional.
Produk Selesaiview
The MTX Audio JH15001 amplifier is designed for robust performance and ease of use. Below are images illustrating the amplifier's design and control panel.

Gambar 1: Depan view of the MTX Audio JH15001 amplifier, showing the MTX Audio logo and Jackhammer JH15001 model name, along with the control knobs for Gain, LPF, Subsonic, and Bass Boost.
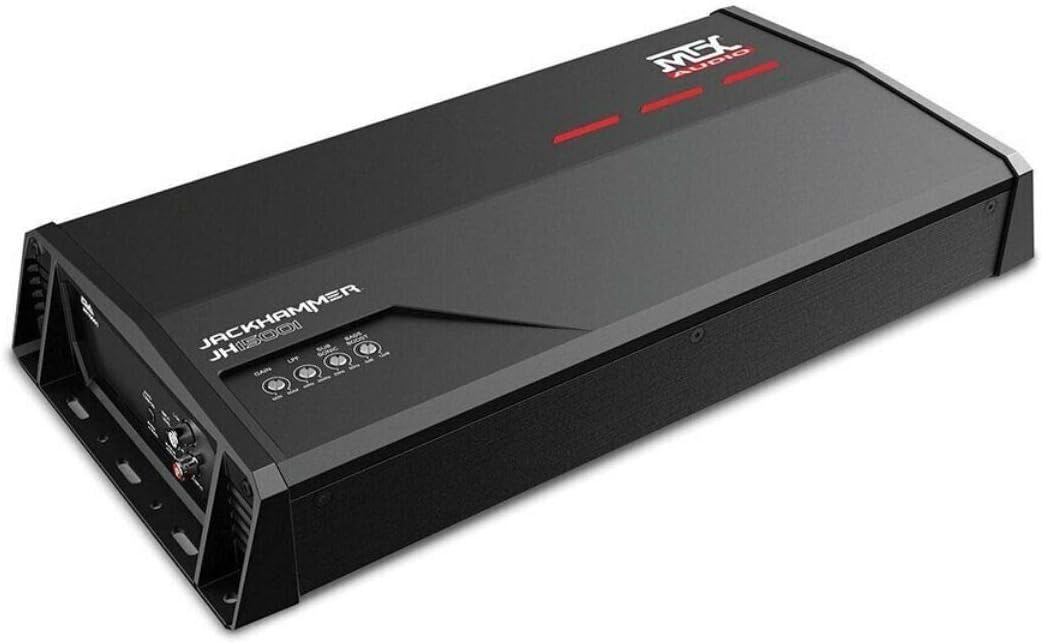
Gambar 2: Sudut view of the MTX Audio JH15001 amplifier, providing a perspective of its compact design and heat sink fins.
Pengaturan dan Instalasi
Pemasangan yang tepat sangat penting untuk kinerja dan keamanan yang optimal. Ikuti langkah-langkah berikut dengan saksama.
Pertimbangan Pengkabelan
- Always use high-quality power and ground cables. For the JH15001, a minimum of 4-gauge power and ground wire is recommended.
- Install an in-line fuse holder within 18 inches of the vehicle's battery. The fuse rating should match the amplifier's requirements (typically 80-100A for this power level).
- Ensure all connections are clean, tight, and free from corrosion.
Koneksi Daya

Gambar 3: Belakang view of the MTX Audio JH15001 amplifier, detailing the Power Input (GND, REM, +12V) and Speaker Output terminals.
- Tanah (GND): Connect the ground terminal to a clean, unpainted metal surface of the vehicle's chassis. The ground wire should be as short as possible, ideally less than 3 feet (1 meter).
- Jarak Jauh (REM): Connect the remote terminal to the remote turn-on output of your head unit. This wire signals the ampPenguat suara akan menyala saat unit utama aktif.
- +12V: Connect the +12V terminal to the positive terminal of your vehicle's battery, via the in-line fuse holder.
Koneksi Speaker
The JH15001 is a monoblock amplifier, designed for a single subwoofer or multiple subwoofers wired to a single channel. Refer to Figure 3 for the speaker output terminals.
- Connect your subwoofer(s) to the "SPEAKER OUTPUT" terminals. Ensure correct polarity (+ to + and - to -).
- Itu amplifier is stable down to 1 Ohm. Ensure your subwoofer's impedance (or combined impedance of multiple subwoofers) matches the amplifier's capabilities for optimal performance and to prevent damage.
Koneksi Input

Gambar 4: Belakang view of the MTX Audio JH15001 amplifier, showing the Line Input (RCA) and Auto Turn On switch.
- Masukan Saluran (RCA): Connect the RCA output from your head unit or signal processor to the "LINE INPUT" (L CH and R CH) on the amppengangkat.
- Hidupkan Otomatis: Sakelar ini memungkinkan amplifier to turn on automatically by sensing a DC offset or audio signal on the input. Set to "REM" if using a dedicated remote wire, or "AUDIO" if using signal sensing.
- Tingkat Masukan: This switch adjusts the input sensitivity for either "PRE IN" (low-level RCA input) or "SPK IN" (high-level speaker input, if using a line output converter).
Tombol Bass Jarak Jauh
Connect the included remote bass knob to the "EBC" port on the amplifier (refer to Figure 4). This allows for convenient adjustment of the bass level from the driver's seat.
Petunjuk Pengoperasian
Setelah terinstal, Anda dapat menyempurnakannya ampPengaturan amplifier untuk performa audio optimal.
Penyesuaian Keuntungan
The "GAIN" knob (refer to Figure 1) matches the ampSensitivitas input penguat terhadap volume outputtage of your head unit. This is not a volume control. To set the gain:
- Turn the gain knob all the way down (counter-clockwise).
- Atur volume head unit Anda sekitar 75-80% dari volume maksimumnya.
- Putar perlahan amplifier's gain knob clockwise until you hear slight distortion, then back it off slightly until the sound is clean.
Filter Akses Rendah (LPF)
The "LPF" knob (refer to Figure 1) controls the low-pass crossover frequency. This filter allows only frequencies below the set point to pass through to the subwoofer. Adjust this between 40Hz and 250Hz to blend the subwoofer's output with your main speakers.
Filter Subsonik
The "SUBSONIC" knob (refer to Figure 1) controls a high-pass filter specifically for the subwoofer channel, preventing extremely low, inaudible frequencies from being played. These frequencies can waste amplifier power and potentially damage the subwoofer. Adjust this between 20Hz and 50Hz, typically set slightly below your LPF or subwoofer's resonant frequency.
Bass Boost
The "BASS BOOST" knob (refer to Figure 1) provides an adjustable boost (0-12dB) at 45Hz. Use this sparingly to enhance bass impact. Excessive bass boost can lead to distortion and potential damage to your subwoofer.
Nyalakan Otomatis
As mentioned in the input connections, the "AUTO TURN ON" switch (Figure 4) allows the amplifier to power on without a dedicated remote wire. If your head unit does not have a remote output, set this to "AUDIO" to detect an audio signal, or "DC" (if available, though not explicitly labeled as DC on this model, it's implied by "AUDIO" vs "REM") to detect a DC offset on the speaker lines. For best results and reliability, using the "REM" setting with a remote wire from the head unit is recommended.
Pemeliharaan
Your MTX Audio amplifier requires minimal maintenance to ensure long-lasting performance.
- Pembersihan: Bersihkan secara berkala ampBersihkan bagian luar pengangkat dengan kain lembut dan kering. Jangan gunakan bahan kimia keras atau pembersih abrasif.
- Ventilasi: Pastikan bahwa ampSirip pendingin lifier bebas dari debu dan kotoran. Aliran udara yang baik sangat penting untuk mencegah panas berlebih.
- Koneksi: Occasionally check all power, ground, and speaker connections to ensure they remain tight and secure. Loose connections can cause performance issues or damage.
Penyelesaian Masalah
Jika Anda mengalami masalah dengan ampUntuk penguat suara, lihat tabel di bawah ini untuk mengetahui masalah dan solusi umum.
| Masalah | Kemungkinan Penyebab | Larutan |
|---|---|---|
| Tidak Ada Daya / Amplifier Tidak Menyala | Blown fuse, loose power/ground/remote wire, incorrect Auto Turn On setting. | Check in-line fuse, verify all power connections are secure, ensure remote wire has +12V, or adjust Auto Turn On switch. |
| Tidak ada Keluaran Suara | Loose RCA cables, incorrect input level setting, speaker wires disconnected, amplifier dalam mode perlindungan. | Check RCA connections, ensure Input Level switch is correct (PRE IN/SPK IN), verify speaker wiring, check for protect light (usually red). |
| Suara Terdistorsi | Gain set too high, LPF/Subsonic settings incorrect, poor ground connection, damaged speaker. | Reduce gain, adjust LPF/Subsonic filters, check ground connection, inspect speaker for damage. |
| Amplifier Terlalu Panas | Insufficient ventilation, impedance too low, gain set too high. | Pastikan aliran udara yang tepat di sekitar amplifier, verify speaker impedance is not below 1 Ohm, reduce gain. |
Spesifikasi
Detailed technical specifications for the MTX Audio JH15001 amppengangkat.
| Fitur | Spesifikasi |
|---|---|
| Model | JH15001 |
| Jenis | Monoblock Class-D Car Audio Amppengangkat |
| Jumlah Saluran | 1 |
| RMS Power Output (4 Ohm) | 650 watt x 1 saluran |
| RMS Power Output (2 Ohm) | 1100 watt x 1 saluran |
| RMS Power Output (1 Ohm) | 1650 watt x 1 saluran |
| Respon Frekuensi | 20Hz - 250Hz |
| Low Pass Filter (Variable) | 40Hz - 250Hz, 12dB/Octave |
| Subsonic Filter (Variable) | 20Hz - 50Hz, 12dB/Octave |
| Bass Boost | 0 - 12dB at 45Hz |
| Jil.tage | 12 Volt (DC) |
| Suhu Operasional | 40 Derajat Celcius |
| Dimensi Barang (P x L x T) | 18x12x6 inci |
| Berat Barang | 10.18 pon |
| Jenis Pemasangan | Pemasangan Permukaan |
| Pabrikan | Audio MTX |
| Spesifikasi Met | Komisi Komunikasi Federal (FCC) |
| UPC | 715442242115 |
Garansi dan Dukungan
MTX Audio products are designed for reliability and performance. For information regarding warranty coverage, please refer to the warranty card included with your product or visit the official MTX Audio website. For technical support, troubleshooting assistance beyond this manual, or service inquiries, please contact MTX Audio customer service through their official channels.
Always ensure you have your product model number (JH15001) and purchase details available when contacting support.
Ask a question about this manual
Ask about setup, troubleshooting, compatibility, parts, safety, or missing instructions. Manuals+ will review the question and use this page’s manual context to help answer it.