1. Pendahuluan
Welcome to the user manual for your Nokia 216 Dual SIM mobile phone. This guide provides essential information to help you set up, operate, and maintain your device. The Nokia 216 (RM-1187) is a classic feature phone designed for reliable communication, featuring dual SIM capability, a 2.4-inch display, and a VGA camera.
Please read this manual carefully to ensure proper use and to get the most out of your phone.
2. Isi Paket
Pastikan semua item ada dalam paket produk Anda:
- Nokia 216 Dual SIM Mobile Phone (RM-1187)
- Baterai
- Adaptor Daya
- Kabel USB
3. Perangkat Berakhirview
Familiarize yourself with the key components of your Nokia 216 phone.
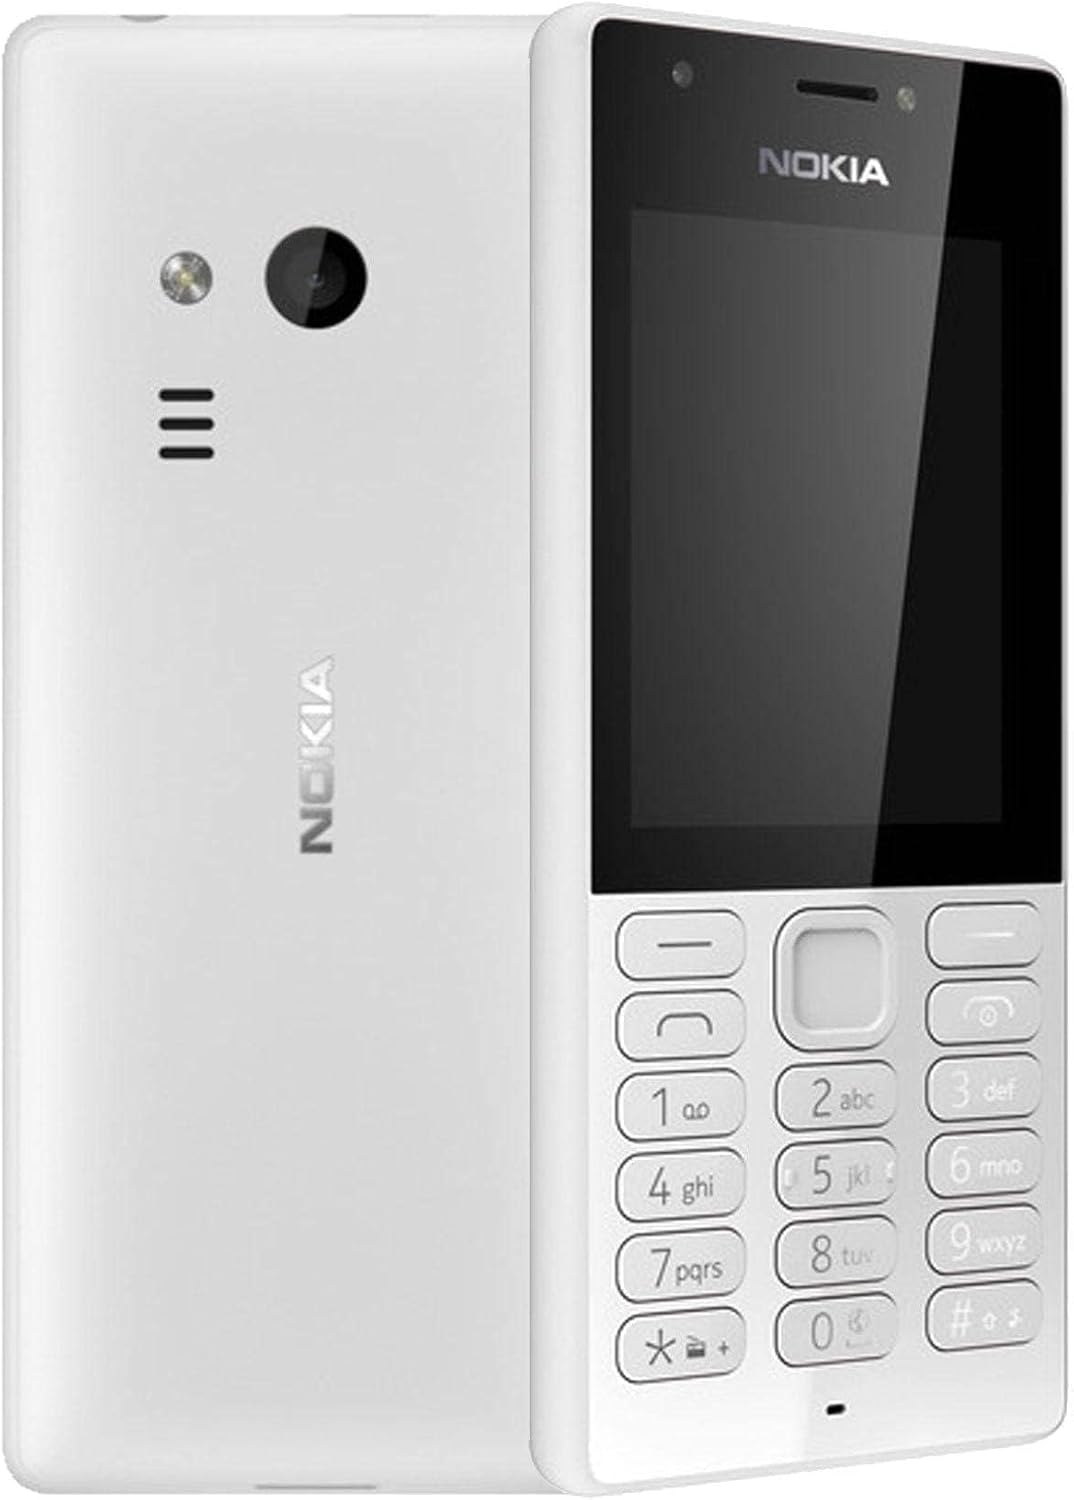
Gambar 3.1: Depan dan belakang view of the Nokia 216 Dual SIM mobile phone. The front shows the display, earpiece, and numeric keypad. The back features the rear camera, LED flash, and loudspeaker grille.

Gambar 3.2: Depan view of the Nokia 216 Dual SIM mobile phone. This image highlights the 2.4-inch display, the navigation keys, and the alphanumeric keypad for dialing and text input.

Gambar 3.3: Kembali view of the Nokia 216 Dual SIM mobile phone. This view shows the rear VGA camera lens, the LED flash, and the Nokia branding.
Komponen Utama:
- Menampilkan: 2.4-inch QVGA screen.
- Papan tombol: Alphanumeric keypad for dialing and text entry, with navigation keys.
- Kamera Belakang: VGA camera with LED flash.
- Pengeras suara: For audio playback and hands-free calls.
- Mikropon: Untuk input suara selama panggilan dan perekaman.
- Jack Audio 3.5mm: Untuk headphone atau speaker eksternal.
- Port Pengisian Daya: Micro-USB port for charging and data transfer.
4. Pengaturan
4.1. Masukkan Kartu SIM
- Turn off the phone and disconnect any charger.
- Carefully remove the back cover by prying it open from the notch.
- Jika baterai masuk, angkat.
- Insert the SIM card(s) into the designated slot(s) with the gold contacts facing down. For dual SIM models, ensure both SIMs are correctly seated.
- If applicable, insert a microSD card into its slot for additional storage.
- Ganti baterainya.
- Sejajarkan penutup belakang dan tekan dengan kuat hingga berbunyi klik dan terpasang dengan benar.
4.2. Isi baterai
- Sambungkan adaptor daya ke stopkontak di dinding.
- Plug the micro-USB end of the cable into the phone's charging port.
- Indikator baterai di layar akan menunjukkan status pengisian daya.
- Once fully charged, disconnect the charger from the phone and then from the wall outlet.
5. Petunjuk Pengoperasian
5.1. Daya Hidup/Mati
- Untuk menghidupkan: Tekan dan tahan tombol daya (biasanya tombol merah 'Akhiri Panggilan') hingga ponsel bergetar dan logo Nokia muncul.
- Untuk mematikan: Press and hold the power key until the 'Power off' option appears on the screen, then select it.
5.2. Melakukan Panggilan
- Dari layar utama, masukkan nomor telepon menggunakan papan tombol numerik.
- Press the green 'Call' key to initiate the call.
- To end a call, press the red 'End Call' key.
5.3. Mengirim Pesan Teks (SMS)
- Pergi ke Menu > Pesan > Menulis pesan.
- Ketik pesan Anda menggunakan keypad.
- Masukkan nomor telepon penerima atau pilih dari kontak.
- Memilih Mengirim.
5.4. Menggunakan Kamera
- Pergi ke Menu > Kamera.
- Atur komposisi bidikan Anda menggunakan layar.
- Tekan tombol navigasi tengah untuk mengambil foto.
6. Pemeliharaan dan Perawatan
To ensure the longevity and optimal performance of your Nokia 216, follow these care guidelines:
- Jaga agar perangkat tetap kering: Kelembapan dapat merusak sirkuit elektronik.
- Use original accessories: Only use batteries, chargers, and accessories approved by Nokia.
- Bersihkan dengan lembut: Use a soft, clean, dry cloth to clean the surface of the device.
- Hindari suhu ekstrim: Do not expose your device to very high or low temperatures.
- Tangani dengan hati-hati: Hindari menjatuhkan atau membenturkan perangkat dengan keras.
7. Penyelesaian masalah
If you encounter issues with your Nokia 216, try these common troubleshooting steps:
| Masalah | Larutan |
|---|---|
| Telepon tidak menyala | Ensure the battery is charged. Connect the charger and try again. Check if the battery is properly inserted. |
| Tidak ada sinyal jaringan | Check if the SIM card is correctly inserted. Move to an area with better network coverage. Restart the phone. |
| Baterai tidak mengisi daya | Ensure the charger is properly connected to both the phone and the power outlet. Try a different power outlet or charger. Check for any damage to the charging port. |
| Tidak dapat membuat atau menerima panggilan | Check network signal. Ensure your SIM card is active and has sufficient credit/plan. Verify that call barring is not enabled. |
8. Spesifikasi
| Fitur | Detil |
|---|---|
| Merek | Nokia |
| Nama Model | RM-1187 |
| Sistem Operasi | Symbian 9.1 (Series 30) |
| Ukuran Layar | 2.4 inci |
| Resolusi Layar | 240 x 320 piksel |
| Tingkat Penyegaran | 90Hz |
| Ukuran RAM Terpasang | 256MB |
| Kapasitas Penyimpanan Memori | 3.9 GB (Internal, likely for system/apps, expandable via microSD) |
| Model CPU | Nomor telepon A10 |
| Teknologi Seluler | 2G |
| Teknologi Komunikasi Nirkabel | Seluler |
| Teknologi Konektivitas | USB, Bluetooth, Wi-Fi |
| Bahasa Indonesia: GPS | GPS (Global Positioning System) |
| Primary Device User Interface | Buttons, Numeric Keypad, Microphone |
| Fitur Kamera Lainnya | Rear Camera (VGA) |
| Soket Audio | 3.5 mm |
| Faktor Bentuk | Klasik |
| Warna | Abu-abu |
| Waktu Bicara | Hingga 18 jam |
| Berat Barang | 339 gram |
| Dimensi Paket | Ukuran 13.4x12.6x3.6 cm |
| Apa yang ada di dalam kotak | Adaptor daya, kabel USB |
9. Garansi dan Dukungan
For warranty information, please refer to the warranty card included in your product package or visit the official Nokia website. If you require further assistance or technical support, please contact Nokia customer service through their official channels.
Simpan struk pembelian Anda sebagai bukti pembelian untuk klaim garansi.