1. Pendahuluan
This manual provides detailed instructions for the Tyler 16-inch Portable LCD TV Monitor, Model T709. Please read this manual thoroughly before using the product to ensure proper operation and to maximize its lifespan. Keep this manual for future reference.
2. Informasi Keselamatan
- Jangan biarkan unit terkena hujan atau kelembapan untuk mencegah kebakaran atau sengatan listrik.
- Jangan membuka casing. Serahkan semua servis kepada personel yang berkualifikasi.
- Pastikan ventilasi yang baik. Jangan halangi lubang ventilasi.
- Use only the power adapter and car charger provided by the manufacturer.
- Hindari suhu ekstrim dan sinar matahari langsung.
- Handle the screen with care to prevent damage.
3. Isi Paket
Verifikasi bahwa semua item yang tercantum di bawah ini disertakan dalam paket Anda:
- Tyler 16-inch Portable LCD TV Monitor (Model T709)
- Kontrol Jarak Jauh
- Baterai untuk Remote Control
- Adaptor Daya AC/DC
- Car Charger Adapter (12V)
- Antenna Set (for digital TV and FM receivers)
- RCA Cable (for analogue video input)

Image: All components included with the Tyler 16-inch Portable TV Monitor, including the TV, remote control, batteries, AC/DC adapter, car charger, antenna, and RCA cable.
4. Produk Lebihview
The Tyler 16-inch Portable LCD TV Monitor (Model T709) is designed for versatile entertainment on the go. It features a 16-inch widescreen LED display, built-in rechargeable battery, and multiple connectivity options.
Depan View

Gambar: Depan view of the Tyler 16-inch Portable TV Monitor, showcasing the screen, integrated stand, and the included remote control and antenna.
Koneksi Samping dan Belakang
The unit provides various ports for connecting external devices:

Gambar: Detail view of the side panel connections, including the USB port, Analogue Video port, HDMI digital video and audio port, and FM radio antenna input.
- Port USB: For external audio/video playback.
- Analogue Video Port: Untuk menghubungkan perangkat lama.
- Port HDMI: Untuk input video dan audio digital definisi tinggi.
- FM Radio Antenna Input: Untuk penerimaan radio FM.
- DC 12V Masukan: For power adapter or car charger.
- Input/Output AV: Dual AV inputs for DVD players or game systems.
- Jack Headphone: Untuk didengarkan secara pribadi.
5. Pengaturan
5.1 Pengisian Awal
Before first use, fully charge the built-in battery. Connect the AC/DC power adapter to the DC 12V input on the TV and plug it into a wall outlet. The charging indicator will illuminate. A full charge typically takes several hours.
5.2 Koneksi Antena
For receiving digital TV or FM radio signals, connect the included antenna to the appropriate antenna input port on the TV. Extend the antenna fully for optimal reception.
5.3 Menghidupkan/Mematikan
Tekan tombol KEKUATAN button on the TV or the remote control to turn the unit on or off.
5.4 Menghubungkan Perangkat Eksternal
- HDMI: Connect an HDMI cable from your device (e.g., Roku, Firestick, game console) to the HDMI port on the TV.
- Kabel USB: Masukkan drive USB ke port USB untuk pemutaran media.
- RCA (AV In): Use the provided RCA cable to connect devices like DVD players to the AV In ports.
5.5 Menyesuaikan Stand
The TV features a built-in steel stand that can be adjusted for optimal viewing angles. Simply pull out the stand from the back of the unit and position it as desired. The stand allows for a wide range of rotation.

Image: The rear of the TV demonstrating the adjustable, rotating stand for flexible positioning.
6. Petunjuk Pengoperasian
6.1 Fungsi Kontrol Jarak Jauh
The included remote control provides full functionality for the TV. Ensure batteries are correctly inserted.

Image: The Tyler multimedia remote control, showing various buttons for power, channel, volume, menu navigation, and input selection.
- KEKUATAN: Menghidupkan/mematikan TV.
- TIDAK BISA: Mengakses menu utama untuk pengaturan.
- CH +/-: Mengubah saluran.
- VOL +/-: Menyesuaikan volume.
- MASUKAN/SUMBER: Memilih sumber input (HDMI, AV, USB, TV).
- Oke/MASUK: Konfirmasikan pilihan.
- BISU: Membisukan/membunyikan audio.
- INFORMASI: Menampilkan informasi saluran.
6.2 Channel Scan (First Time Setup)
- Pastikan antena terhubung.
- Nyalakan TV.
- Tekan tombol MENU tombol pada remote.
- Navigate to the "Channel" or "Setup" menu.
- Select "Auto Scan" or "Auto Tune" and confirm. The TV will search for available digital channels. This process may take several minutes.
6.3 Pemutaran Media melalui USB
Insert a USB flash drive containing compatible media files (AVI, MOV, MPEG, MP4, MP3, JPEG, etc.) into the USB port. Select "USB" as the input source using the MASUKAN button. Navigate through your filemenggunakan remote control.
Operasi Radio FM 6.4
Select "FM Radio" as the input source. Use the channel buttons to tune to different radio stations. Perform an auto-scan in the FM radio menu for the first time to find available stations.
6.5 Penggunaan Headphone
Connect standard 3.5mm headphones to the headphone jack for private listening. The built-in speakers will automatically mute when headphones are connected.
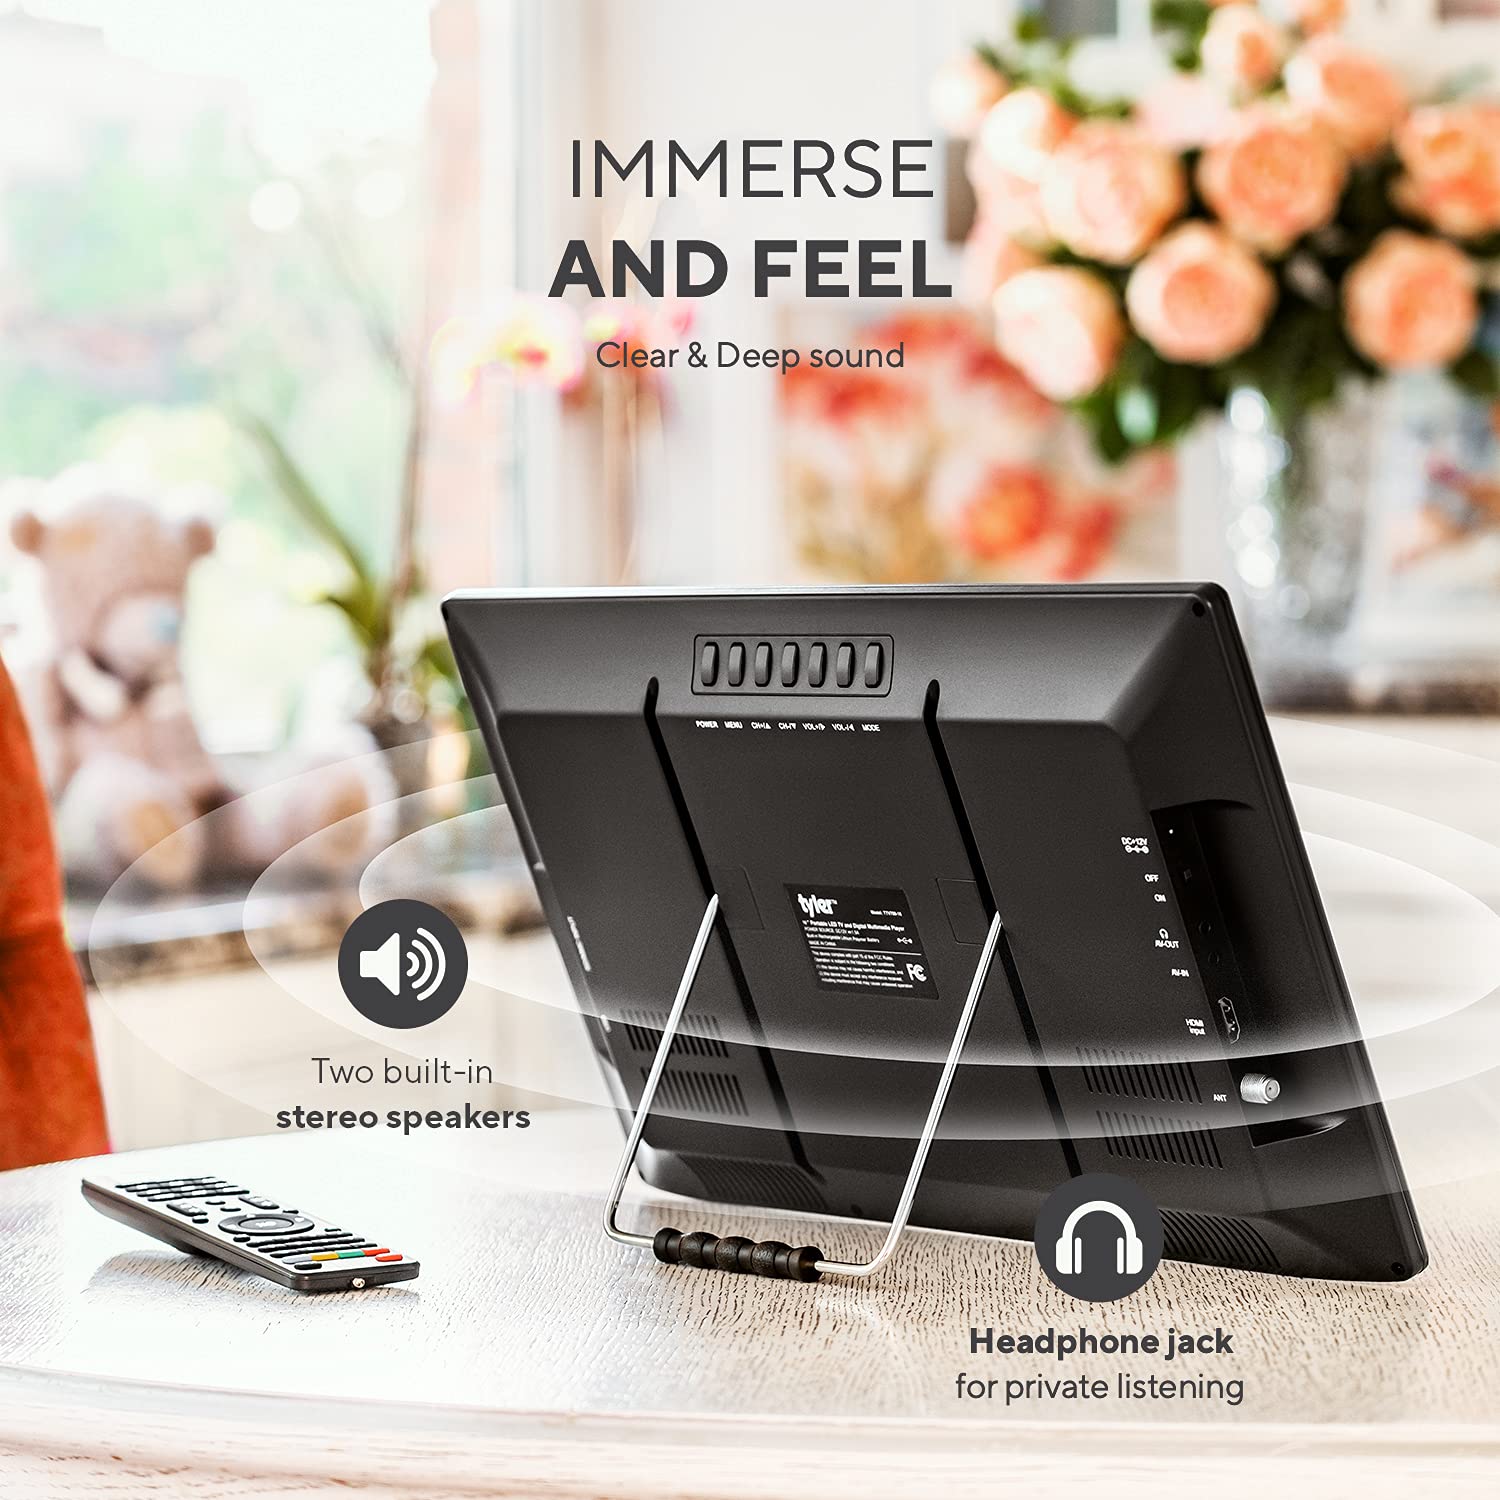
Image: The rear of the TV, indicating the location of the headphone jack for private listening and the two built-in stereo speakers.
7. Pemeliharaan
7.1 Membersihkan Unit
Bersihkan layar dan casindengan kain lembut, kering, dan bebas serat. Untuk noda membandel, keringkan sedikitampBilas kain dengan air. Jangan gunakan pembersih abrasif, lilin, atau pelarut.
7.2 Perawatan Baterai
- Untuk memperpanjang masa pakai baterai, hindari mengosongkan baterai sepenuhnya secara sering.
- If storing the unit for an extended period, charge the battery to approximately 50% every 3-6 months.
- Jangan biarkan baterai terkena panas atau dingin ekstrem.
8. Penyelesaian masalah
| Masalah | Kemungkinan Penyebab | Larutan |
|---|---|---|
| Tidak ada daya | Battery discharged; Power adapter not connected; Remote control batteries dead. | Charge the battery; Connect the power adapter; Replace remote control batteries. |
| No signal/Poor picture quality | Antenna not connected or positioned correctly; No channel scan performed; Weak broadcast signal. | Connect/adjust antenna; Perform auto channel scan; Try repositioning the TV or antenna. |
| Tidak ada suara atau volume rendah | Volume too low; Mute activated; External speakers/headphones not connected properly. | Increase volume; Deactivate mute; Check external audio connections. Note: Built-in speakers are designed for portability and may not offer high fidelity. |
| HDMI input not working | Incorrect input source selected; Faulty HDMI cable; External device not powered on. | Select correct HDMI input; Try a different HDMI cable; Ensure external device is on. |
| Piksel mati atau garis pada layar | Manufacturing defect or physical damage. | Hubungi dukungan pelanggan untuk bantuan. |
| Pengendali jarak jauh tidak merespons | Baterai habis atau terpasang tidak benar; Ada penghalang antara remote dan TV. | Replace batteries; Ensure clear line of sight to the TV's IR receiver. |
9. Spesifikasi
| Fitur | Detil |
|---|---|
| Nomor Model | T709 |
| Ukuran Layar | 16 inci |
| Teknologi Tampilan | LCD, LED |
| Resolusi | 1080p |
| Tingkat Penyegaran | 60Hz |
| Rasio Aspek | 16:9 |
| Konektivitas | HDMI, USB, VGA, RCA (AV In/Out), Headphone Jack, FM Antenna |
| Sumber Daya | AC/DC Adapter, 12V Car Charger, Built-in Lithium Ion Battery |
| Daya Tahan Baterai | Approximately 4+ hours (TV playback), 25 minutes (HDMI with DVD player) |
| Dimensi Produk | 1"D x 1"W x 2"H (Note: These dimensions are as provided in product data and may refer to packaging or a specific component.) |
| Berat | 4.35 pon |
| Pabrikan | tyler-seorang |
10. Garansi dan Dukungan
10.1 Informasi Garansi
This product is covered by a manufacturer's warranty. Please refer to the warranty card included in your package or visit the official Tyler webSitus ini untuk syarat dan ketentuan garansi yang terperinci. Simpan bukti pembelian Anda untuk klaim garansi.
10.2 Dukungan Pelanggan
For technical assistance, troubleshooting not covered in this manual, or warranty inquiries, please contact Tyler customer support. Contact details can typically be found on the manufacturer's websitus atau pada kemasan produk.
Note: Specific contact information is not provided in this manual. Please refer to the product packaging or manufacturer's websitus untuk rincian dukungan terkini.