SANODESK B09BCXTNTZ
SANODESK Cable Channel Desk Cable Management Tray
Model: B09BCXTNTZ
1. Produk Lebihview
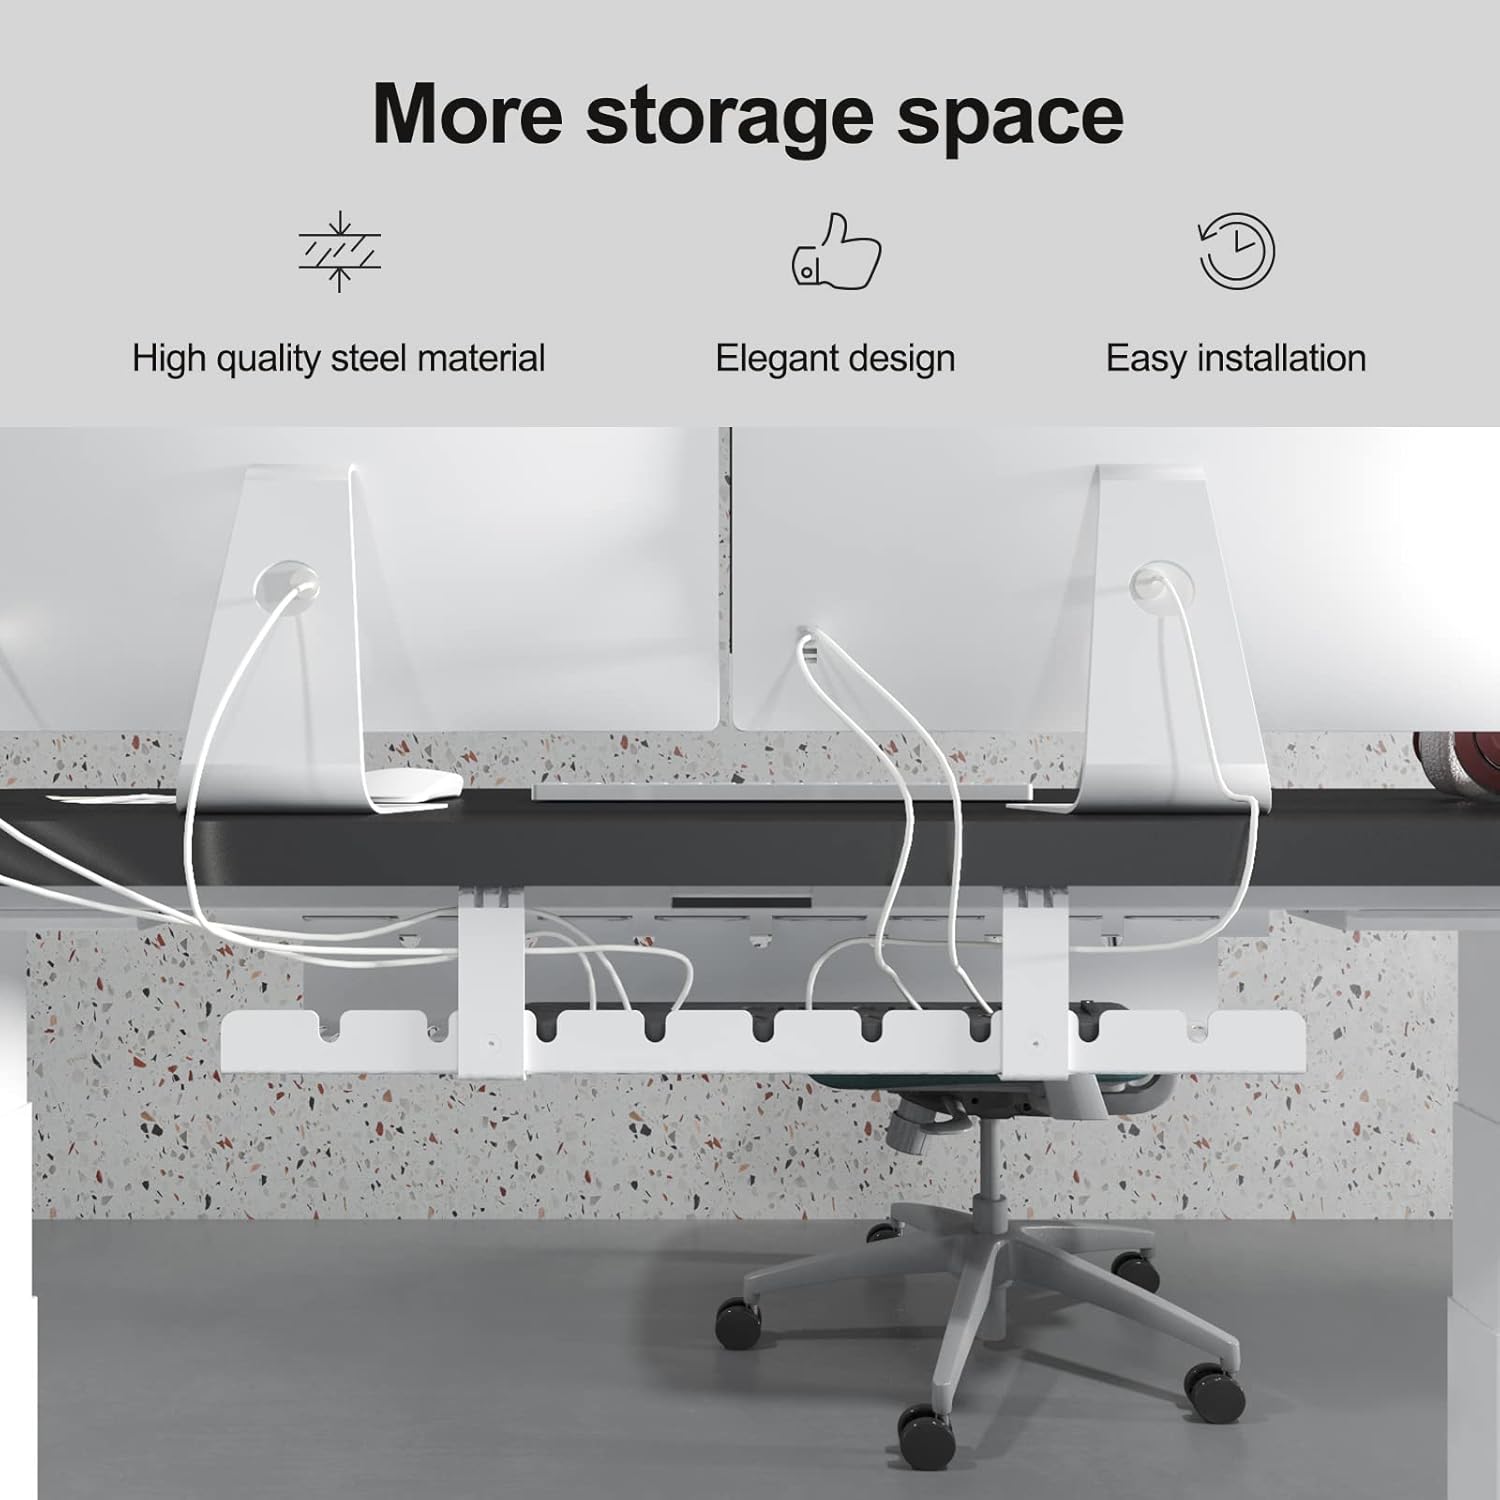
The SANODESK Cable Channel Desk Cable Management Tray is designed to help you maintain a tidy and organized workspace by effectively managing cables under your desk. Made from durable, powder-coated metal, this flexible and space-saving solution ensures your cables are securely locked in place, reducing clutter and improving productivity.

Fitur Utama:
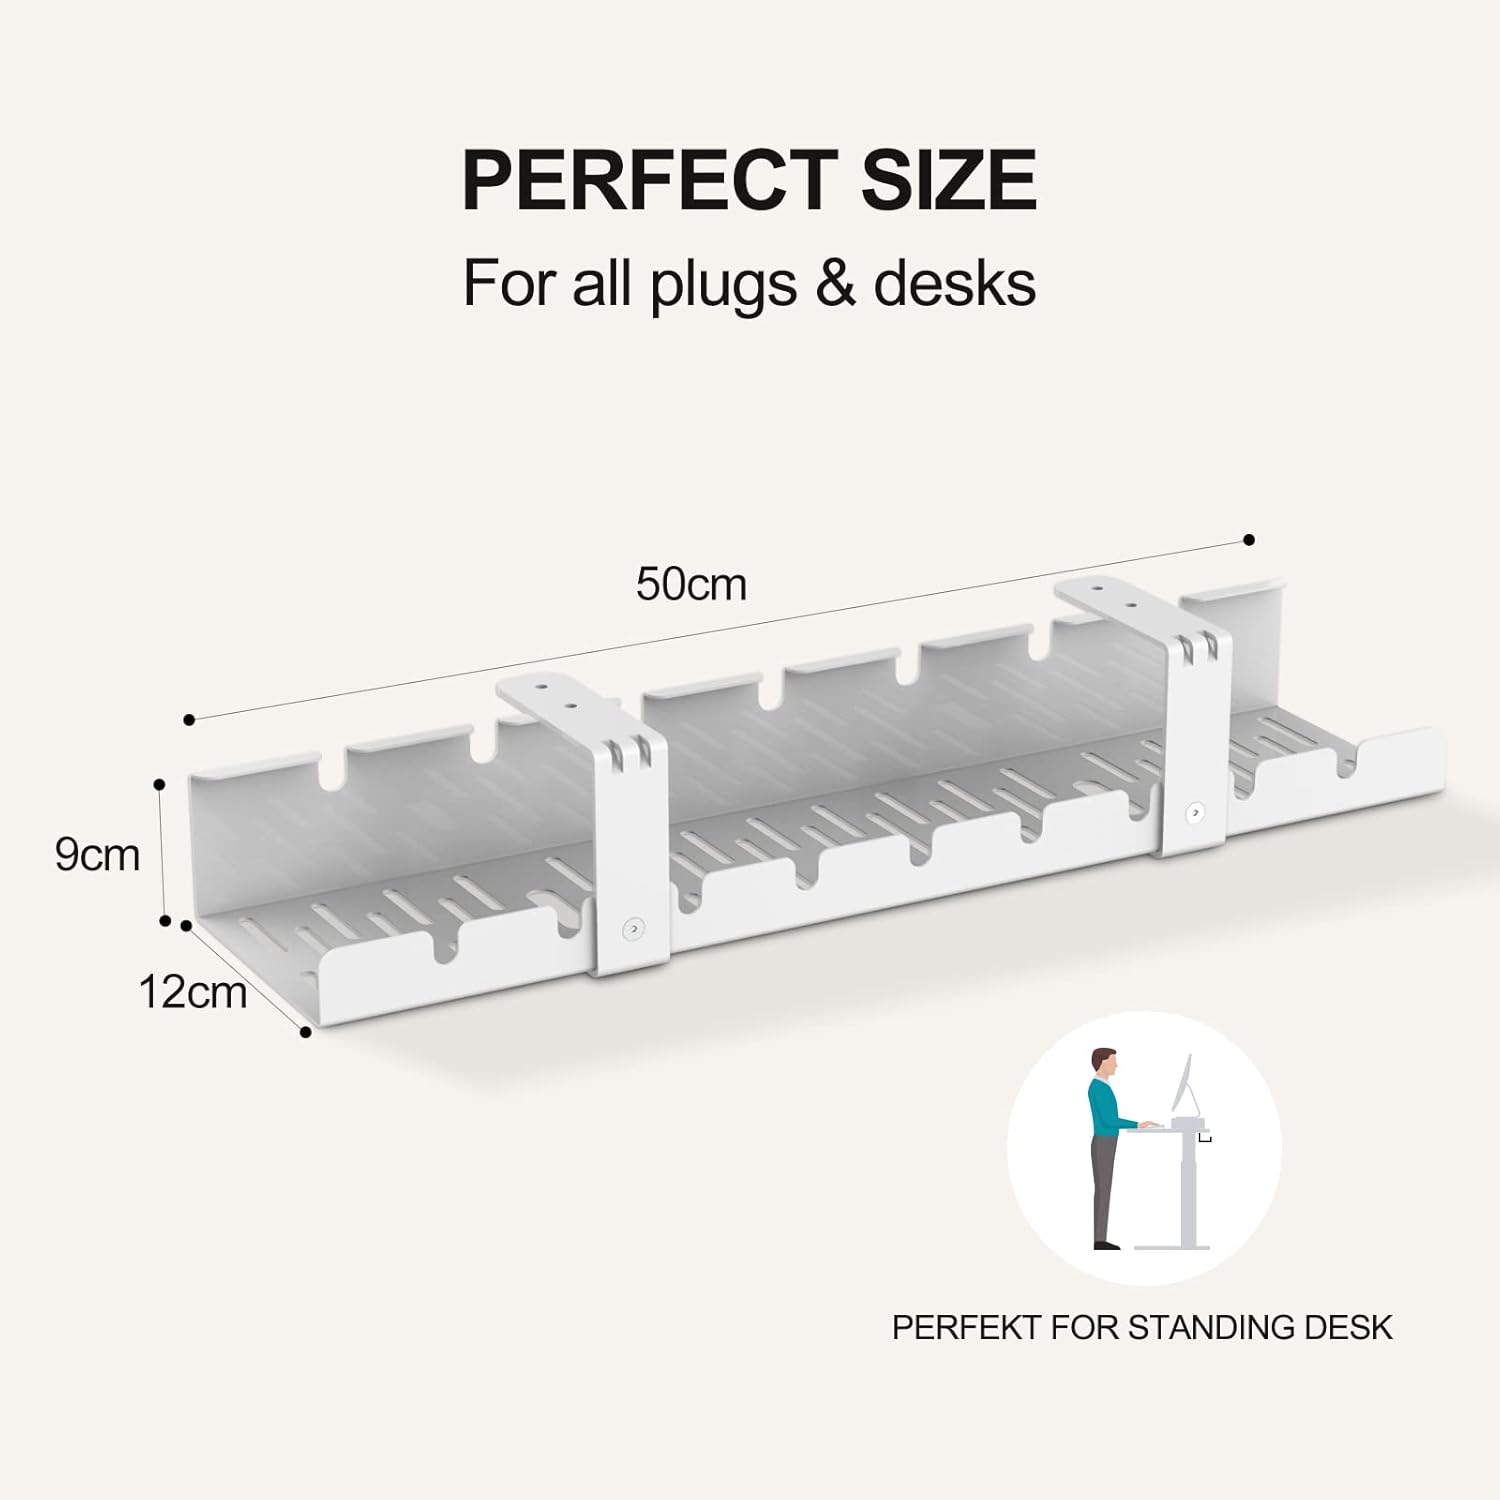
- Ukuran: Width 50 cm, Height 9 cm, Depth 12 cm.
- Instalasi Mudah: Attaches to any tabletop with only 4 included screws.
- Konstruksi Tahan Lama: Made from high-quality powder-coated metal.
- Organisasi Kabel: Securely locks cables in place for a neat desk.
- Paket Lengkap: Includes cable tray and all necessary mounting accessories.
2. Pengaturan dan Instalasi
Follow these steps to properly install your SANODESK Cable Channel:
- Bongkar Isi: Carefully remove all components from the packaging. Verify that all parts listed in the 'Package Contents' section are present.
- Penempatan: Determine the desired location under your desk for the cable tray. Ensure it is positioned to effectively manage your cables and does not interfere with desk functionality or legroom.
- Menandai Lubang Bor: Hold the cable tray in place and use a pencil to mark the positions for the 4 mounting screws on the underside of your tabletop.
- Drilling Pilot Holes (Optional but Recommended): For easier installation and to prevent wood splitting, drill small pilot holes at the marked locations. Use a drill bit slightly smaller than the screw diameter.
- Amankan Baki: Align the cable tray with the pilot holes (or marked spots) and use the provided St4.2x19mm screws to firmly attach the tray to the tabletop. Use the 2.5x2.5mm Allen Key for tightening.
- Assemble Connecting Brackets: If your tray comes in multiple sections, use the M4x6mm screws to connect the sections with the connecting brackets.


3. Pengoperasian dan Penggunaan
Once installed, the SANODESK Cable Channel provides an efficient way to manage your desk cables. Its open design allows for easy placement and removal of cables.
Cable Management Tips:
- Route Cables Neatly: Guide power cords, data cables, and peripheral wires through the slots in the cable tray.
- Utilize Slots: The tray features multiple slots and openings to help separate and organize different types of cables.
- Kesesuaian: The design accommodates various items, including long power strips, adapters, overvoltage protection devices, and external hard drives.
- Reduce Clutter: By lifting cables off the floor and desk surface, the tray significantly reduces visual clutter and potential tripping hazards.

4. Pemeliharaan
The SANODESK Cable Channel requires minimal maintenance to ensure its longevity and continued performance.
- Pembersihan: Wipe the cable tray periodically with a soft, damp kain untuk menghilangkan debu dan kotoran.
- Hindari Bahan Kimia Keras: Do not use abrasive cleaners or harsh chemicals, as these may damage the powder-coated finish.
- Periksa Pengencang: Occasionally check the mounting screws to ensure they remain tight and secure. Retighten if necessary.
5. Penyelesaian masalah
Most issues with the cable channel are minor and can be resolved with simple adjustments.
- Masalah: Cables are not staying securely in the tray.
Larutan: Ensure cables are properly routed through the designated slots. For very loose cables, consider using additional cable ties (not included) to bundle them within the tray. - Masalah: The cable tray feels wobbly or unstable after installation.
Larutan: Check all 4 mounting screws to ensure they are fully tightened. If the issue persists, verify that the desk material is suitable for screw-in installation and that pilot holes (if drilled) were not too large.
6. Spesifikasi
| Fitur | Detil |
|---|---|
| Model | B09BCXTNTZ |
| Merek | SANODESK |
| Dimensi (L x H x D) | Ukuran 50x9x12cm |
| Bahan | Logam berlapis bubuk |
| Warna | Putih |
| Jenis Instalasi | Screw-in, Tabletop Mount |
| Berat Paket | 1.31 Kilogram |

7. Informasi Garansi
Specific warranty details for the SANODESK Cable Channel Desk Cable Management Tray are not provided in this manual. For information regarding warranty coverage, terms, and conditions, please refer to the product packaging or contact SANODESK customer support directly.
8. Dukungan
If you encounter any issues or have questions regarding your SANODESK Cable Channel Desk Cable Management Tray that are not covered in this manual, please contact SANODESK customer support for assistance.
SANODESK Customer Support:
Please visit the official SANODESK websitus atau lihat dokumentasi pembelian Anda untuk rincian kontak.
Ask a question about this manual
Ask about setup, troubleshooting, compatibility, parts, safety, or missing instructions. Manuals+ will review the question and use this page’s manual context to help answer it.