1. Pendahuluan
This manual provides essential information for the safe and efficient operation, maintenance, and troubleshooting of the EMCO Compact 10 Metal Lathe. Please read this manual thoroughly before operating the machine to ensure proper understanding and to prevent damage or injury.
2. Pengaturan dan Instalasi
2.1 Penempatan Umum
Ensure the lathe is placed on a stable, level surface capable of supporting its weight. Allow sufficient space around the machine for safe operation and maintenance.
2.2 Koneksi Listrik
Connect the lathe to a power supply that matches the specifications indicated on the machine's nameplate. Consult the wiring diagrams section for detailed electrical connections.
3. Petunjuk Pengoperasian
3.1 The Top Slide
The top slide is secured to the cross slide using three T-nuts (4) and socket head screws (5). To adjust its position, loosen the two socket head screws (6). This allows the top slide to be set to the desired angle. The graduated scale on the top slide handwheel facilitates precise angle positioning. Graduations are 0.025 mm for metric machines and 0.001 inch for inch-type machines.
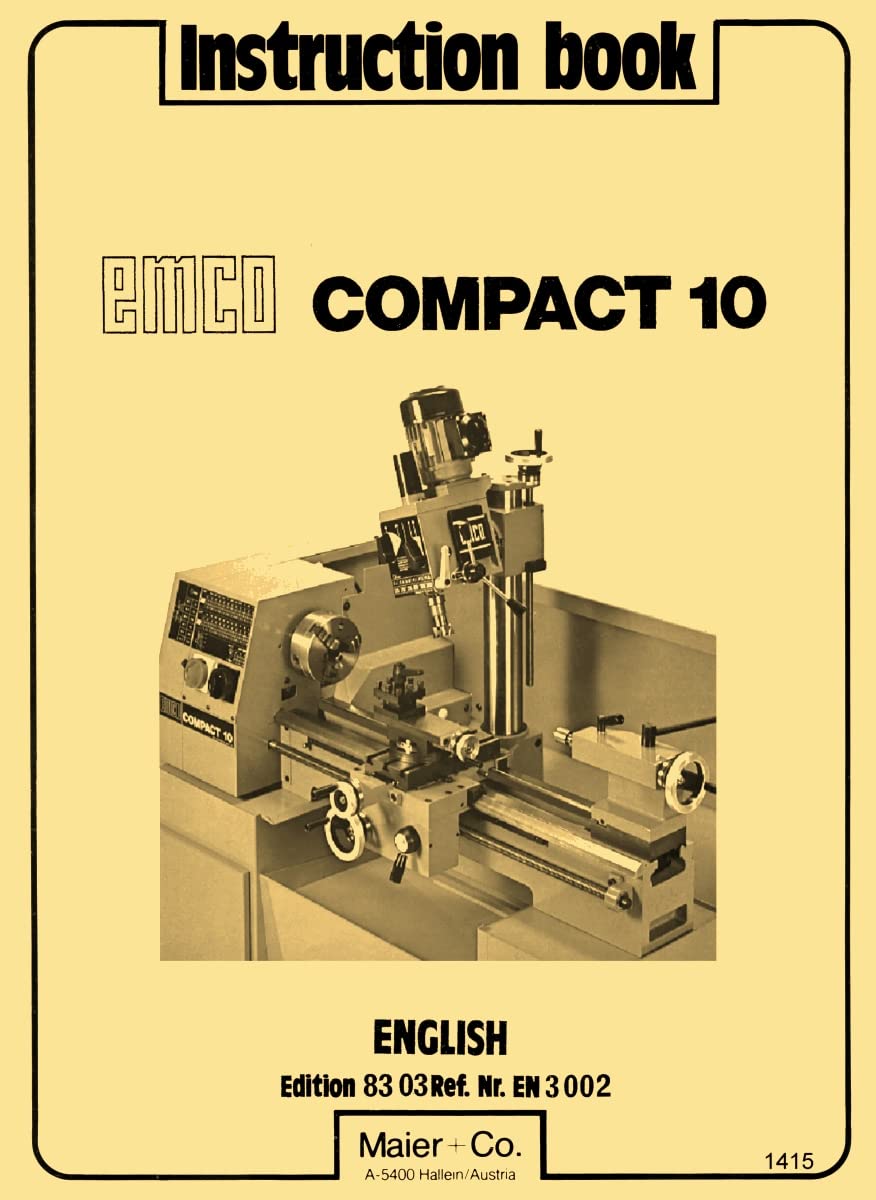
Figure 3.1: Top Slide Assembly. Components 4 and 5 are T-nuts and socket head screws, 6 are socket head screws for positioning, 7 is the hexagon screw for clamping, and 8 is the centering bolt.
Clamping Turning Tools
- Clampdengan clamp: The distance from the top slide surface to the center height is 23 mm. Use steel spacers of appropriate size under the turning tool to achieve the exact center height. The hexagon screw (7) must be positioned so that the clamp is parallel to the top slide (23 mm = 0.9").
- Clamping with the four-way toolpost and quick-change toolpost: These are centered by the centering bolt of the top slide (8) and secured with a hexagon nut and a special washer.
3.2 The Tailstock
The tailstock is mounted on the rear Vee of the lathe bed and is constructed from high-grade, vibration-free cast iron. The tailstock ram is advanced or retracted using the handwheel, providing a travel of 80 mm. A graduated scale is engraved directly onto the tailstock ram for precise measurements. Accurate feed is ensured by a scale ring on the tailstock handwheel.
Figure 3.2: Tailstock Assembly. Note the handwheel for ram movement and the overall robust construction.
Tailstock Graduations
- Metric machines: 0.05 mm
- Inch-type machines: 0.001"
Catatan:
The tailstock ram should always be clamped, except during drilling operations.
The internal taper of the tailstock ram (MT2) is designed to accommodate centers and drill chucks. To eject a center or drill chuck, simply turn the ram back.
4. Maintenance and Lubrication
Regular maintenance is crucial for the longevity and performance of your EMCO Compact 10 lathe. Refer to the lubrication chart within this manual for specific lubrication points and schedules. Keep all moving parts clean and free of debris.
5. Penyelesaian masalah
This section provides guidance for common operational issues. If you encounter a problem not listed here, or if the suggested solutions do not resolve the issue, consult a qualified technician.
5.1 Permasalahan Umum
- Mesin tidak menyala: Check power supply, circuit breaker, and emergency stop button.
- Kebisingan yang tidak biasa selama pengoperasian: Inspect for loose components, lack of lubrication, or worn parts.
6. Spesifikasi
- Panjang Cetak Manual: 57 halaman
- Berat Barang Manual: 5 ons
- Bahasa: Bahasa inggris
- Penerbit: Ozark Tool Manuals & Books
7. Garansi dan Dukungan
This document is a reproduction of the original operator's manual and does not include specific warranty information for the EMCO Compact 10 Metal Lathe. For product warranty details or technical support, please refer to the original manufacturer's documentation or contact an authorized EMCO service center.