1. Pendahuluan
This manual provides essential instructions for the safe and efficient operation, setup, maintenance, and troubleshooting of your OMTech 100W CO2 Laser Engraver. Please read this manual thoroughly before operating the machine to ensure proper usage and to prevent damage or injury. Retain this manual for future reference.
The OMTech 100W CO2 Laser Engraver is designed for precision engraving and cutting across a variety of materials, including wood, glass, and acrylic. It features a 28"x20" workspace, four-way pass-through doors, autofocus capability, and integrated air assist.

Image 1.1: The OMTech 100W CO2 Laser Engraver, a large blue and grey machine with a transparent lid open, showcasing the internal laser head and work area.
2. Informasi Keselamatan
Operating a laser engraver involves potential hazards. Adhere to all safety guidelines to prevent injury or damage to the equipment.
- Radiasi Laser: This product is a Class 2 laser device with 0.827 mW output power. Never look directly into the laser beam or at reflections. Always wear appropriate laser safety glasses.
- Ventilasi: Ensure adequate ventilation to remove smoke, fumes, and particulate matter generated during operation. Connect the machine to an external exhaust system.
- Bahaya Kebakaran: Certain materials are flammable when exposed to a laser. Always supervise the machine during operation. Keep a fire extinguisher nearby.
- Keamanan Listrik: Pastikan mesin terhubung ke ground dengan benar. Jangan operasikan dengan tangan basah atau di tempat yang lembab.amp conditions. Disconnect power before performing maintenance.
- Kompatibilitas Bahan: Only engrave or cut materials approved for CO2 lasers. Avoid materials that produce toxic fumes or are highly reflective.
- Pemberhentian darurat: Biasakan diri Anda dengan lokasi dan pengoperasian tombol berhenti darurat.
3. Isi Paket
Verifikasi bahwa semua komponen ada saat membuka kemasan:
- OMTech 100W CO2 Laser Engraver Unit
- LightBurn Software License (if included with purchase)
- Water Pump for cooling system
- Air Assist Compressor
- Exhaust Fan and Ducting
- USB Cable, Ethernet Cable
- Kabel listrik
- Tool Kit and Accessories
- Panduan Pengguna dan Dokumentasi
4. Pengaturan
4.1. Pembongkaran dan Penempatan
Carefully remove the engraver from its packaging. Place the machine on a stable, level surface capable of supporting its weight (approximately 251 lb.). Ensure sufficient clearance around the machine for ventilation and access to the pass-through doors.
4.2. Connecting Cooling System
The CO2 laser tube requires water cooling. Connect the provided water pump to the designated inlet and outlet ports on the machine. Fill the water reservoir with distilled water. Ensure the water pump is submerged and operating correctly before powering on the laser.
4.3. Connecting Air Assist
Connect the air assist compressor to the machine's air inlet. The air assist system helps to clear debris from the laser's path and reduce scorching during cutting and engraving.
4.4. Pemasangan Sistem Knalpot
Attach the exhaust fan and ducting to the machine's exhaust port. Route the ducting to an outdoor vent or a suitable filtration system to safely remove smoke and fumes from the workspace.
4.5. Sambungan Listrik
Connect the power cable to the machine and a grounded electrical outlet. Ensure the power supply matches the machine's requirements.
4.6. Software Installation (LightBurn)
Install the LightBurn software on your computer. Follow the instructions provided with your LightBurn license for installation and activation. Connect the engraver to your computer via USB or Ethernet cable.

Image 4.1: A computer screen displaying the LightBurn software interface, used for designing and controlling laser engraving and cutting operations.
5. Operasi
5.1. Menghidupkan
Ensure all connections (power, water, air, exhaust) are secure. Turn on the main power switch on the machine. Allow the water cooling system to circulate before proceeding.
5.2. Memuat Bahan
Open the machine lid and place your material onto the workbed. Ensure the material is flat and securely positioned. For larger materials, utilize the four-way pass-through doors.
5.3. Fungsi Fokus Otomatis
The machine features an autofocus function. Position the laser head over the material and activate the autofocus. The laser head will automatically adjust to the optimal focal distance for your material, ensuring precise engraving and cutting.

Gambar 5.1: Close-up view of the laser head with a red dot indicating the laser's position, performing an automatic focus adjustment on a piece of material.
5.4. Using LightBurn Software
Create or import your design in LightBurn. Configure the appropriate laser settings (power, speed, passes) based on your material and desired outcome. Preview the job to ensure correct placement and scale.
5.5. Proses Pengukiran dan Pemotongan
Close the machine lid. Initiate the job from LightBurn. The machine will begin the engraving or cutting process. Monitor the operation closely. The maximum engraving speed is 600 mm/s.
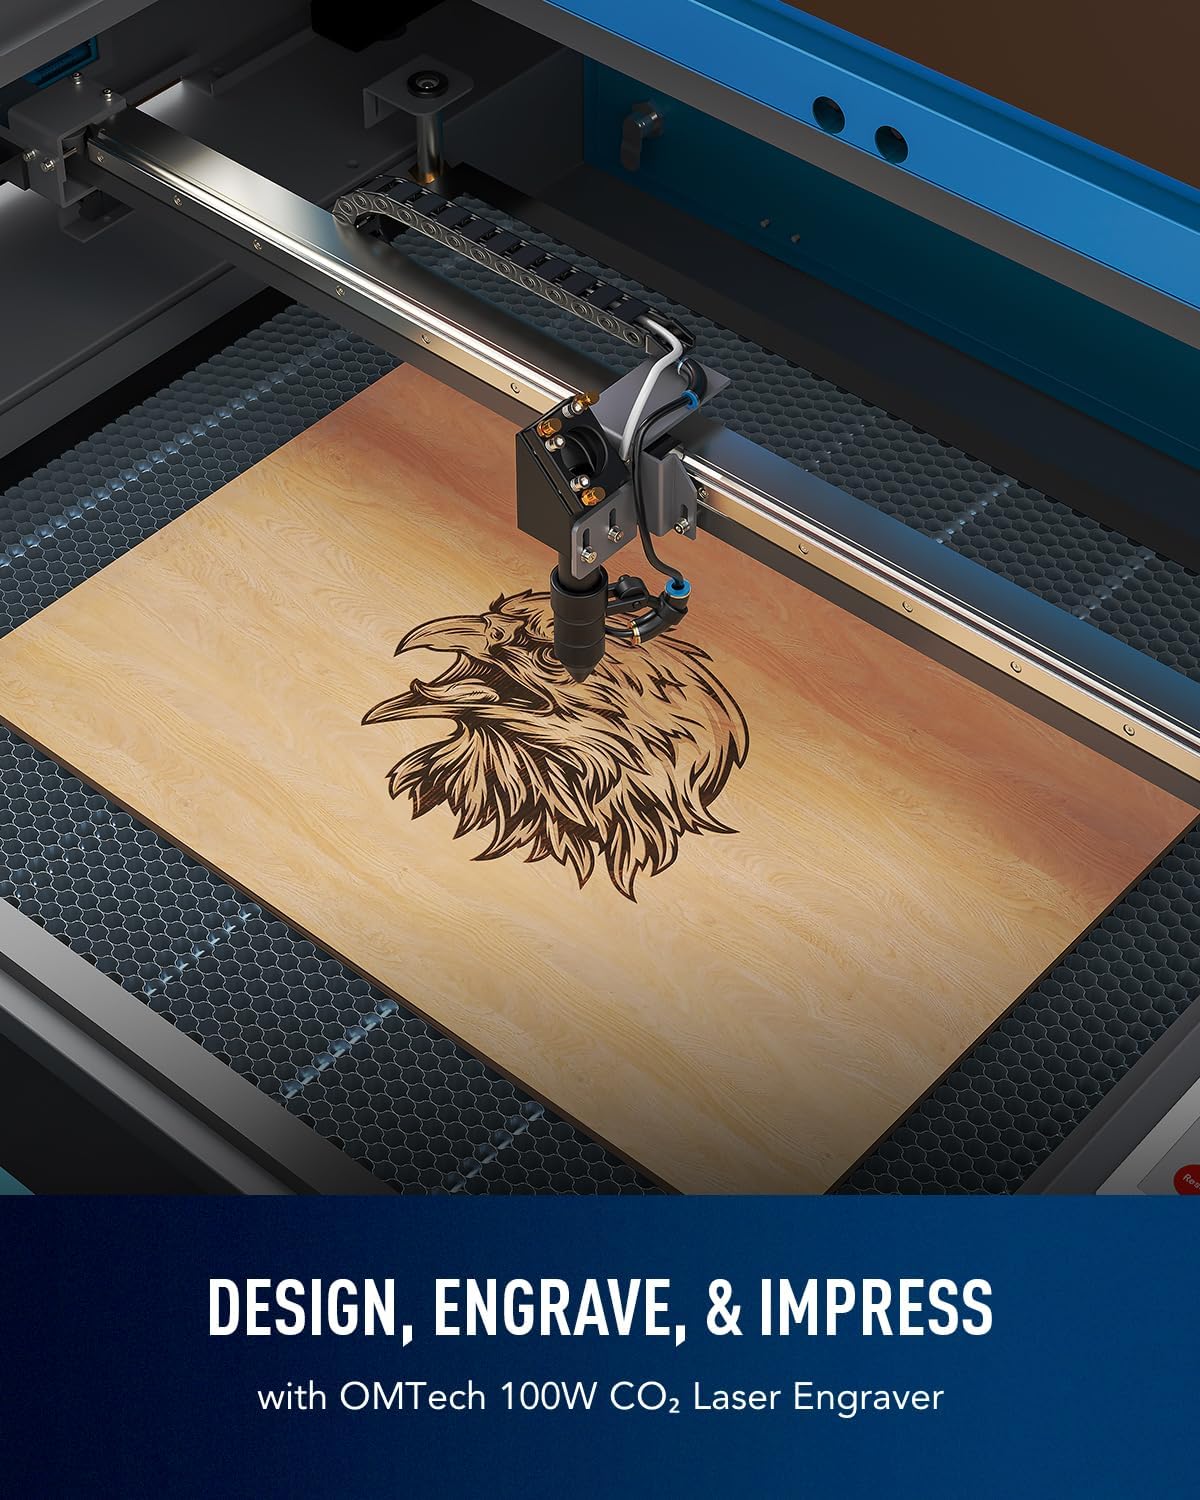
Image 5.2: The laser engraver in operation, precisely engraving a detailed eagle design onto a wooden surface.

Image 5.3: An illustration of the laser head moving at high speed (600 mm/s) across a wooden surface, demonstrating the machine's operational efficiency.
6. Pemeliharaan
Perawatan rutin memastikan kinerja optimal dan memperpanjang umur pakai mesin ukir laser Anda.
- Pembersihan Lensa dan Cermin: Periodically clean the laser lens and mirrors with a specialized lens cleaning solution and cotton swabs. Dust and debris can degrade laser performance.
- Sistem Pendingin Air: Regularly check the water level in the cooling reservoir and replenish with distilled water as needed. Replace the water every 1-2 months to prevent algae growth and maintain cooling efficiency.
- Nosel Bantuan Udara: Inspect and clean the air assist nozzle to ensure unobstructed airflow.
- Workbed Cleaning: Clean the honeycomb workbed to remove accumulated debris and residue.
- Pelumasan: Oleskan sedikit pelumas pada rel pemandu dan bagian yang bergerak sesuai rekomendasi pabrikan untuk memastikan pengoperasian yang lancar.
7. Penyelesaian masalah
Bagian ini membahas masalah umum yang mungkin Anda temui.
| Masalah | Kemungkinan Penyebab | Larutan |
|---|---|---|
| Laser tidak menyala | Lid open, water flow error, power issue, emergency stop engaged | Ensure lid is closed, check water pump and flow sensor, verify power connections, disengage emergency stop. |
| Kualitas ukiran/pemotongan yang buruk | Incorrect focus, dirty lens/mirrors, incorrect power/speed settings, material issues | Perform autofocus, clean optics, adjust laser settings in LightBurn, ensure material is flat and suitable. |
| Mesin tidak terhubung ke komputer. | Cable issue, driver issue, software settings | Check USB/Ethernet cable, reinstall drivers, verify LightBurn device settings. |
| Excessive smoke/fumes | Inadequate ventilation, material type | Ensure exhaust system is fully functional and properly vented. Use appropriate materials. |
8. Spesifikasi
| Fitur | Detil |
|---|---|
| Model | RYGEL-USB0705U5 |
| Jenis Laser | Laser CO2 untuk penerangan |
| Kekuatan Laser | 100W |
| Wilayah kerja | 28" x 20" (700mm x 500mm) |
| Maks. Kecepatan Ukiran | 600 mm/detik |
| Kedalaman Pemotongan Maksimum (Kayu) | 0.6 inci (15mm) |
| Pass-Through Doors | Four-way (Front/Back: 32.8"x3.7", Side/Side: 20.4"x0.7") |
| Memfokuskan | Fokus otomatis |
| Bantuan Udara | Sudah terpasang |
| Sistem Pendingin | Water Pump (external) |
| Transmisi Data | USB Cable, Ethernet Cable, USB Flash Drive, Offline |
| Kompatibilitas Perangkat Lunak | Cahaya Terbakar |
| Dimensi Produk | 65x34.3x36.6 inci |
| Berat Mesin | 251 pon |

Image 8.1: A visual representation of the OMTech 100W CO2 Laser Engraver with key specifications overlaid, including engraving speed, data transmission methods, pass-through sizes, and machine dimensions.
9. Garansi dan Dukungan
OMTech provides comprehensive support for your laser engraver.
- Jaminan: The product includes 2 years of comprehensive service. Refer to your purchase documentation for specific terms and conditions.
- Dukungan Teknis: A 24/7 global support team is available for expert assistance, including technical guidance.
- Informasi Kontak: For support, please refer to the contact details provided with your product documentation or visit the official OMTech weblokasi.