Artillery Sidewinder X3 Pro
Buku Panduan Pengguna Printer 3D Artillery Sidewinder X3 Pro
Model: Sidewinder X3 Pro
Produk Selesaiview
The Artillery Sidewinder X3 Pro is a high-performance 3D printer designed for both beginners and experienced users. It features a robust build, high-speed printing capabilities, and advanced functionalities to ensure precise and efficient model creation.

Figure 1: Artillery Sidewinder X3 Pro 3D Printer, showcasinkarena desainnya yang ringkas dan kokoh.
- Ultra-Quiet High-Speed Printing: Capable of printing at speeds up to 300 mm/s while maintaining high precision.
- 49-Point Auto Bed Leveling: Ensures quick and accurate leveling of the build platform, simplifying the setup process.
- Ekstruder Penggerak Langsung: Features a newly developed metal direct drive extruder with a dual gear set for higher drive ratio and stronger extrusion force, leading to more accurate extrusion.
- Dual Z-axes & Dual Motors: Enhances stability and printing accuracy by reducing lines and ridges on prints.
- Fungsi Pencetakan Resume: Detects filament runout, breakage, or power loss, allowing printing to resume after recovery, preventing material waste.
Pengaturan dan Perakitan
The Artillery Sidewinder X3 Pro comes 95% pre-installed, making the initial setup straightforward. Installation to first print typically requires only 4 steps and approximately 10 minutes, even for beginners.

Figure 2: Illustrated assembly steps for the Sidewinder X3 Pro, highlighting the minimal effort required for initial setup.
Langkah Awal:
- Membongkar: Keluarkan semua komponen dari kemasan dengan hati-hati. Pastikan semua komponen yang tercantum dalam daftar kemasan tersedia.
- Base and Gantry Assembly: Attach the gantry to the printer base using the provided screws.
- Koneksi Kabel: Connect all necessary cables, ensuring they are securely fastened. Pay attention to the hotend and extruder connections.
- Pemuatan Filamen: Load your chosen filament into the direct drive extruder.
- Nyalakan: Hubungkan kabel listrik dan hidupkan printer.
Petunjuk Pengoperasian
Antarmuka Pengguna:
The Sidewinder X3 Pro features a 4.3-inch full-color touchscreen with large icons, providing a simple and feature-rich interface that helps prevent misoperation.

Figure 3: The 4.3-inch full-color touchscreen interface of the Sidewinder X3 Pro, designed for intuitive navigation.
Auto Bed Leveling:
The newly upgraded 49-point auto bed leveling system ensures the build platform is quickly and accurately leveled, which is crucial for successful first layers and overall print quality.

Figure 4: Visual representation of the 49-point smart auto-leveling process, which automatically measures and adjusts the print bed.
Pencetakan Kecepatan Tinggi:
The Sidewinder X3 Pro is engineered for high-speed printing, reaching up to 300 mm/s, allowing for faster completion of prints without compromising precision.
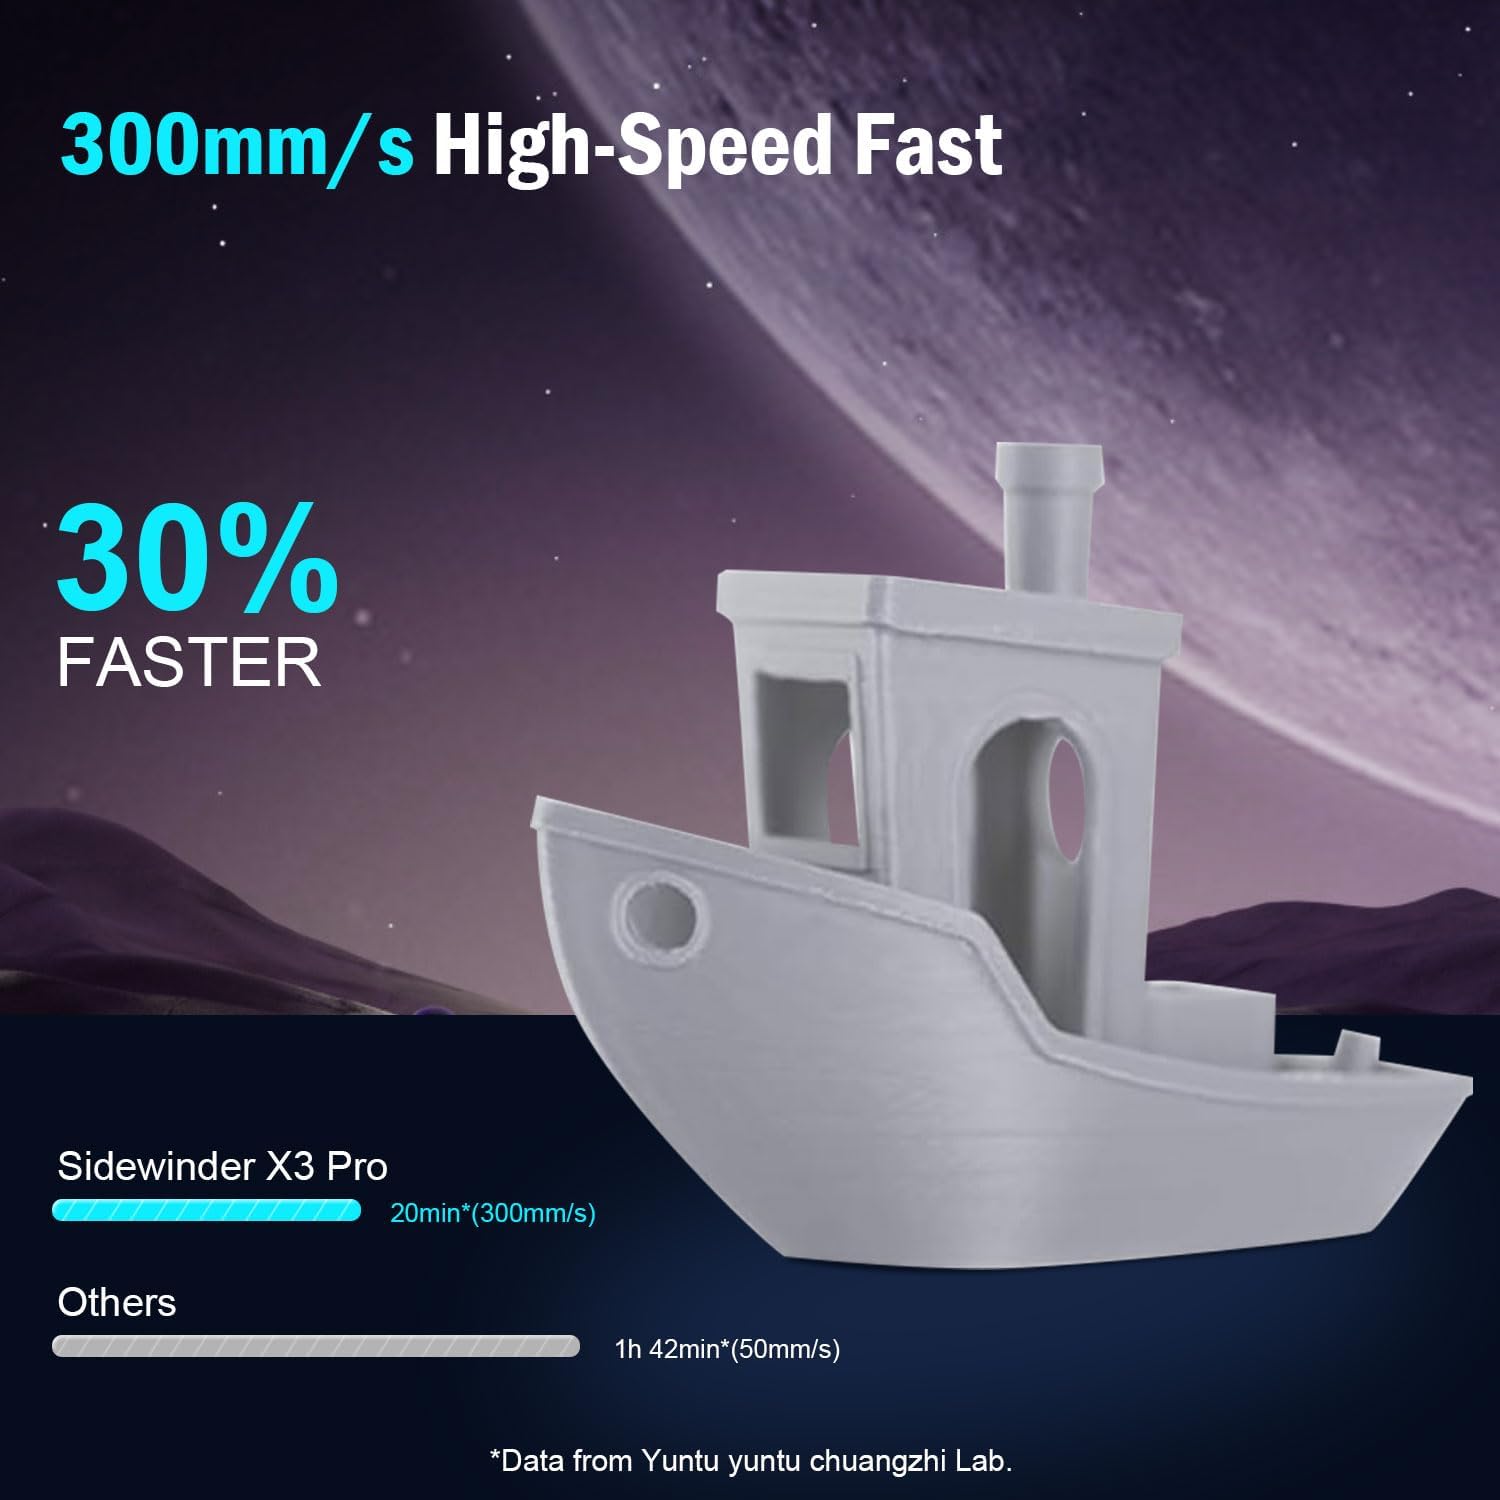
Figure 5: Comparison illustrating the speed advantage of the Sidewinder X3 Pro at 300mm/s compared to slower printers.
Extrusion System:
Equipped with a dual-gear direct extruder, the printer provides powerful and smoother filament feeding, which is essential for consistent and high-quality prints. The all-metal automatic cleaning hotend supports printing temperatures up to 300°C.
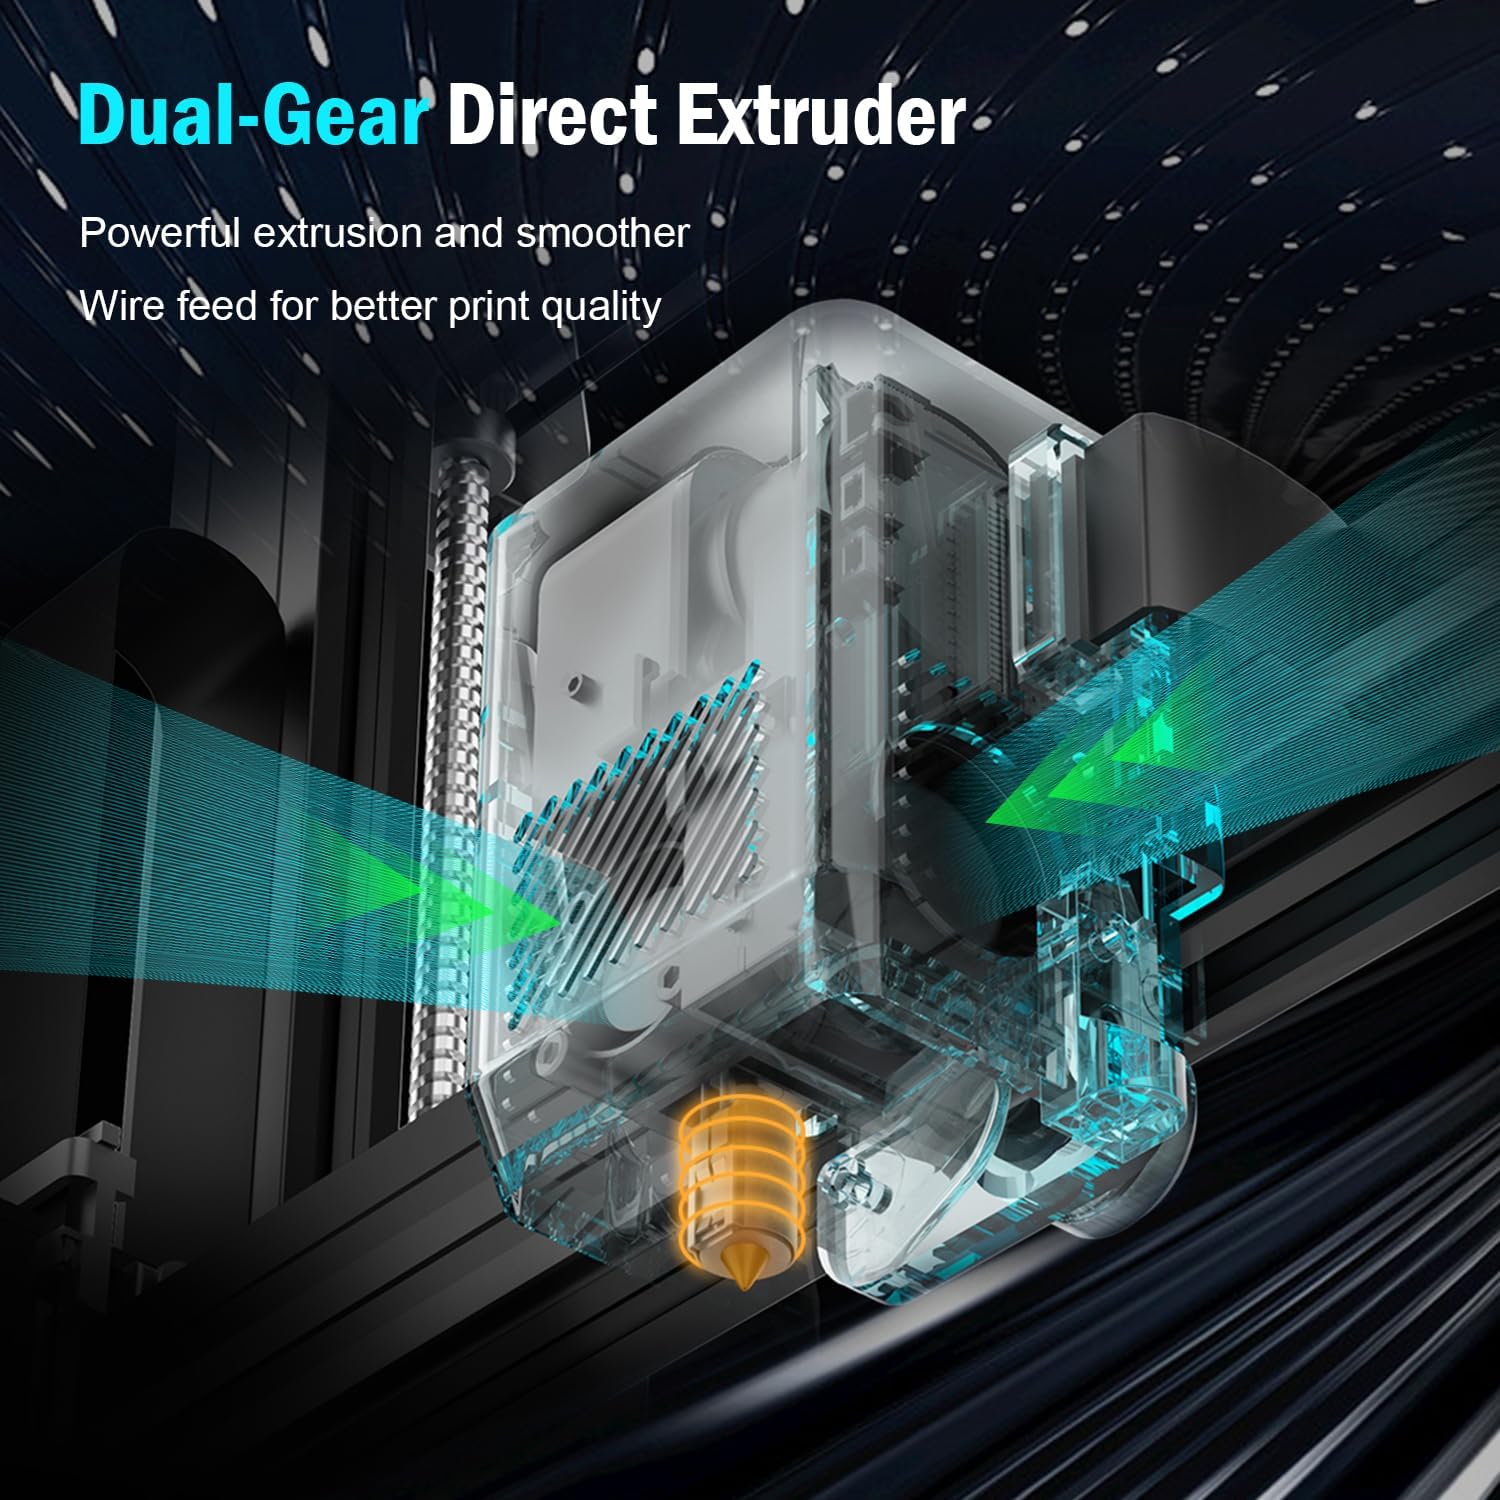
Gambar 6: Rinci view of the dual-gear direct extruder, designed for powerful and precise filament extrusion.

Figure 7: Illustration of the all-metal automatic cleaning hotend, capable of reaching temperatures up to 300°C.
Print Stability and Accuracy:
The dual Z-axes and dual motors design ensures stable movement of the print head and contributes to higher printing accuracy by minimizing artifacts like lines and ridges on your prints.

Figure 8: Diagram showing the dual Z-axes and dual motors, which provide enhanced stability and precision during printing.
Print Volume and Build Plate:
The printer offers a print size of 9.44" x 9.44" x 10.23" (240mm x 240mm x 260mm), suitable for a wide range of projects. It features a PEI Magnetic Platform with a maximum hotbed temperature of 100°C. Models can be easily removed by slightly bending the platform once cooled.

Figure 9: Illustration of the print volume dimensions and the PEI magnetic build platform, demonstrating easy print removal.
Pemeliharaan
Regular maintenance ensures the longevity and optimal performance of your Artillery Sidewinder X3 Pro 3D printer.
- Hotend Cleaning: The printer features an automatic cleaning hotend. Periodically inspect the nozzle for any residue or clogs.
- Perawatan Pelat Bangunan: Clean the PEI magnetic build plate after each print to ensure good adhesion for subsequent prints. Use isopropyl alcohol for best results.
- Pelumasan: Apply a small amount of lubricant to the Z-axis lead screws and smooth rods periodically to ensure smooth movement.
- Pembaruan Firmware: Check the official Artillery webKunjungi situs web untuk memeriksa pembaruan firmware yang tersedia guna memastikan printer Anda memiliki fitur terbaru dan perbaikan bug.
- Pembersihan Umum: Keep the printer free of dust and filament debris. Use compressed air to clean hard-to-reach areas.
Penyelesaian Masalah
This section provides solutions to common issues you might encounter during the operation of your Sidewinder X3 Pro.
| Masalah | Kemungkinan Penyebab | Larutan |
|---|---|---|
| Print Not Sticking to Bed | Improper bed leveling, dirty build plate, incorrect bed temperature. | Perform auto bed leveling. Clean the build plate with isopropyl alcohol. Adjust bed temperature according to filament type. |
| Filamen Tidak Ekstrusi | Clogged nozzle, tangled filament, incorrect hotend temperature, extruder issue. | Check hotend temperature. Clear nozzle clog using a needle or cold pull. Ensure filament spool is free and untangled. Inspect extruder for proper function. |
| Printer Stops Mid-Print | Filament runout/breakage, power loss, corrupted G-code. | Utilize the resume printing function. Check filament path. Ensure stable power supply. Reslice and re-upload G-code. |
| Poor Print Quality (Layer Shifts, Stringing) | Loose belts, incorrect print speed, retraction settings, temperature. | Check and tighten belts. Adjust print speed. Calibrate retraction settings in slicer. Optimize hotend temperature. |
| Touchscreen Unresponsive/Incorrect Language | Software glitch, loose connection, corrupted firmware. | Restart the printer. Check display cable connections. Consider re-flashing firmware if issue persists (refer to Artillery support). |
For more complex issues or if the problem persists, please refer to the Warranty and Support section for contact information.
Spesifikasi
| Fitur | Detil |
|---|---|
| Model | Sidewinder X3 Pro |
| Merek | Artileri |
| Dimensi Produk | 17.6 x 9.76 x 19.7 inci (447 x 248 x 500 mm) |
| Berat Barang | 24 pon (10.89 kg) |
| Bahan | Logam |
| Warna | Hitam |
| Kecepatan Cetak Maks | 300 mm/detik |
| Leveling Otomatis | Perataan Tempat Tidur Otomatis 49 Titik |
| Jenis Ekstruder | Ekstruder Penggerak Langsung Gigi Ganda |
| Suhu Hotend Maksimum | 300°C (All-Metal Hotend) |
| Bangun Plat | PEI Magnetic Spring Steel |
| Suhu Maksimum Alas Pemanas | 100 derajat celcius |
| Z-axis Design | Dual Z-axes & Dual Motors |
| Konektivitas | SD Card, USB (assumed) |
| Antarmuka Pengguna | Layar Sentuh Penuh Warna 4.3 inci |

Gambar 10: Dimensi lebih dariview of the Artillery Sidewinder X3 Pro 3D Printer.
Garansi dan Dukungan
Artillery provides a one-year warranty for the Sidewinder X3 Pro 3D Printer. Additionally, 24-hour after-sales service is available to assist with any inquiries or issues you may encounter.
For technical support, warranty claims, or general inquiries, please contact Artillery customer service through their official channels. Refer to the product packaging or the official Artillery websitus untuk informasi kontak terkini.
Disarankan untuk menyimpan tanda terima pembelian Anda sebagai bukti pembelian untuk tujuan garansi.
Dokumen Terkait - Sidewinder X3 Pro
 |
Panduan Pengguna Printer 3D Artillery Sidewinder X3 Plus Comprehensive user manual for the Artillery Sidewinder X3 Plus 3D printer, covering setup, operation, maintenance, and troubleshooting. |
 |
Artillery Hornet Extruder Parts User Manual & Instructions Official user manual and instructions for Artillery Hornet 3D printer extruder replacement parts, including Titan Extruder Gear Guide Tube Extrusion Handle and Extruder Cover. Details components, specifications, and assembly. |
 |
Panduan Pengguna Printer 3D Artillery Sidewinder X3 Plus Panduan pengguna komprehensif untuk printer 3D Artillery Sidewinder X3 Plus, mencakup pengaturan, pengoperasian, perawatan, dan pemecahan masalah. Pelajari cara memasang, mencetak, dan merawat perangkat Anda. |
 |
Panduan Pengguna Printer ELEGOO Neptune 4 Max 3D Panduan pengguna komprehensif untuk printer 3D ELEGOO Neptune 4 Max, yang merinci pengaturan, pengoperasian, pemecahan masalah, perangkat lunak, dan spesifikasi teknis untuk pencetakan optimal. |
 |
Buku Panduan Pengguna Anycubic Kobra 2 Neo Panduan pengguna komprehensif untuk printer 3D Anycubic Kobra 2 Neo, yang merinci instalasi, pengoperasian, pemecahan masalah, dan spesifikasi teknis. |
 |
PrimaCreator Direct Drive Extruder Assembly Instructions Comprehensive assembly guide for the PrimaCreator Direct Drive Extruder, detailing parts identification, hotend assembly, and integral extruder mechanism construction. |
Ask a question about this manual
Ask about setup, troubleshooting, compatibility, parts, safety, or missing instructions. Manuals+ will review the question and use this page’s manual context to help answer it.