
JMT 007
JMT M.2 RGB SSD Enclosure
Model: 007 - Buku Petunjuk
1. Pendahuluan
Thank you for choosing the JMT M.2 RGB SSD Enclosure, Model 007. This enclosure is designed to provide a high-speed, portable storage solution for your M.2 NVMe and SATA SSDs. It supports both M-Key and B+M Key SSDs in the 2280 form factor, offering versatile compatibility for your storage needs.
The Model 007 features a robust all-aluminum design for optimal heat dissipation and durability. It utilizes a Master Control 9210B chip, enabling dual-protocol support for NVMe (up to 10Gbps) and SATA (up to 6Gbps) drives via a USB 3.2 interface. This model does not include a touch screen.

Gambar 1: Depan view of the JMT M.2 RGB SSD Enclosure (Model 007), showcasing its sleek design and integrated RGB light bar.
2. Pengaturan dan Instalasi
This section guides you through the process of installing your M.2 SSD into the enclosure and connecting it to your device.
2.1. SSD Installation
- Siapkan Lampiran: Gently slide open the enclosure cover. The Model 007 typically has a sliding mechanism or screws to access the internal PCB.
- Masukkan SSD: Align your M.2 2280 NVMe or SATA SSD with the M-Key or B+M Key slot on the enclosure's circuit board. Insert the SSD firmly but carefully into the slot at an angle.
- Amankan SSD: Once inserted, gently push down the SSD until it is flat against the PCB. Secure it with the provided screw or rubber fastener at the end of the SSD.
- Tutup pagar pembatas: Slide the cover back onto the enclosure until it clicks into place or secure it with the screws. Ensure it is fully closed to protect the internal components.
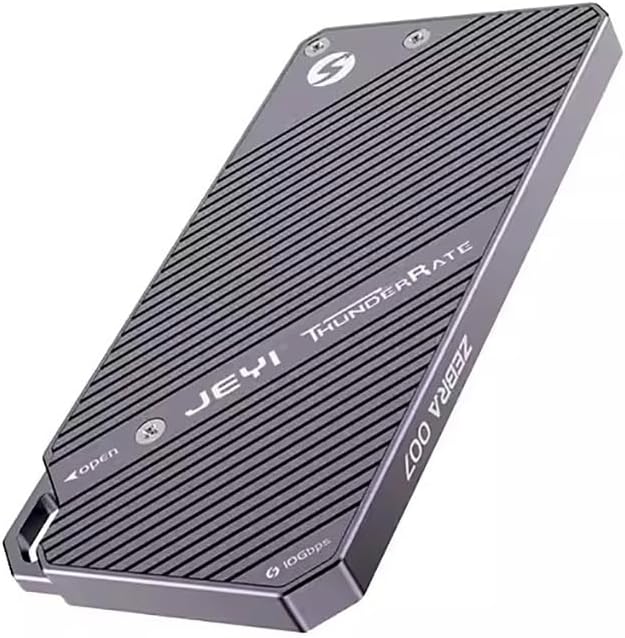
Gambar 2: Belakang view of the enclosure, indicating the access points for SSD installation. Note the "JEYI ThunderRate ZEBRA 007" branding.
2.2. Menghubungkan ke Perangkat Anda
- Hubungkan Kabel USB: Use the provided USB-C to USB-C or USB-C to USB-A cable to connect the enclosure's USB-C port to a compatible USB port on your computer or device.
- Pengenalan Perangkat: Your operating system should automatically detect the new storage device. For new SSDs, you may need to initialize and format the drive through Disk Management (Windows) or Disk Utility (macOS) before it appears as a usable drive.

Gambar 3: Sisi view of the enclosure, highlighting the USB-C port for connection and the "10Gbps" speed indicator.
3. Petunjuk Pengoperasian
Once connected, the JMT M.2 RGB SSD Enclosure functions as an external storage device. You can drag and drop files, or use it for backups and other data management tasks.
3.1. Pemindahan Data
- Kinerja Kecepatan Tinggi: The enclosure supports USB 3.2, providing data transfer speeds of up to 10Gbps with NVMe drives and up to 6Gbps with SATA drives. Ensure your computer's USB port also supports USB 3.2 (or higher) for optimal performance.
- RGB Indicator: The integrated RGB light bar indicates activity and status. Its dynamic lighting provides visual feedback during operation.

Figure 4: The enclosure with its RGB light bar illuminated, indicating operational status.
3.2. Read and Write Protection
The enclosure supports read and write protection features to safeguard your data. Consult your operating system's disk management tools for options to enable or disable write protection for the drive, if applicable. This feature helps prevent accidental data deletion or modification.
4. Pemeliharaan
Proper maintenance ensures the longevity and optimal performance of your SSD enclosure.
- Pembersihan: Use a soft, dry cloth to wipe the exterior of the enclosure. Avoid using liquid cleaners or abrasive materials.
- Pembuangan Panas: The all-aluminum design is optimized for heat dissipation. Ensure the enclosure is placed in a well-ventilated area during prolonged use to prevent overheating, especially during large data transfers.
- Penyimpanan: Saat tidak digunakan, simpan wadah tersebut di tempat yang sejuk dan kering, jauh dari sinar matahari langsung dan suhu ekstrem.
- Ejeksi Aman: Always safely eject the enclosure from your operating system before disconnecting the USB cable to prevent data corruption.
5. Penyelesaian masalah
If you encounter issues with your JMT M.2 RGB SSD Enclosure, refer to the following common troubleshooting steps:
- Kandang Tidak Terdeteksi:
- Ensure the USB cable is securely connected to both the enclosure and your computer.
- Coba port USB lain di komputer Anda.
- Uji dengan kabel USB yang berbeda.
- Verify that the M.2 SSD is correctly seated and secured within the enclosure.
- Periksa Manajemen Disk (Windows) atau Utilitas Disk (macOS) untuk melihat apakah drive terdeteksi tetapi belum diinisialisasi/diformat.
- Kecepatan Transfer Lambat:
- Ensure you are using a USB 3.0/3.1/3.2 port on your computer. Connecting to a USB 2.0 port will result in significantly slower speeds.
- Verify the type of SSD installed (NVMe drives are faster than SATA drives).
- Check for background processes that might be consuming system resources or disk I/O.
- Ensure the enclosure is not overheating during large transfers.
- RGB Light Not Illuminating:
- Ensure the enclosure is properly connected to a powered USB port.
- If the drive is detected and functioning, the light issue might be minor and not affect functionality.
If problems persist, please refer to the support information provided in Section 7.
6. Spesifikasi
| Fitur | Detil |
|---|---|
| Model | 007 |
| Chip Kontrol Utama | 9210B |
| Jenis SSD yang Didukung | M.2 NVMe / SATA (2280 form factor only) |
| Supported Keys | M-Key, B+M Key |
| Antarmuka | USB 3.2 Tipe-C |
| NVMe Transfer Speed | Hingga 10Gbps |
| SATA Transfer Speed | Hingga 6Gbps |
| Bahan | Aluminium |
| Fitur Khusus | RGB Light Bar, Read/Write Protection |
| Menampilkan | None (Model 007) |
7. Garansi dan Dukungan
JMT products are designed for reliability and performance. For specific warranty details, please refer to the documentation included with your purchase or visit the official JMT weblokasi.
For technical support, troubleshooting assistance, or inquiries regarding your JMT M.2 RGB SSD Enclosure, please contact JMT customer service. You can often find contact information on the official JMT brand store or product packaging.
JMT Brand Store: Visit the JMT Store on Amazon
Ask a question about this manual
Ask about setup, troubleshooting, compatibility, parts, safety, or missing instructions. Manuals+ will review the question and use this page’s manual context to help answer it.