BOMGE U202
Panduan Pengguna Antarmuka Audio USB BOMGE U202
Model: U202 | Brand: BOMGE
Perkenalan
The BOMGE U202 is a compact and versatile USB audio interface designed for high-quality audio recording, streaming, and podcasting. It features two combo XLR/Line/Instrument inputs with 48V phantom power, 32-Bit/192 kHz resolution, and zero-latency monitoring, making it suitable for both beginners and professionals.
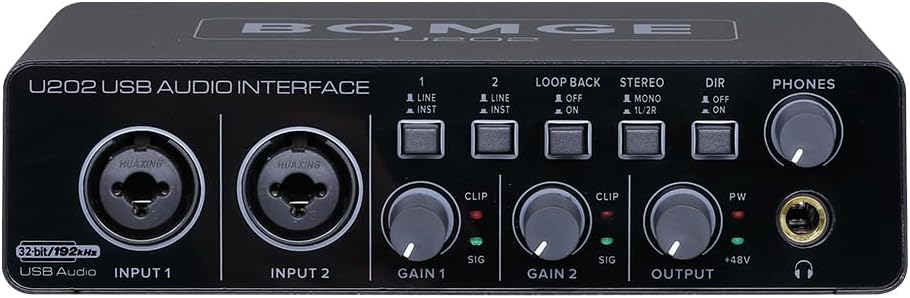
Gambar 1: Depan view of the BOMGE U202 USB Audio Interface.
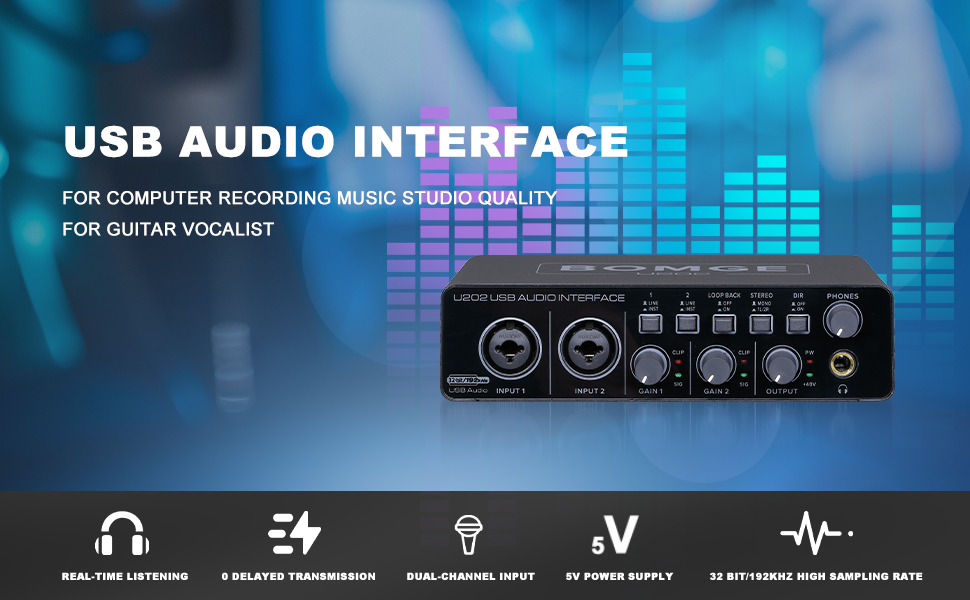
Figure 2: The BOMGE U202 USB Audio Interface is designed for computer recording, music studio quality, and for guitarists and vocalists.
Panduan Pengaturan
1. Isi Paket
Sebelum memulai, pastikan semua item ada dalam paket:
- BOMGE U202 USB Audio Interface
- USB Type-B to USB Type-A Cable
- User Manual (dokumen ini)
2. Menghubungkan ke Komputer Anda
The U202 interface connects to your computer via a USB cable. It supports both USB Type-B and USB Type-C power input.
- Connect the USB Type-B end of the provided cable to the "USB Audio" port on the rear of the U202.
- Hubungkan ujung kabel USB Tipe-A ke port USB yang tersedia di komputer Anda.
- For additional power stability, you can connect a 5V/2A DC power adapter (not included) to the "5V/2A DC" port and switch the "POWER SOURCE" toggle to "DC".
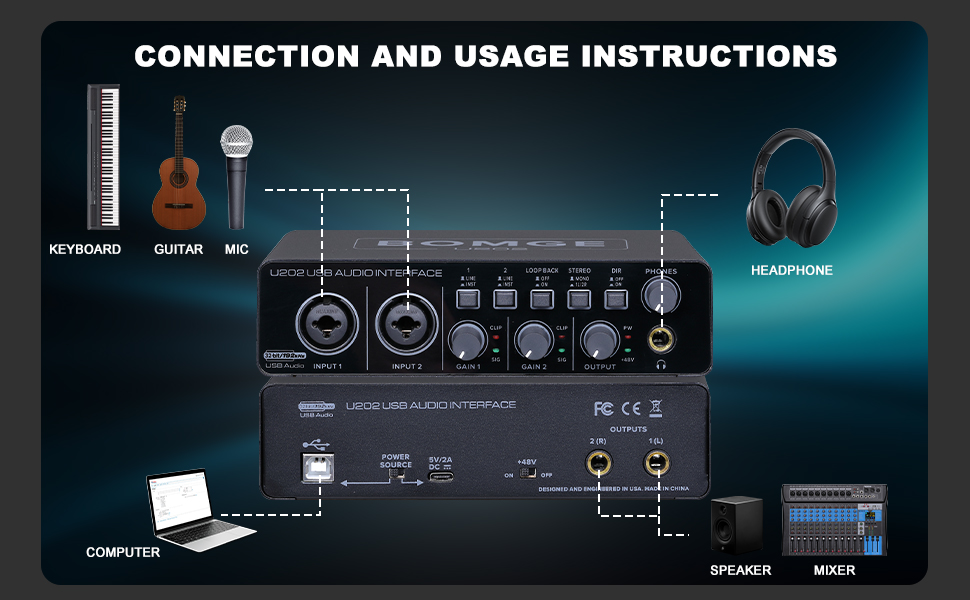
Figure 3: Diagram illustrating typical connections for the BOMGE U202, including keyboard, guitar, mic, computer, speaker, and mixer.

Figure 4: The BOMGE U202 supports USB/Type-C 5V charging, enhancing portability and user experience.
3. Instalasi Driver
The BOMGE U202 is designed for plug-and-play operation with Windows and Mac OS. No additional driver downloads are required.

Figure 5: The U202 offers plug-and-play functionality, eliminating the need for redundant driver downloads and allowing immediate recording.
Once connected, your computer should automatically recognize the device. You may need to select "BOMGE U202" as your audio input and output device in your operating system's sound settings or your Digital Audio Workstation (DAW).
4. Kompatibilitas Perangkat Lunak
The U202 is compatible with popular recording software, including but not limited to:
- Alat Pro Avid
- Ableton Langsung
- Steinberg Cubase
- RAPPER
- And many more DAW applications.
Petunjuk Pengoperasian
1. Kontrol dan Koneksi Melaluiview
Familiarize yourself with the controls and connections on your BOMGE U202 interface.
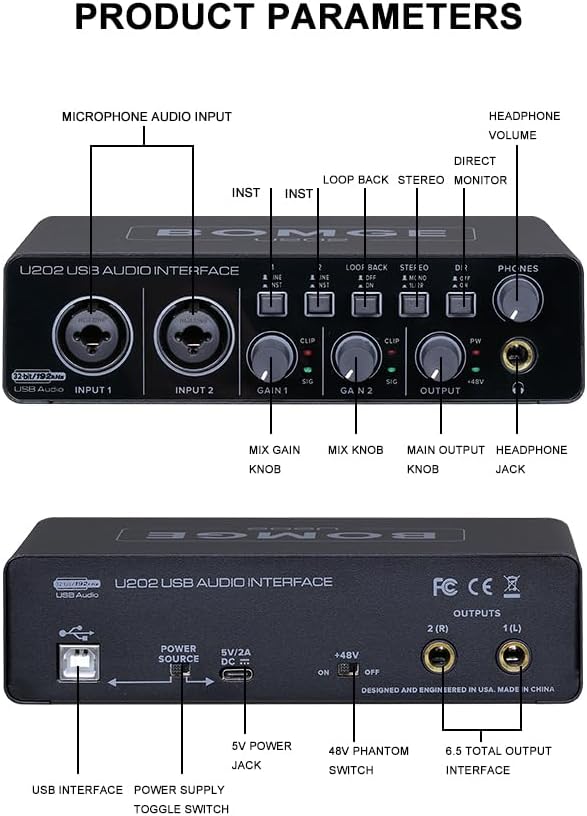
Figure 6: Detailed diagram of the BOMGE U202's front and rear panels, highlighting all controls and connections.
Kontrol Panel Depan:
- MASUKAN 1 & 2: Combo XLR/TS jacks for connecting microphones, guitars, or line-level instruments.
- LINE/INST Switches: Toggles input type between Line (for keyboards, mixers) and Instrument (for guitars, basses).
- KEUNTUNGAN 1 & 2: Adjusts the input gain for Input 1 and Input 2 respectively.
- CLIP/SIG Indicators:
- SIG (Sinyal): Lights up green when an input signal is detected.
- KLIP: Lights up red when the input signal is too strong and clipping (distortion) is occurring. Reduce the GAIN knob if this light illuminates.
- Tombol LOOP BACK: Enables or disables the loopback function, allowing you to route computer audio back into your recording software for live streaming or podcasting.
- STEREO/MONO Switch: Toggles monitoring mode between stereo (separate left/right channels) and mono (summed to both channels).
- DIR (Direct Monitor) Switch: Enables zero-latency direct monitoring of your input signals, bypassing computer processing.
- TELEPON: Output headphone stereo 1/4".
- VOLUME HEADPON: Menyesuaikan volume keluaran headphone.
- KELUARAN: Main output level control for the 1/4" stereo outputs on the rear panel.
- +48V (Phantom Power) Indicator: Lights up when 48V phantom power is active.
Koneksi Panel Belakang:
- Audio USB: USB Type-B port for connecting to your computer.
- Saklar SUMBER DAYA: Selects between USB power and external 5V/2A DC power.
- 5V/2A DC: Input for an optional external 5V/2A DC power adapter.
- Sakelar +48V: Mengaktifkan/menonaktifkan daya phantom 48V untuk mikrofon kondensor.
- OUTPUTS 1(L) & 2(R): 1/4" TS outputs for connecting to studio monitors or a mixer.
2. Menghubungkan Mikrofon dan Instrumen
The U202 features versatile combo inputs that accept both XLR and 1/4" TS/TRS connectors.
- Mikrofon XLR: Connect dynamic or condenser microphones using an XLR cable to INPUT 1 or 2. If using a condenser microphone, ensure the +48V switch on the rear panel is set to "ON" to provide phantom power.
- Instruments (Guitars, Basses): Connect instruments directly using a 1/4" TS cable to INPUT 1 or 2. Ensure the corresponding LINE/INST switch is set to "INST".
- Line-Level Devices (Keyboards, Mixers): Connect line-level devices using a 1/4" TS/TRS cable to INPUT 1 or 2. Ensure the corresponding LINE/INST switch is set to "LINE".

Figure 7: The U202 features a dual-channel input interface with XLR and 6.35mm (1/4") AUX inputs, offering wide compatibility for various microphone devices.
3. Pemantauan dan Pencatatan
- Pemantauan Tanpa Latensi: Engage the "DIR" (Direct Monitor) switch on the front panel to hear your input signals directly through your headphones or main outputs without any delay from your computer. This is crucial for accurate performance monitoring during recording.
- Pemantauan Headphone: Connect your headphones to the "PHONES" jack and adjust the "HEADPHONE VOLUME" knob for comfortable listening.
- Main Output Monitoring: Connect your studio monitors to the "OUTPUTS 1(L)" and "2(R)" jacks on the rear panel and adjust the "OUTPUT" knob on the front panel.
- Fungsi Loopback: The loopback feature allows you to capture audio playing on your computer and mix it with your live microphone or instrument inputs. This is ideal for live streaming, podcasting, or creating content where you need to record both your voice/instrument and computer audio simultaneously. Activate it using the "LOOP BACK" switch.
- Rekaman Resolusi Tinggi: The U202 supports up to 32-Bit/192 kHz resolution, ensuring high-fidelity audio capture for detailed and pristine recordings.

Figure 8: The U202 provides professional zero-delay monitoring, allowing real-time listening in either mono or stereo.
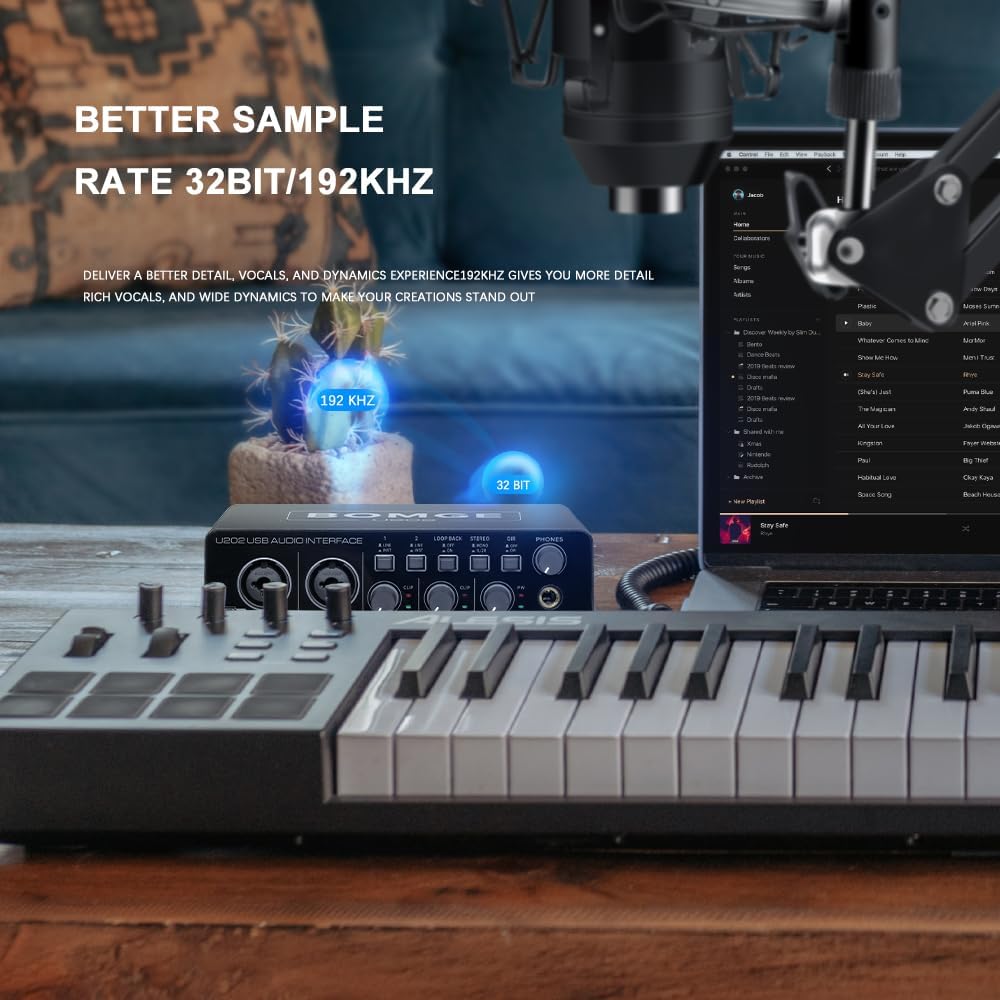
Figure 9: The BOMGE U202 delivers detailed vocals and dynamic experience with 32-Bit/192 kHz resolution.
4. Aplikasi
The BOMGE U202 is suitable for a variety of audio applications:
- Live Podcasting: Utilize the loopback function to easily integrate background music or sound effects with your live commentary.
- Rekaman Musik: Capture vocals and instruments with clarity and detail, suitable for home studio setups.
- Rekaman Studio: Provides essential features for professional-grade audio production.
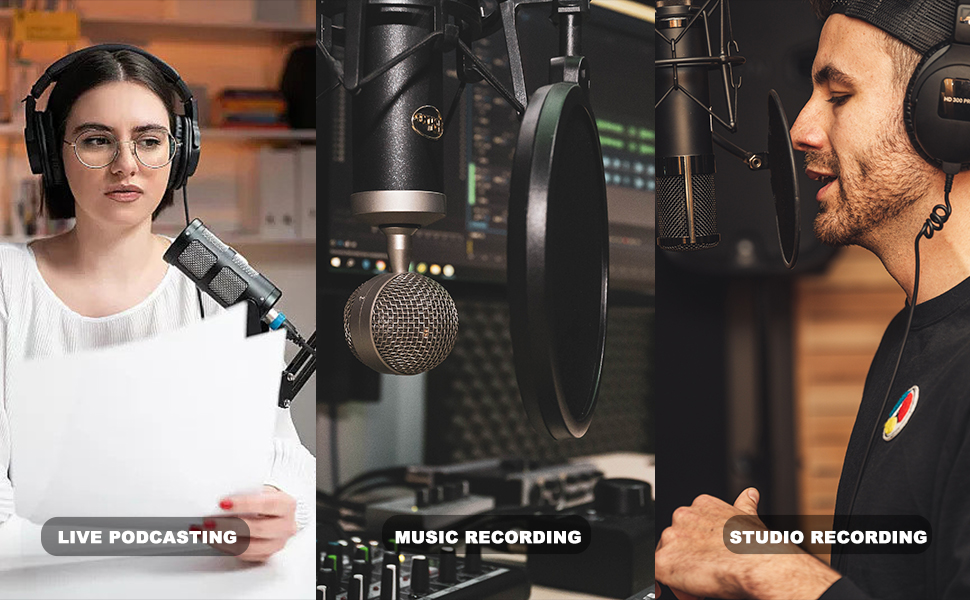
Figure 10: The BOMGE U202 is ideal for live podcasting, music recording, and studio recording.
Video 1: An official product video demonstrating the BOMGE U202 USB Audio Interface features and usage. This video highlights key functionalities such as 48V phantom power, dual-channel inputs, direct monitoring, and power input options.
Pemeliharaan
Proper maintenance ensures the longevity and optimal performance of your BOMGE U202.
- Pembersihan: Gunakan kain lembut dan kering untuk membersihkan bagian luar unit. Hindari penggunaan pembersih abrasif, pelarut, atau lilin, karena dapat merusak lapisan akhir atau komponen internal.
- Penyimpanan: When not in use, store the interface in a cool, dry place away from direct sunlight, extreme temperatures, and high humidity.
- Penanganan: Tangani perangkat ini dengan hati-hati. Hindari menjatuhkannya atau membuatnya terkena benturan keras.
Penyelesaian Masalah
If you encounter issues with your BOMGE U202, refer to the following common troubleshooting steps:
| Masalah | Kemungkinan Penyebab | Larutan |
|---|---|---|
| Tidak ada daya/Unit tidak menyala. | Incorrect power source selected or insufficient power. | Ensure the "POWER SOURCE" switch on the rear is set correctly (USB or DC). If using DC, ensure the adapter is 5V/2A. Try a different USB port or cable. |
| No sound from inputs. | Incorrect gain settings, phantom power off, incorrect input type, or software settings. |
|
| Distorted audio (clipping). | Sinyal input terlalu kuat. | Reduce the corresponding GAIN knob until the CLIP indicator no longer lights up red. |
| No sound from headphones/outputs. | Volume too low, incorrect output selection, or software settings. |
|
| Latency (delay) during monitoring. | Direct monitoring is off or software buffer size is too high. | Engage the "DIR" (Direct Monitor) switch. In your DAW, try reducing the audio buffer size (this may increase CPU load). |
| Loopback not working. | Loopback function is not enabled. | Ensure the "LOOP BACK" switch is engaged. Verify your software settings are configured to receive the loopback signal. |
Spesifikasi
| Fitur | Detil |
|---|---|
| Nomor Model | U202 |
| Berat Barang | 1.65 pon (0.75 kg) |
| Dimensi Produk | 6.69 x 4.41 x 1.77 inci (17 x 11.2 x 4.5 cm) |
| Resolusi Audio | 32-Bit / 192kHz |
| Jumlah Saluran | 2 Input, 2 Output |
| Masukan | 2 x Combo XLR / 1/4" TS/TRS (Mic/Line/Instrument) |
| Kekuatan Hantu | +48V (dapat dialihkan) |
| Keluaran | 2 x 1/4" TS (Main Out), 1 x 1/4" TRS (Headphone Out) |
| Konektivitas | USB (Type-B), 5V/2A DC (Type-C for power input only) |
| Kompatibilitas Sistem Operasi | Windows, macOS (Plug and Play) |
| Bahan Tubuh | Logam |

Figure 11: Dimensions of the BOMGE U202 USB Audio Interface.
Garansi dan Dukungan
For warranty information, technical support, or service inquiries, please refer to the official BOMGE webKunjungi situs web mereka atau hubungi layanan pelanggan mereka secara langsung. Simpan struk pembelian Anda sebagai bukti pembelian.
BOMGE Music US: Visit the BOMGE Store on Amazon
Ask a question about this manual
Ask about setup, troubleshooting, compatibility, parts, safety, or missing instructions. Manuals+ will review the question and use this page’s manual context to help answer it.