CHIGEE MFP0022
CHIGEE MFP0022 Crossbar Mount User Manual
For CHIGEE AIO-5 Series & AIO-6 Series
1. Pendahuluan
This manual provides detailed instructions for the installation, operation, and maintenance of the CHIGEE MFP0022 Crossbar Mount. This mount is designed to securely attach CHIGEE AIO-5 Series and AIO-6 Series devices to motorcycles with 12-16mm horizontal handlebars.
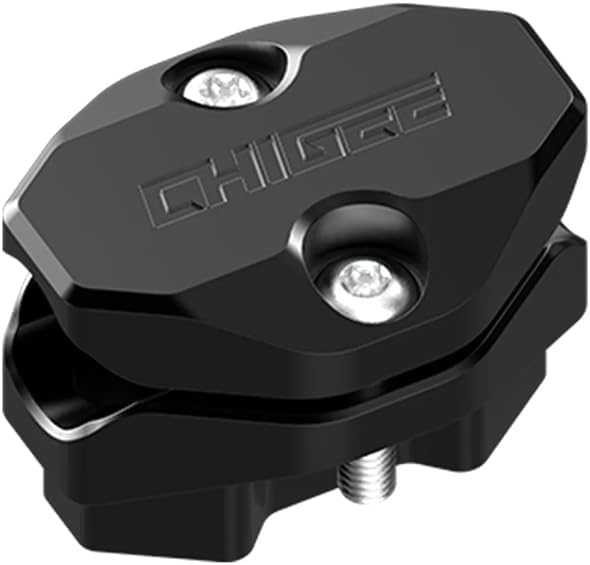
Figure 1.1: CHIGEE MFP0022 Crossbar Mount
The image displays the compact, black CHIGEE MFP0022 Crossbar Mount, featuring two visible screws on its top surface, indicating its robust design for secure attachment.
2. Informasi Keselamatan
- Always ensure the mount is securely fastened before riding. Loose mounts can cause distraction or detachment of the device, leading to potential hazards.
- Do not overtighten screws, as this may damage the mount or the handlebar. Refer to the installation section for proper torque specifications if available, or tighten until snug and secure.
- Regularly inspect the mount for any signs of wear, damage, or loosening, especially after long rides or exposure to harsh conditions.
- Ensure the mounted device does not obstruct your view of the road, mirrors, or motorcycle controls.
- If you are unsure about any installation step, consult a professional motorcycle mechanic.
3. Daftar Komponen
Pastikan semua komponen yang tercantum di bawah ini termasuk dalam paket Anda sebelum memulai instalasi.

Gambar 3.1: Komponen yang Termasuk
This image illustrates the individual components of the MFP0022 Crossbar Mount. It shows the main pipe clamp, the pipe clamp base, and various screws including M3*8 (x2), M4*12 (x2), M4*20 (x2), and M5*12 (x1).
- 1x Pipe Clamp: The upper section of the mount that secures the device.
- 1x Pipe Clamp Basis: The lower section of the mount that attaches to the crossbar.
- 2x M3*8 Screws: Small screws for specific assembly points.
- 2x M4*12 Screws: Medium length screws for general assembly.
- 2x M4*20 Screws: Longer screws for specific assembly points.
- 1x M5*12 Screw: A larger screw for primary attachment.
4. Spesifikasi
Key technical details for the MFP0022 Crossbar Mount.

Figure 4.1: Product Dimensions and Compatibility
This diagram provides precise measurements of the MFP0022 mount, including its length (40mm), width (30mm), and height (26mm). It also clearly indicates the compatible crossbar diameters: 12mm and 16mm, with a clamp opening of 8.5mm for the 12mm bar.
| Atribut | Detil |
|---|---|
| Model | MFP0022 Crossbar Mount |
| Bahan | Paduan aluminium 6061 |
| Dimensi (P x L x T) | 40mm x 30mm x 26mm (1.57 x 1.18 x 1.02 inci) |
| Compatible Crossbar Diameter | 12mm - 16mm |
| Berat | 0.952 ons |
| Warna | Hitam |
5. Panduan Instalasi
Follow these steps to properly install your CHIGEE MFP0022 Crossbar Mount.
5.1 Attaching the Mount to the Crossbar
- Identify the appropriate location on your motorcycle's horizontal handlebar or crossbar (12mm to 16mm diameter). Ensure it does not interfere with other controls or instruments.
- Separate the Pipe Clamp and the Pipe Clamp Basis.
- Position the Pipe Clamp Base around the crossbar.
- Align the Pipe Clamp on top of the Pipe Clamp Base, ensuring the screw holes are aligned.
- Insert the appropriate M4 screws (M4*12 or M4*20 depending on the thickness of your crossbar and desired fit) through the Pipe Clamp and into the Pipe Clamp Basis.
- Tighten the screws evenly until the mount is snug and secure on the crossbar. Do not overtighten.

Figure 5.1: Mount Assembly and Attachment
This image demonstrates the two main parts of the mount (pipe clamp and base) and how they fit together. It also shows the mount securely attached to a motorcycle crossbar, highlighting its compact and stable fit.
5.2 Attaching Your CHIGEE Device to the Mount
The MFP0022 mount is designed to integrate seamlessly with CHIGEE AIO-5 and AIO-6 series devices.
- Locate the mounting point on the back of your CHIGEE AIO-5 or AIO-6 series device.
- Align the device's mounting point with the top surface of the installed MFP0022 Crossbar Mount.
- Use the provided M5*12 screw (or other appropriate screws from your CHIGEE device's accessories) to secure the device to the mount.
- Ensure the device is firmly attached and does not wobble. Gently test its stability before riding.

Figure 5.2: CHIGEE Device Mounted
This image shows a CHIGEE AIO-5 series device securely mounted on a motorcycle's crossbar using the MFP0022 mount. The device is positioned centrally, providing an optimal viewing angle for the rider.

Gambar 5.3: Sisi Profile of Mounted Device
Sebuah sisi view of the CHIGEE device mounted on the crossbar, illustrating the low-profile and integrated fit of the MFP0022 mount. This perspective highlights how the mount keeps the device close to the handlebar for a streamlined appearance.
6. Kompatibilitas
The MFP0022 Crossbar Mount is specifically designed for optimal compatibility with the following CHIGEE products and motorcycle handlebar types:
- CHIGEE AIO-5 Series: Including AIO-5 LITE and AIO-5 PLAY models.
- CHIGEE AIO-6 Series: Including AIO-6 LTE and AIO-6 Max models.
- Motorcycle Handlebars: Compatible with horizontal handlebars or crossbars ranging from 12mm to 16mm in diameter (e.g., many ADV models).

Gambar 6.1: Contohample CHIGEE AIO-5 Series Devices
This image displays various models from the CHIGEE AIO-5 series, which are compatible with the MFP0022 crossbar mount. These devices are designed for motorcycle integration, offering features like navigation and multimedia.
7. Pemeliharaan
- Pembersihan: Usap dudukan dengan kain lembut,amp cloth to remove dust and dirt. Avoid using harsh chemicals or abrasive cleaners, which can damage the finish.
- Inspeksi: Periodically check all screws for tightness. Vibrations from riding can cause screws to loosen over time.
- Pemeriksaan Kerusakan: Inspect the mount for any cracks, bends, or other signs of damage. If damage is found, replace the mount immediately to ensure the safety of your device.
8. Penyelesaian masalah
| Masalah | Kemungkinan Penyebab | Larutan |
|---|---|---|
| Mount feels loose on handlebar. | Screws are not tightened sufficiently. Incorrect screw size used. | Ensure screws are tightened evenly and securely. Verify you are using the correct M4 screws for your crossbar diameter. |
| Device wobbles on the mount. | Device not securely attached to the mount. | Check the M5*12 screw (or equivalent) securing the device to the mount. Ensure it is fully tightened. |
| Mount does not fit crossbar. | Crossbar diameter is outside the 12-16mm range. | Verify your crossbar diameter. This mount is only compatible with 12mm to 16mm handlebars. |
9. Garansi dan Dukungan
For warranty information, technical support, or further inquiries regarding your CHIGEE MFP0022 Crossbar Mount, please visit the official CHIGEE websitus atau hubungi layanan pelanggan mereka.
Resmi Weblokasi: www.chigee.com
You may also refer to the contact information provided on the product packaging for direct support channels.

Gambar 9.1: Detail Kemasan Produk
This image shows the product packaging, which includes details such as the model number (MFP0022), adaptation aperture (12-16mm), and potentially manufacturer contact information or website details for support.
Dokumen Terkait - MFP0022
 |
CHIGEE AIO-5 PLAY for BMW: User Manual and Installation Guide Comprehensive user manual and installation guide for the CHIGEE AIO-5 PLAY Smart Digital Display for BMW motorcycles. Learn about features, setup, activation, and troubleshooting. |
 |
Panduan Instruksi Sistem Berkendara Cerdas CHIGEE AIO-6 MAX Manual ini memberikan instruksi terperinci untuk Sistem Berkendara Cerdas CHIGEE AIO-6 MAX, yang mencakup produk lebih dari 100%view, isi paket, detail komponen, instalasi, kabel, aktivasi, pembaruan firmware, dan aksesori opsional. Dilengkapi layar ultra-terang 6 inci, kamera HDR, deteksi titik buta BSD, dan ketahanan air IP69K. |
 |
Lenovo ideacentre AIO 520 Series Quick Start Guide A concise and accessible quick start guide for the Lenovo ideacentre AIO 520 Series All-in-One PCs. This guide covers unpacking, setting up the stand, connecting peripherals, powering on the device, and basic internet connectivity. It also provides information on accessing support and other manuals. |
 |
Panduan Pengguna Kamera Dasbor Cerdas Sepeda Motor CHIGEE AIO-5 Lite Panduan pengguna lengkap untuk CHIGEE AIO-5 Lite Motorcycle Smart Dash Cam, yang mencakup pemasangan, pengoperasian, fitur, pemeliharaan, dan spesifikasi teknis. |
 |
Panduan Penggunaan Seri AIO: Penginstalan, Pengoperasian, dan Pengoperasian Panduan lengkap panduan penggunaan untuk stasiun energi Fox ESS Serie AIO. Mengatasi instalasi, fungsi, teknik data, keamanan dan penyelesaian masalah untuk model AIO-H1 dan AIO-AC1. |
 |
Extreme Networks Wi-Fi 7 Antennas: Compatibility & Installation Guide Comprehensive guide from Extreme Networks on Wi-Fi 7 antenna compatibility, specifications, and installation for enterprise WLAN deployments. Features models like AIO-TS06360-N and covers selection, part numbers, and best practices. |
Ask a question about this manual
Ask about setup, troubleshooting, compatibility, parts, safety, or missing instructions. Manuals+ will review the question and use this page’s manual context to help answer it.