1. Pendahuluan
This manual provides detailed instructions for assembling, operating, and maintaining your MiOYOOW DIY Self-Balancing Robot Car Kit. This kit is designed as a STEM project for users aged 15 and above, combining soldering practice with robotics, sensor technology, and control systems. The robot car features self-balancing capabilities, ultrasonic obstacle avoidance, and dual control via WiFi and infrared remote.

Image: The assembled MiOYOOW Self-Balancing Robot Car Kit, highlighting its key features.
2. Informasi Keselamatan
Please read all safety instructions before beginning assembly or operation. This kit involves soldering, which requires caution. Ensure proper ventilation and use appropriate safety gear, such as safety glasses. Keep small components away from children. The kit is recommended for individuals aged 15 and above due to the complexity and small parts involved in soldering.
- Always work in a well-ventilated area when soldering.
- Kenakan kacamata keselamatan untuk melindungi mata Anda dari cipratan solder.
- Use a soldering iron stand to prevent accidental burns.
- Ensure the power supply is disconnected when not in use or during assembly.
- Produk ini mengandung bagian-bagian kecil dan tidak cocok untuk anak di bawah 3 tahun.
3. Isi Paket
Verify that all components listed below are present in your package before starting assembly. If any parts are missing or damaged, please contact customer support.

Gambar: Lebih dariview of all components included in the kit.
- Papan PCB
- lampu LED
- Resistors and other electronic components
- ESP-32 Development Board
- Ultrasonic Sensor (HC-SR04 Module)
- 280 RPM Motors (x2)
- Wheels with anti-slip rubber tires (x2)
- Remote Control Infra Merah
- Battery Box (requires 2x 3.7V rechargeable batteries, not included)
- Acrylic chassis parts and fasteners
- Menghubungkan kabel dan kabel
- Color-printed user manual (physical copy)
4. Pengaturan dan Perakitan
Assembly of this kit requires soldering. It is recommended for intermediate soldering learners. Follow the step-by-step instructions provided in the included color-printed user manual for detailed assembly guidance. Ensure you have the necessary tools, including a soldering iron, solder, wire cutters, and a screwdriver.
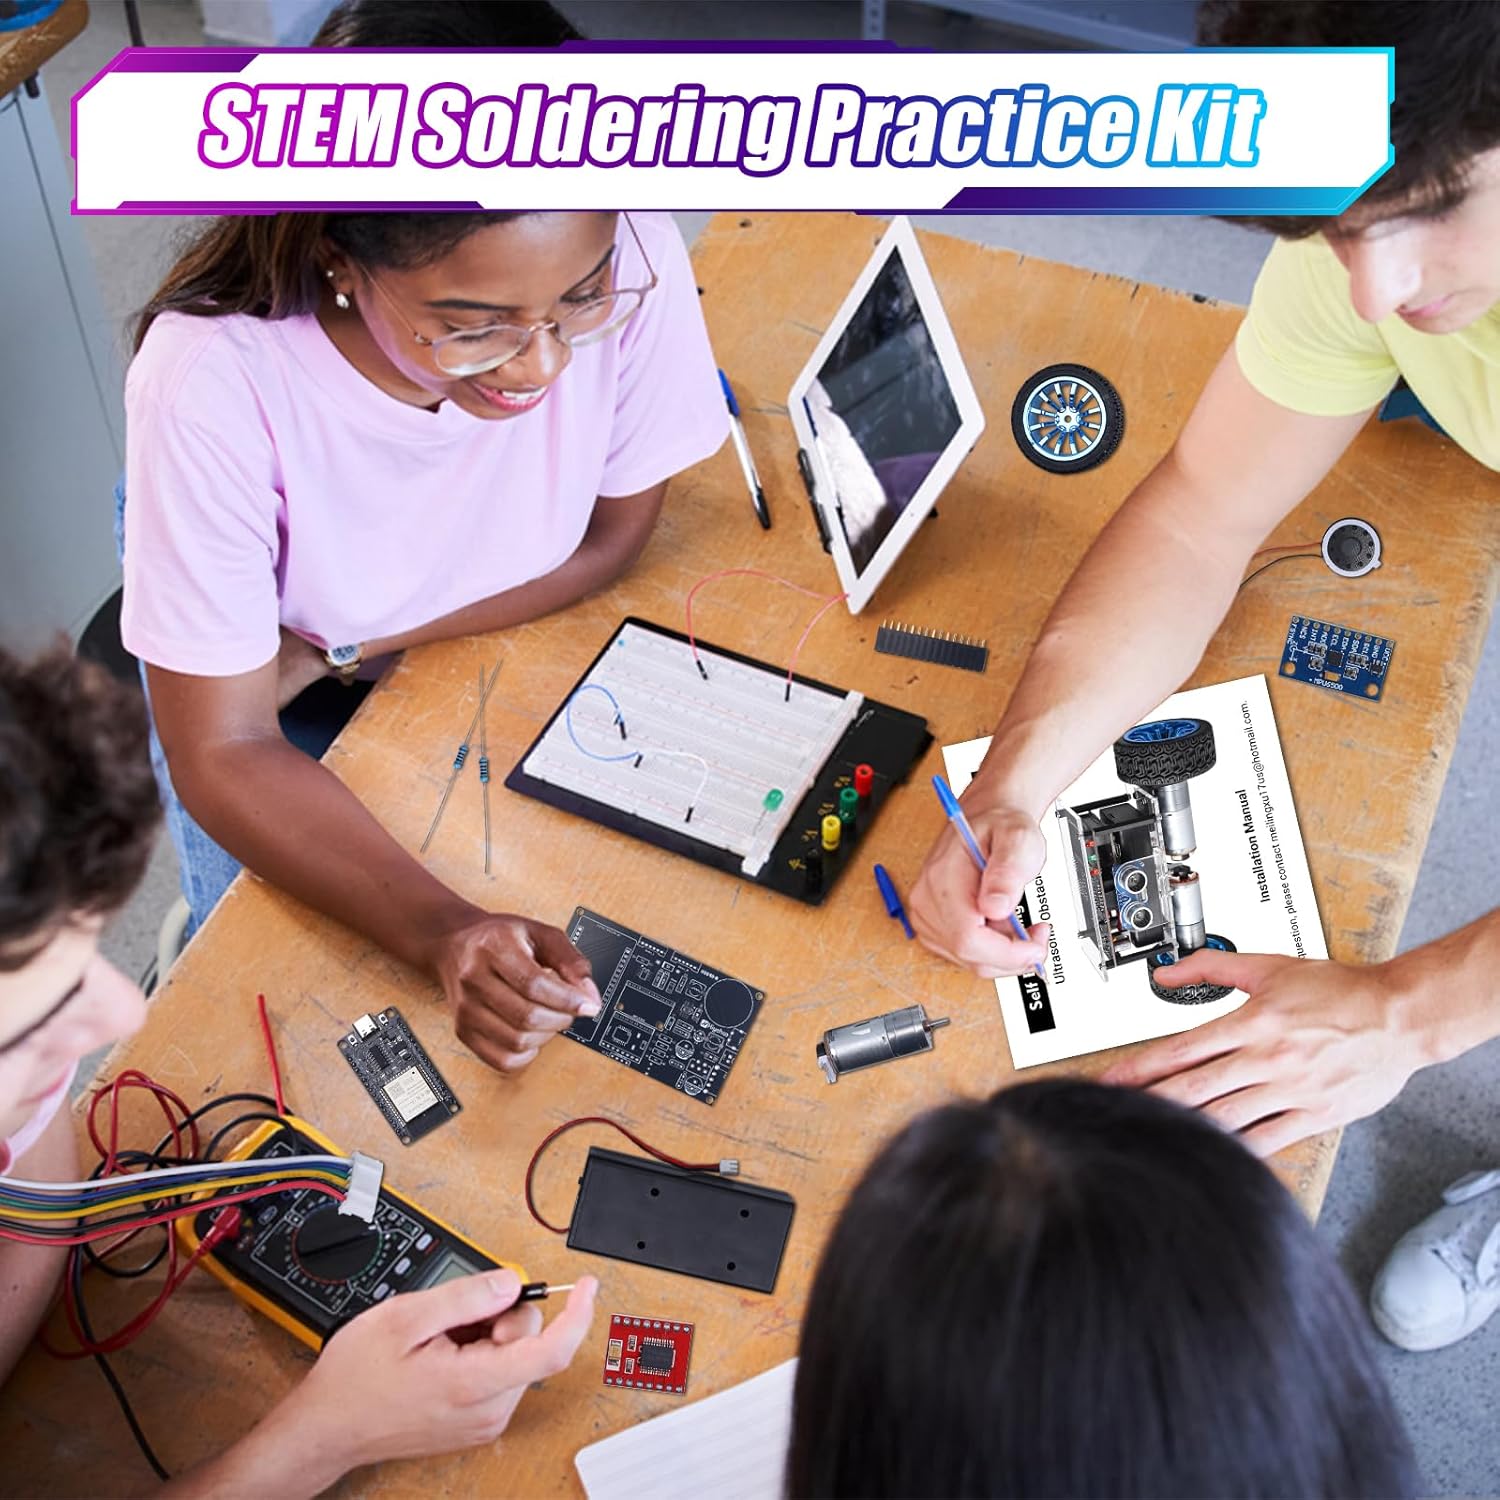
Image: Soldering practice with the kit components.

Image: Students assembling the kit.
4.1 Important Notes for Assembly:
- Some components are small and require precise soldering.
- Ensure correct polarity for LEDs and other polarized components.
- Periksa kembali semua sambungan sebelum mengalirkan daya.
- The kit requires 2x 3.7V rechargeable batteries, which are not included. Install them into the battery box after assembly.
5. Petunjuk Pengoperasian
5.1 Initial Power-On and Self-Balancing
After successful assembly and battery installation:
- Turn on the battery box switch.
- Place the car flat on the ground and turn on the main power switch.
- Wait approximately 10 seconds for the car to initialize and achieve self-balancing. The LED1 indicator will light up, signaling it is ready.
Video: Demonstrates initial power-on, self-balancing, and obstacle avoidance features of the robot car.
5.2 Ultrasonic Obstacle Avoidance
The integrated ultrasonic sensor enables the car to detect and avoid obstacles automatically. When an obstacle is detected, the car will automatically reverse, turn, and sound an alarm.
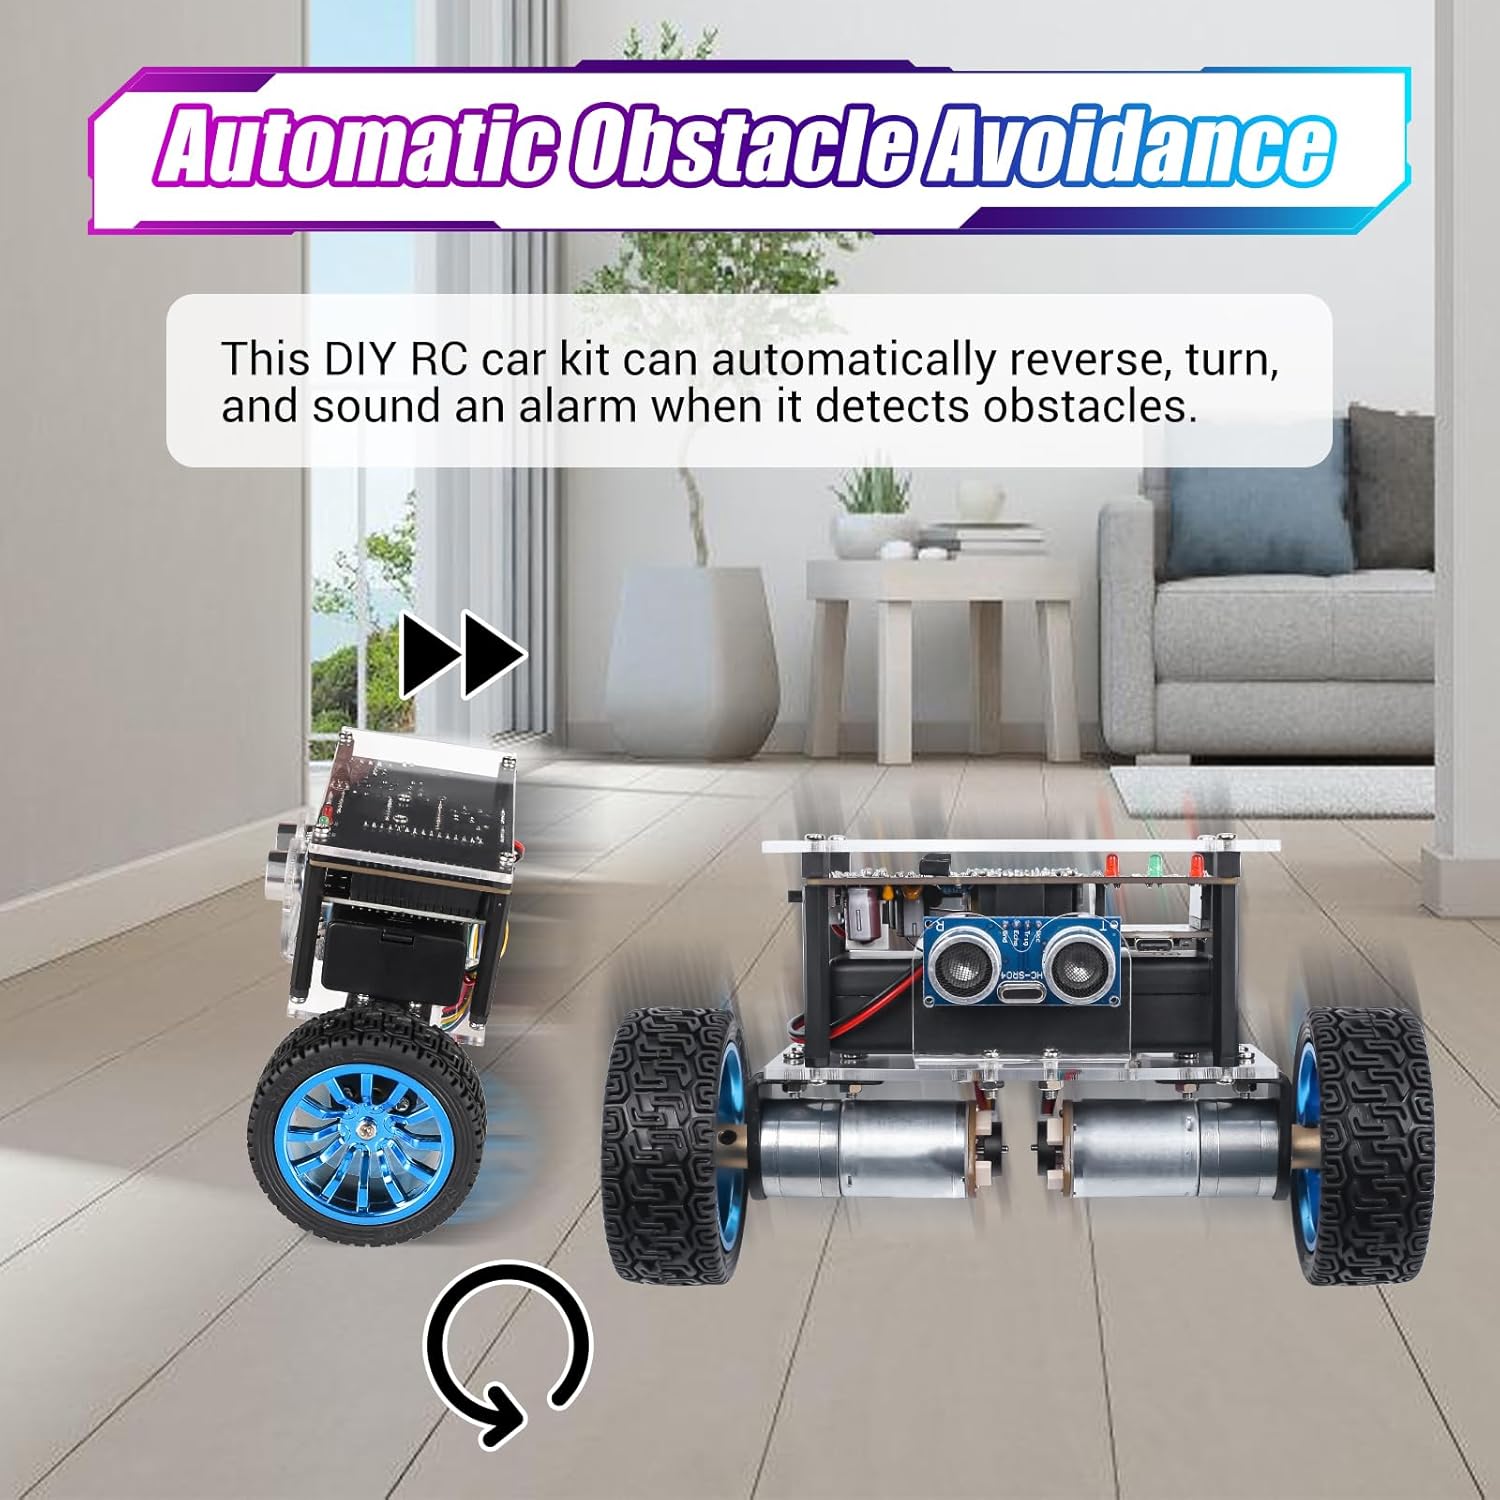
Image: Robot car performing automatic obstacle avoidance.
5.3 Control Methods: WiFi and IR Remote
The robot car can be controlled using either a mobile device via WiFi or the included infrared remote control.
5.3.1 WiFi Control
To control the car via WiFi:
- Connect your mobile device to the WiFi network named "HE048-XXXXXX" (where XXXXXX is the product serial number) with the password "88888888".
- Open a mobile browser and enter "10.0.10.1" to access the control interface.
- Enter your home WiFi name and password, then click "Set WiFi".
- Once the WiFi icon on the interface turns blue, the connection is successful. You can now use the on-screen controls to operate the car.
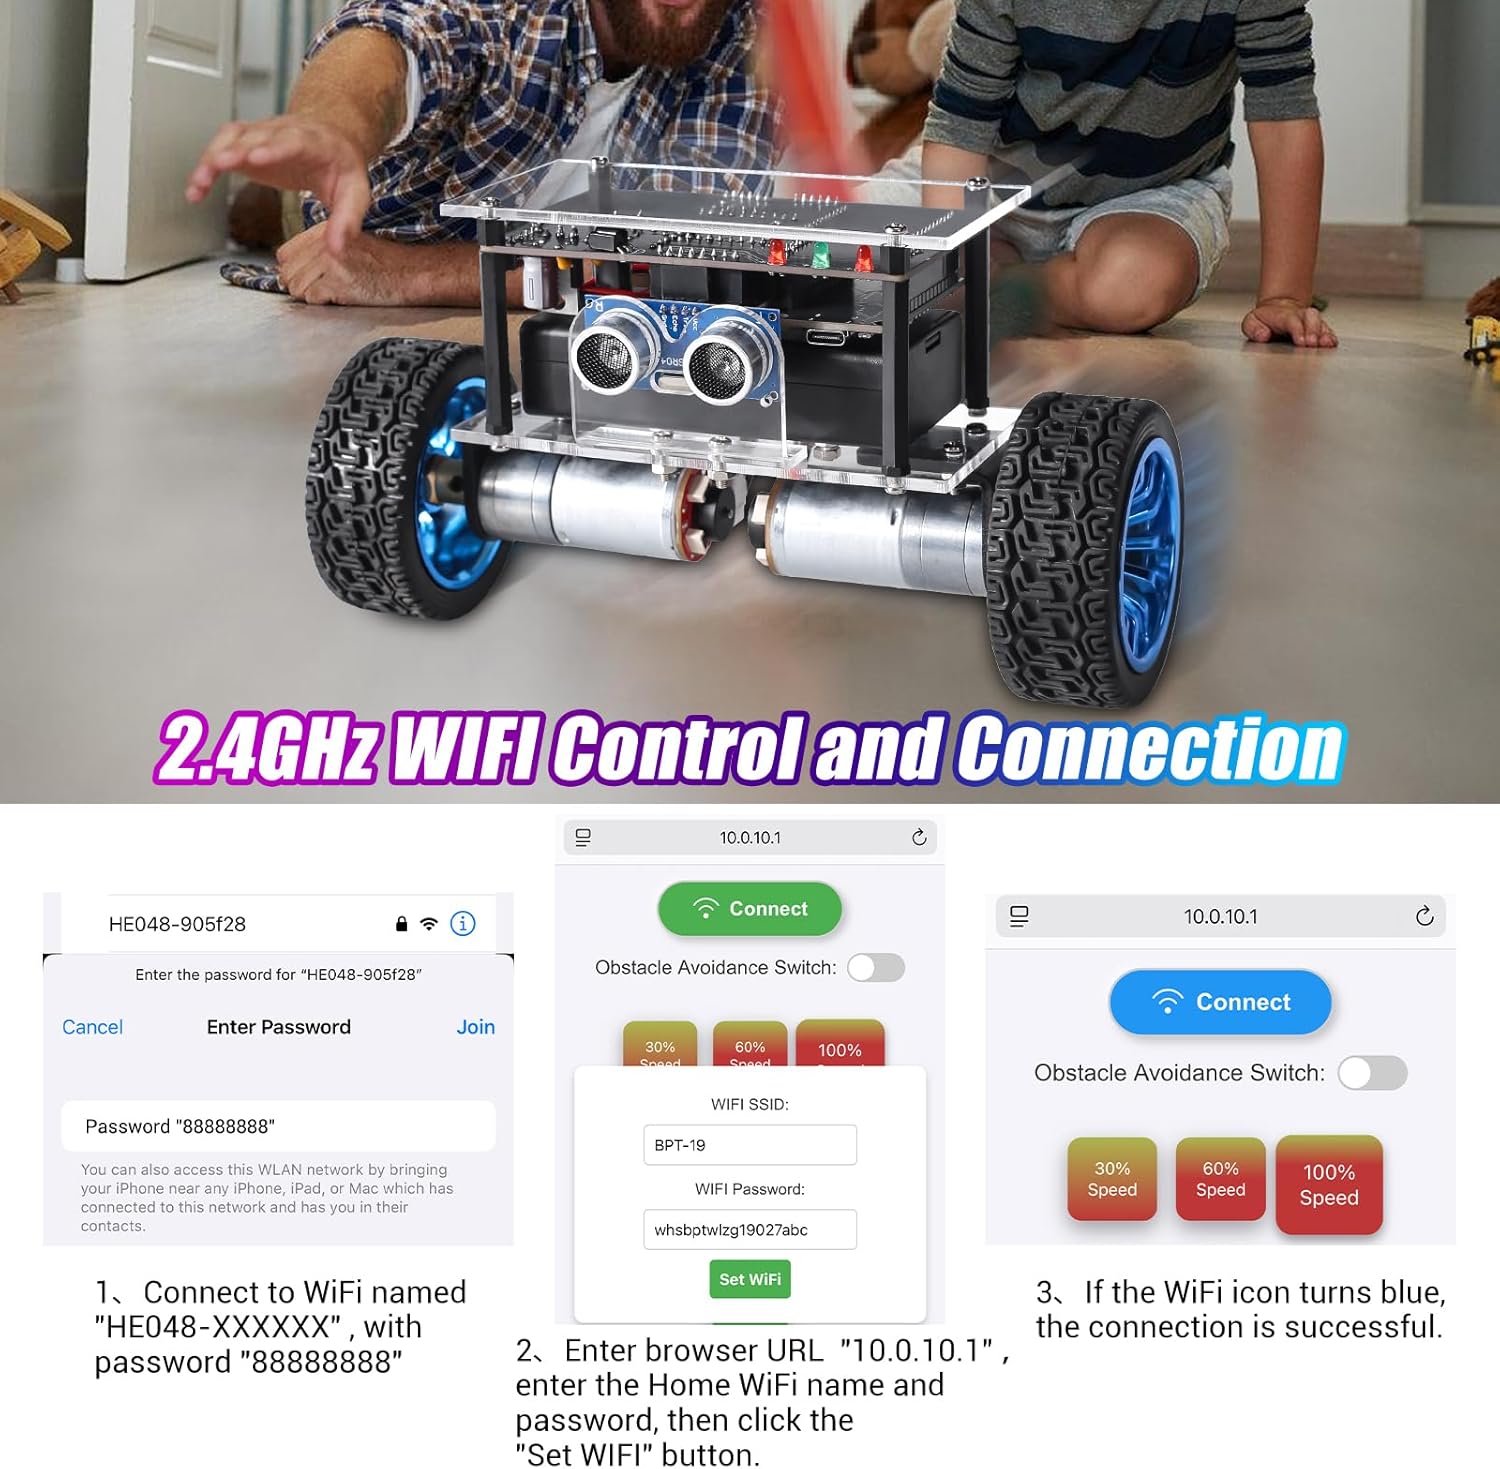
Image: Steps for WiFi control setup.

Image: WiFi control interface details.
5.3.2 Kontrol Jarak Jauh Inframerah (IR)
Use the provided IR remote control for direct operation. Ensure the remote is pointed towards the car's infrared receiver.

Image: Infrared remote control button functions.
- Kontrol Kecepatan: Buttons 1, 2, 3 control speed (1=slowest, 3=fastest, default is 3).
- Penghindaran Rintangan: Buttons 7 (on) and 9 (off, default) toggle obstacle avoidance.
- Kontrol Arah: Use the arrow keys for Forward, Backward, Turn Left, Turn Right.
- Rotasi: Buttons 0 (Left Rotate in Place) and # (Right Rotate in Place).
- Berhenti: The OK button acts as a stop function.
For both control methods, long-press directional buttons for continuous movement and release to stop. Short-press for momentary adjustments.

Image: Robot car demonstrating various movements.
6. Pemeliharaan
To ensure the longevity and optimal performance of your robot car kit:
- Pembersihan: Gently wipe the car with a dry, soft cloth. Avoid using water or cleaning solutions directly on electronic components.
- Perawatan Baterai: The car is powered by 2x 3.7V rechargeable batteries (not included). Fully charge them for 2 hours for up to 2.5 hours of playtime. Remove batteries if the car will not be used for an extended period.
- Pemeriksaan Komponen: Periodically inspect soldered joints and connections for any signs of loosening or damage. Re-solder if necessary.
- Penyimpanan: Store the robot car in a dry, cool place away from direct sunlight and extreme temperatures.
7. Penyelesaian masalah
| Masalah | Kemungkinan Penyebab | Larutan |
|---|---|---|
| Car does not power on. | Batteries not installed, low charge, or incorrect polarity. Power switch off. Loose connections. | Ensure batteries are correctly installed and charged. Check battery box and main power switches. Inspect all power connections. |
| Car does not self-balance. | Not placed on a flat surface. Initialization incomplete. Sensor issue. | Place the car on a flat, level surface. Wait 10 seconds after power-on for initialization. Check ultrasonic sensor connections. |
| Remote kontrol IR tidak berfungsi. | Remote batteries low/dead. Remote not pointed at IR receiver. Obstruction. | Replace remote batteries. Ensure direct line of sight to the car's IR receiver. Remove any obstructions. |
| WiFi control not connecting. | Incorrect WiFi password. Mobile device not connected to car's hotspot. Incorrect IP address. | Verify WiFi password "88888888". Ensure your phone is connected to the car's "HE048-XXXXXX" network. Confirm "10.0.10.1" is entered in the browser. |
| Obstacle avoidance not functioning. | Ultrasonic sensor disconnected or faulty. Feature turned off. | Check connections to the HC-SR04 module. Ensure obstacle avoidance is enabled via remote (button 7) or WiFi interface. |
8. Spesifikasi
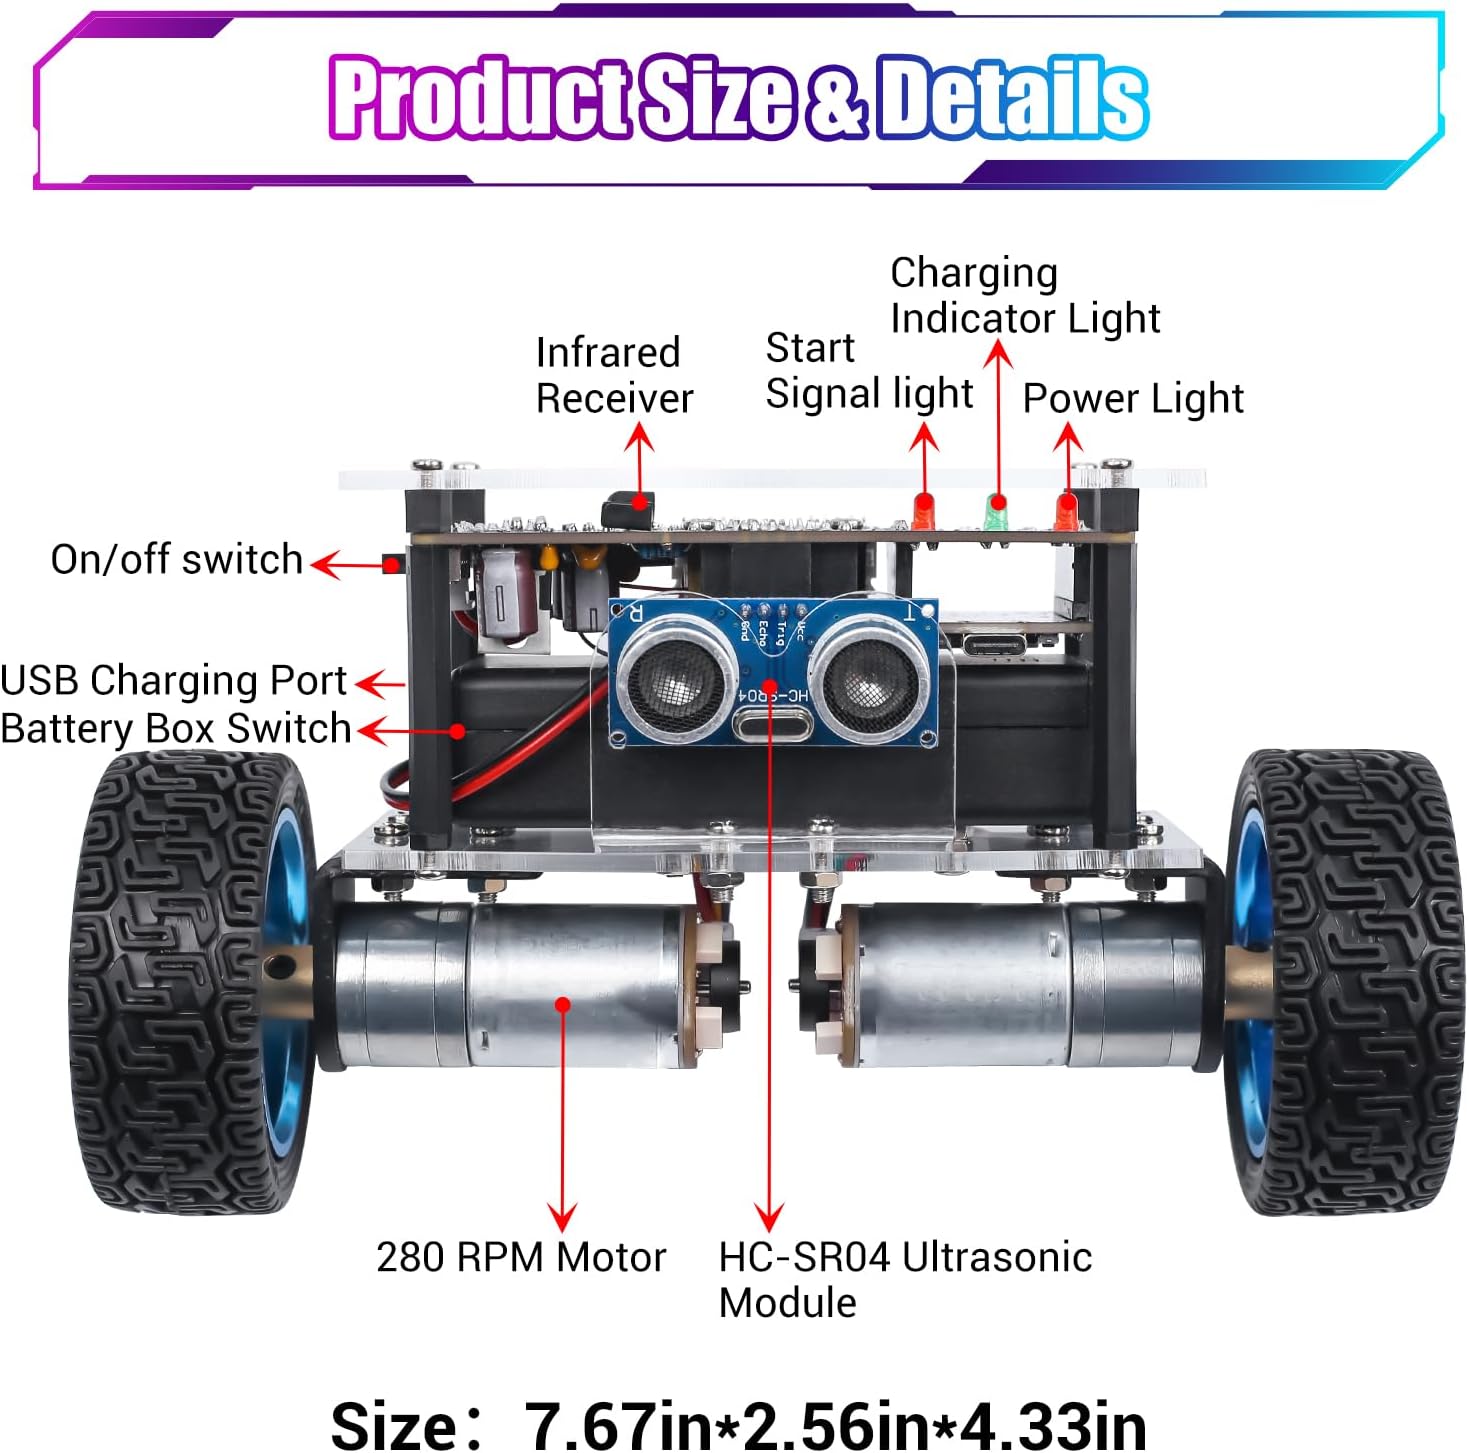
Image: Product details and labeled components.
- Nomor Model: GY21655
- Kontrol: WiFi (ESP-32 Development Board) & Infrared Remote
- Fitur Khusus: Self-balancing, Ultrasonic Obstacle Avoidance, 360° Rotation
- Sumber Daya: 2x 3.7V rechargeable batteries (not included)
- Waktu Pengisian: Sekitar 2 jam
- Waktu bermain: Hingga 2.5 jam
- Motor: 2x 2.25GA-370 Motors, Speed up to 280 RPM
- Ukuran: 7.67 x 2.56 x 4.33 inci (sekitar 19.5 x 6.5 x 11 cm)
- Usia yang Direkomendasikan: 15+ tahun
- Tujuan Pendidikan: STEM (Sains, Teknologi, Teknik, Matematika)
- Jenis Bahan: Semiconductor components, acrylic chassis
9. Garansi dan Dukungan
For warranty information or technical support, please refer to the contact details provided with your purchase or visit the official MiOYOOW websitus. Simpan struk pembelian Anda sebagai bukti pembelian.
Pabrikan: MiYOYOOW
Penjual: WHDTS