
1. Pendahuluan
This manual provides detailed instructions for the setup, operation, and maintenance of your JoFomp 17.3" Large Digital Wall Clock. Please read this manual thoroughly before use to ensure proper functionality and longevity of the product.
2. Informasi Keselamatan
- Ensure the clock is connected to a stable power source (5V/2A adapter included).
- Jangan biarkan perangkat terkena suhu ekstrem, sinar matahari langsung, atau kelembapan tinggi.
- Jauhkan dari jangkauan anak-anak.
- Jangan mencoba membongkar atau memperbaiki sendiri perangkat ini. Hubungi dukungan pelanggan untuk bantuan.
- Remote control membutuhkan 2 baterai AAA (tidak termasuk).
- A 1 AAA battery (not included) is required for the memory function to retain settings during power outagyaitu.
3. Isi Paket
Verifikasi bahwa semua item ada dalam paket:
- JoFomp 17.3" Digital Wall Clock
- Kontrol Jarak Jauh
- Adaptor Daya DC 5V / 1A
- Kabel Listrik
- Mounting Hooks (2)
- Mounting Template Ruler
- User Manual (dokumen ini)

Gambar 3.1: Aksesoris yang disertakan dan unit utama.
4. Produk Lebihview
The JoFomp 17.3" Large Digital Wall Clock features a clear LED display and multiple functions for convenience.

Figure 4.1: Front display of the digital wall clock.
4.1 Fitur Tampilan
- Tampilan Waktu: Large 17.3" LED digits.
- Tampilan Tanggal: Bulan dan Tanggal.
- Hari dalam seminggu: Indicated by illuminated text (Mon-Sun).
- Suhu: Displays in Celsius or Fahrenheit.
- Kelembaban: Displays relative humidity percentage.
- Alarm Ganda: Dua pengaturan alarm independen.
- Indikator DST: Daylight Saving Time status.

Figure 4.2: Labeled display functions.
4.2 Back Panel and Buttons
The back of the clock houses control buttons and connection ports.

Figure 4.3: Back panel with labeled components.
- Tombol Pengaturan: Five buttons for manual adjustments (Light, SET, +, -, Alarm).
- Memory Battery Compartment: For 1 AAA battery (not included) to retain settings.
- Pelabuhan Daya: Untuk menghubungkan adaptor daya.
- Lubang pemasangan: Untuk pemasangan di dinding.
5. Pengaturan
5.1 Sambungan Daya
- Connect the power cord to the clock's power port.
- Plug the 5V/2A power adapter into a standard electrical outlet. The clock will power on and display.
Catatan: The clock requires continuous power to operate. It is not battery-powered for primary display.
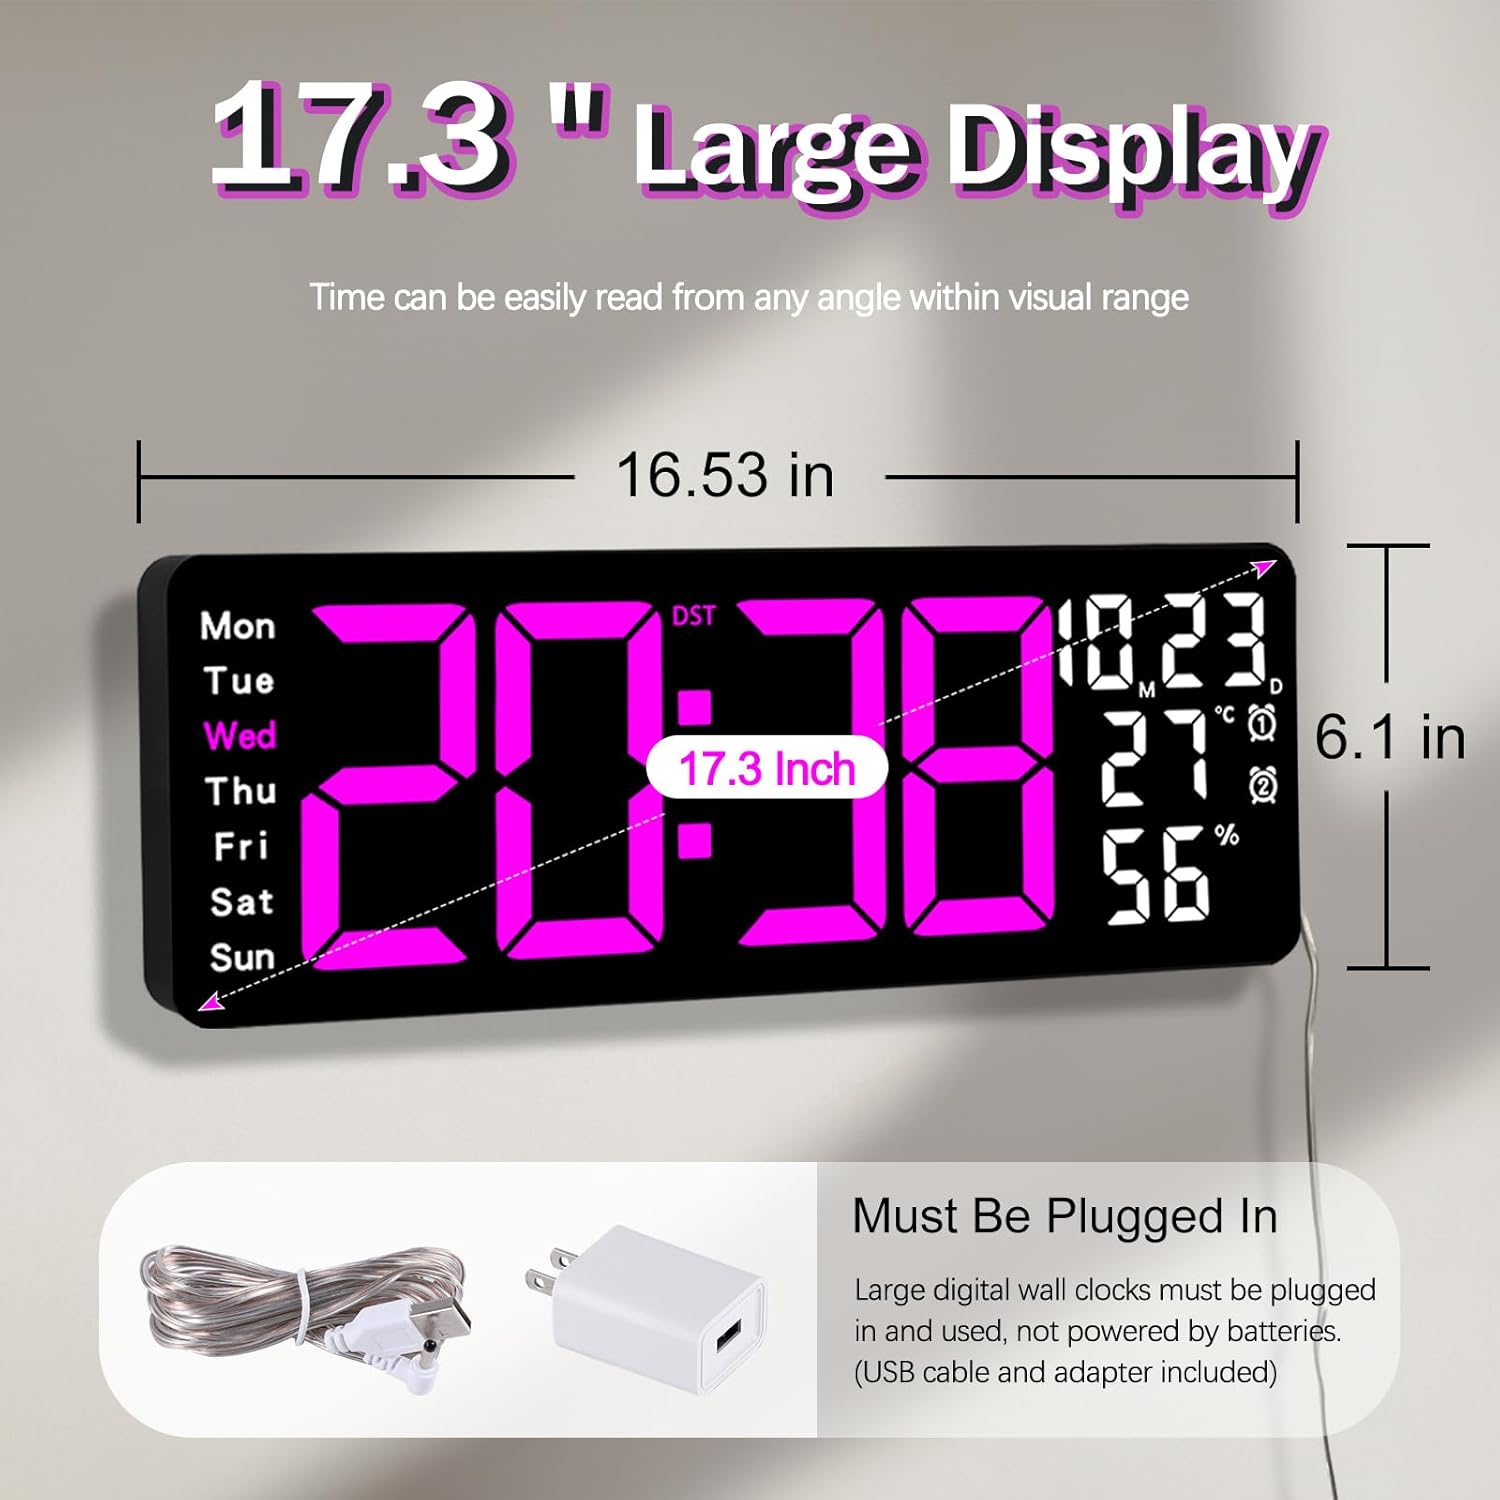
Figure 5.1: Power connection and dimensions.
5.2 Memory Battery Installation (Optional)
To retain time and settings during a power outage, install a 1 AAA battery (not included) into the memory battery compartment on the back of the clock.
- Locate the memory battery compartment on the back of the clock.
- Buka penutup kompartemen.
- Masukkan satu baterai AAA 1.5V, pastikan polaritasnya benar (+/-).
- Tutup penutup kompartemen dengan aman.
5.3 Pemasangan di Dinding
Use the included mounting template ruler and hooks for easy wall installation.
- Determine the desired location for your clock.
- Place the mounting template ruler on the wall at the desired height.
- Mark the positions for the mounting hooks according to the ruler's indications.
- Install the mounting hooks into the wall at the marked positions.
- Carefully hang the clock onto the installed hooks, ensuring it is level and secure.
6. Petunjuk Pengoperasian
The clock can be operated using either the remote control or the buttons on the back.
6.1 Pengaturan Waktu dan Tanggal
Use the remote control or the "SET" button on the back of the clock.
- Tekan tombol MENGATUR button (on remote or back of clock) to enter setting mode.
- Gunakan + Dan - tombol untuk menyesuaikan nilai yang berkedip (misalnya, jam, menit, tahun, bulan, hari).
- Tekan MENGATUR again to confirm the current setting and move to the next parameter.
- Repeat until all settings are configured.
6.2 12/24 Hour Format Conversion
Untuk beralih antara format waktu 12 jam dan 24 jam:
- Tekan tombol khusus 12/24 jam pada kendali jarak jauh.
- Alternatively, during time setting, the format option will appear.

Figure 6.1: 12/24H format conversion.
6.3 Konversi Satuan Suhu (°C/°F)
Untuk beralih antara satuan suhu Celsius dan Fahrenheit:
- Tekan tombol ° C / ° F pada kendali jarak jauh.
6.4 Pengaturan Alarm (Alarm Ganda)
Jam ini mendukung dua alarm independen.
- Tekan tombol ALARM button on the remote control or the back of the clock.
- Menggunakan + Dan - untuk mengatur waktu alarm yang diinginkan.
- Tekan ALARM again to confirm and move to the next alarm or exit.
- To activate/deactivate an alarm, press the corresponding alarm button (e.g., AL1 or AL2) pada kendali jarak jauh.
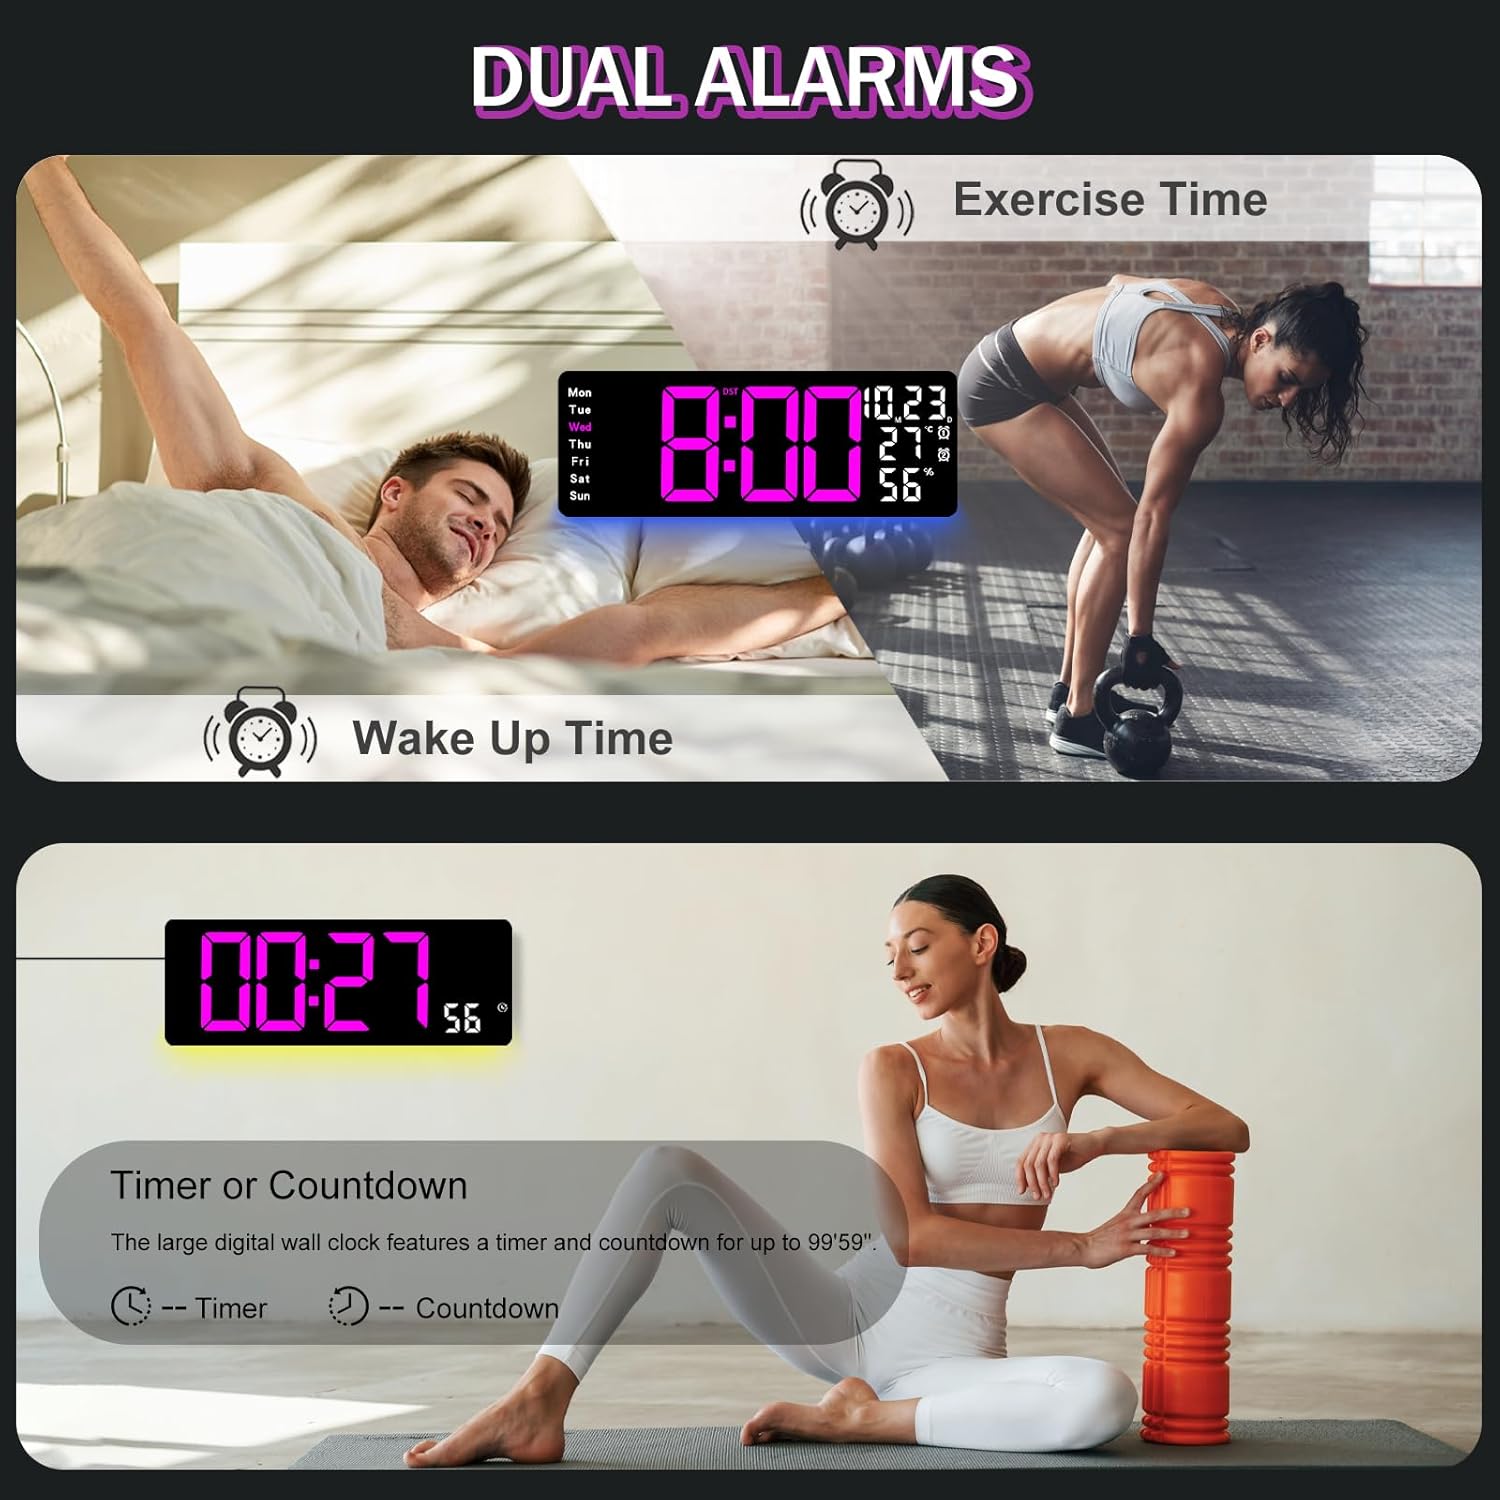
Figure 6.2: Dual alarm and timer functions.
6.5 Penyesuaian Kecerahan
The clock offers 10 levels of brightness, adjustable manually or automatically.
- Kecerahan Otomatis: The built-in light sensor adjusts brightness based on ambient light. Activate this mode by pressing the MOBIL tombol pada remote.
- Kecerahan Manual: Tekan tombol KECERAHAN button on the remote, then use + Dan - to select one of the 10 levels.

Figure 6.3: Custom and auto-brightness settings.

Figure 6.4: Brightness regulator illustration.
6.6 Ambient Light Features
The clock includes a night light feature at the bottom with multiple color options.
- Tekan tombol LAMPU button on the remote control or the back of the clock to cycle through 8 fixed colors and 1 multi-color mode.
- In multi-color mode, the colors automatically convert. Press OK to fix a favorite color.
- Adjust the brightness of the ambient light using the + Dan - buttons when the ambient light is active.

Figure 6.5: Multiple ambient night light options.

Figure 6.6: 9 color ambient light options.
6.7 Timer and Countdown Function
The clock features a timer (count-up) and countdown function up to 99 minutes and 59 seconds.
- Tekan tombol PENGATUR WAKTU pada kendali jarak jauh.
- Menggunakan + Dan - to set the desired time for countdown.
- Tekan MULAI/BERHENTI to begin or pause the timer/countdown.
- Tekan MENGATUR ULANG untuk menghapus pengatur waktu.

Figure 6.7: Timing function (count-up/countdown).
Video 6.1: Demonstration of multi-functional features including night light change, brightness control, count-up, and countdown. This video also shows the time, date, day, alarm clock, temperature, and humidity displayed on the same screen, along with 12/24 hour conversion, Celsius/Fahrenheit conversion, and DST enablement. The back design and buttons are also briefly shown.
6.8 Waktu Musim Panas (DST)
If DST is observed in your region, you can enable or disable it.
- Tekan lama - button on the remote control to enable or disable DST. The DST indicator will appear/disappear on the display.

Figure 6.8: Enabling and disabling Daylight Saving Time.

Figure 6.9: Daylight Saving Time (DST) functionality.
6.9 Penggunaan Kontrol Jarak Jauh
The remote control provides convenient access to all clock functions without needing to reach the clock directly.

Figure 6.10: Remote control and its functions.

Gambar 6.11: Penggunaan remote control.
- Ensure the remote control has 2 AAA batteries installed (not included).
- Point the remote control directly at the clock for optimal response.
- Each button on the remote corresponds to a specific function as described in this manual.
7. Pemeliharaan
- Clean the clock's display and body with a soft, dry cloth. Avoid abrasive cleaners or solvents.
- Ensure the power adapter and cord are free from damage.
- Replace the memory battery annually to ensure settings are retained during power interruptions.
8. Penyelesaian masalah
| Masalah | Kemungkinan Penyebab | Larutan |
|---|---|---|
| Tampilan jam mati. | Tidak ada catu daya. | Check if the power adapter is securely plugged into the clock and the outlet. Ensure the outlet is functional. |
| Kontrol jarak jauh tidak berfungsi. | Low or dead batteries in remote; obstruction; remote out of range. | Replace remote batteries (2 AAA). Ensure no obstructions between remote and clock. Point directly at the clock within effective range. |
| Pengaturan hilang setelah listrik padamtage. | No memory battery or dead memory battery. | Install a fresh 1.5V AAA battery in the memory compartment. |
| Incorrect temperature/humidity reading. | Sensor interference or placement. | Ensure the clock is not placed near heat sources, direct sunlight, or in areas with extreme drafts. Allow time for the sensor to stabilize. |
| Ambient light not changing colors. | Stuck in fixed color mode. | Press the LIGHT button on the remote to cycle through modes. If stuck on a fixed color, press the OK button to release it from fixed mode. |
9. Spesifikasi
| Fitur | Detil |
|---|---|
| Merek | JoFomp |
| Nomor Model | 6669 |
| Jenis Tampilan | Lampu LED digital |
| Ukuran Layar | 17.3 inci |
| Dimensi Produk | 16.5"L x 6.7"T |
| Sumber Daya | Berkabel Listrik (adaptor 5V/2A disertakan) |
| Baterai Memori | 1 x AAA (tidak termasuk) |
| Tingkat Kecerahan | 10 (Auto/Manual) |
| Ambient Light Colors | 8 Fixed + 1 Multi-color |
| Fitur Khusus | Large Display, Adjustable Brightness, Temperature Display, Humidity Display, Dual Alarms, Timer, Countdown, DST, Remote Control |
| Jenis Pemasangan | Dudukan Dinding |
| Berat Barang | 1.95 pon |
10. Garansi dan Dukungan
JoFomp products are designed for reliability and performance. For warranty information or technical support, please refer to the contact details provided with your purchase or visit the official JoFomp websitus. Simpan struk pembelian Anda sebagai bukti pembelian.