Technical Precision 379 YEAR 2002 AC COMPRESSOR-TZ-EVZY-U
Technical Precision Replacement AC Compressor User Manual
Model: 379 YEAR 2002 AC COMPRESSOR-TZ-EVZY-U
Produk Selesaiview
This manual provides essential information for the installation, operation, and maintenance of the Technical Precision Replacement AC Compressor for Peterbilt 379 Year 2002 models. Please read this manual thoroughly before proceeding with any installation or service.
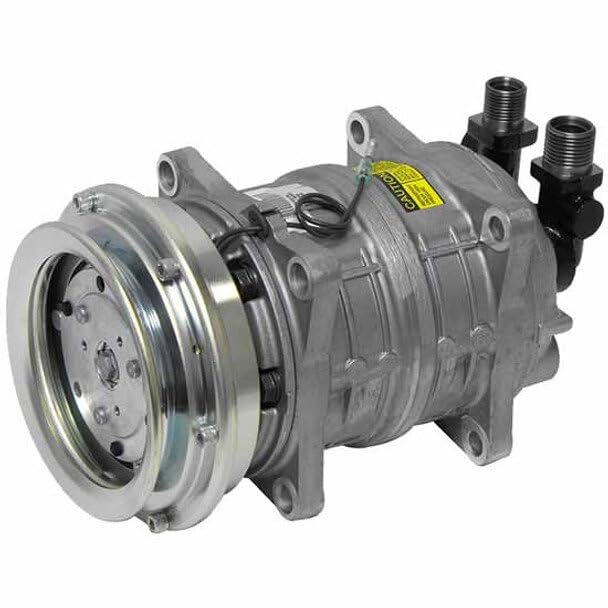
Gambar 1: The Technical Precision Replacement AC Compressor. This image displays the main body of the compressor, which is metallic gray, with a silver-colored pulley assembly on one end and two black threaded fittings on the other. A yellow caution label is visible on the top surface of the compressor body.
Pengaturan dan Instalasi
Proper installation is crucial for the optimal performance and longevity of your new AC compressor. It is highly recommended that installation be performed by a certified automotive technician.
Langkah Pra-Instalasi:
- Keselamatan adalah yang utama: Ensure the vehicle's engine is off and cool. Disconnect the battery's negative terminal.
- Pemulihan Refrigeran: The existing AC system must be properly evacuated of all refrigerant by a certified professional using appropriate recovery equipment. Do not vent refrigerant into the atmosphere.
- Pembilasan Sistem: Flush the entire AC system (condenser, evaporator, lines) to remove old oil, debris, and contaminants. This step is critical to prevent damage to the new compressor.
- Pemeriksaan Komponen: Inspect other AC system components (condenser, evaporator, expansion valve/orifice tube, accumulator/receiver drier) for damage or wear. Replace as necessary. It is strongly recommended to replace the accumulator/receiver drier and expansion valve/orifice tube when replacing the compressor.
- Pelumasan: Add the correct type and amount of PAG oil (or specified oil) to the new compressor as per manufacturer specifications. Distribute some oil into the system components during reassembly.
Prosedur Instalasi:
- Pemasangan: Carefully mount the new compressor onto its bracket, ensuring all mounting bolts are securely fastened to the manufacturer's torque specifications.
- Koneksi Jalur: Connect the suction and discharge lines to the compressor, ensuring O-rings are new and properly lubricated. Tighten fittings to specifications.
- Sambungan Listrik: Connect the electrical clutch wire harness to the compressor. Ensure a secure connection.
- Pemasangan Sabuk: Install the serpentine belt and adjust tension according to vehicle specifications.
- Vakum dan Isi Ulang: Evacuate the system using a vacuum pump to remove air and moisture. Hold vacuum for at least 30 minutes to ensure no leaks. Recharge the system with the correct type and amount of refrigerant (R-134a for Peterbilt 379 Year 2002) using a professional AC charging station.
Petunjuk Pengoperasian
Once the AC compressor is installed and the system is properly charged, the AC system can be operated normally.
- Pengaktifan Awal: After installation and charging, start the vehicle engine and turn on the AC system to its lowest temperature and highest fan setting.
- Pemeriksaan Sistem: Listen for unusual noises from the compressor. Check the air temperature from the vents to ensure proper cooling.
- Clutch Engagement: Observe the compressor clutch. It should engage and disengage smoothly as the AC system cycles.
- Pembacaan Tekanan: A technician can verify system pressures (high and low side) to ensure they are within the manufacturer's specifications.
Pemeliharaan
Regular maintenance helps extend the life of your AC compressor and ensures efficient cooling.
- Pemakaian Reguler: Operate the AC system for at least 10 minutes once a month, even in cold weather, to keep seals lubricated and prevent refrigerant leaks.
- Inspeksi Sabuk: Periodically check the serpentine belt for cracks, fraying, or excessive wear. Replace if necessary.
- Pembersihan Kondensor: Keep the condenser fins clean and free of debris (leaves, dirt, bugs) to ensure proper heat dissipation.
- Pemeriksaan Level Refrigeran: If cooling performance decreases, have the refrigerant level checked by a professional. Low refrigerant can indicate a leak and can damage the compressor.
- Filter Udara Kabin: Replace the cabin air filter regularly to maintain good airflow and prevent strain on the system.
Penyelesaian Masalah
This section outlines common issues and potential solutions. For complex problems, consult a qualified technician.
| Masalah | Kemungkinan Penyebab | Larutan |
|---|---|---|
| AC tidak mengeluarkan udara dingin | Low refrigerant, faulty clutch, electrical issue, clogged expansion valve/orifice tube. | Check refrigerant levels, inspect clutch wiring, consult technician for diagnosis. |
| Compressor making loud noises | Insufficient lubrication, internal damage, worn clutch bearing, incorrect belt tension. | Verify proper oil charge, inspect belt, seek professional diagnosis. |
| Kopling kompresor tidak terpasang | Low refrigerant pressure, electrical fault (fuse, relay, wiring), faulty pressure switch, worn clutch. | Check refrigerant, inspect fuses/relays, test pressure switch, professional inspection. |
| AC system cycles on and off rapidly | Low or overcharged refrigerant, faulty pressure switch, restricted airflow through condenser. | Verify refrigerant charge, clean condenser, check pressure switch. |
Spesifikasi
| Atribut | Detil |
|---|---|
| Merek | Presisi Teknis |
| Nomor Model | 379 YEAR 2002 AC COMPRESSOR-TZ-EVZY-U |
| Pabrikan | Presisi Teknis |
| Aplikasi | Replacement for Peterbilt 379 Year 2002 AC Compressor |
| ASIN | B0F4JS14F1 |
| Tanggal Pertama Tersedia | 31 Januari 2025 |
Garansi dan Dukungan
Specific warranty details for this product are not provided in the available information. Please refer to the original purchase documentation or contact Technical Precision directly for warranty information and technical support.
Untuk bantuan lebih lanjut, Anda dapat mengunjungi Technical Precision Store on Amazon.
Ask a question about this manual
Ask about setup, troubleshooting, compatibility, parts, safety, or missing instructions. Manuals+ will review the question and use this page’s manual context to help answer it.