Perkenalan
This manual provides detailed instructions for the assembly, operation, and maintenance of your Generic Roman Curved Headboard Upholstered Platform Bed. Please read all instructions carefully before beginning assembly and retain this manual for future reference.

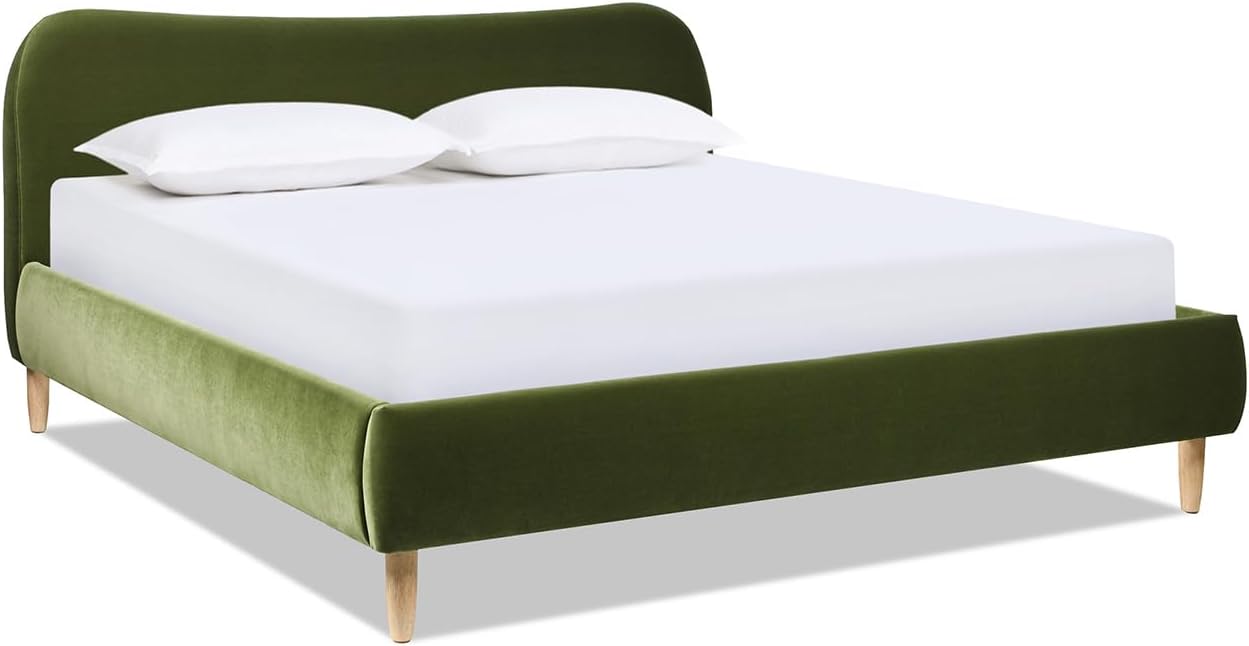
Image: The Roman Curved Headboard Upholstered Platform Bed, King size, in Olive Green Performance Velvet, shown in a bedroom setting.
Informasi Keselamatan
- Always assemble the bed on a soft, clean surface to prevent damage to the product or your floor.
- Ensure all bolts and screws are securely tightened before using the bed. Periodically check and re-tighten fasteners.
- Do not use power tools for assembly as this may overtighten and damage the fasteners or components.
- Jauhkan komponen-komponen kecil dari jangkauan anak-anak selama perakitan.
- Produk ini dirancang untuk penggunaan di dalam ruangan saja.
- Disarankan dua orang untuk merakitnya guna memastikan keamanan dan kemudahan pemasangan.
Isi Paket
Sebelum memulai perakitan, pastikan semua komponen ada dan tidak rusak. Jika ada komponen yang hilang atau rusak, silakan hubungi dukungan pelanggan.
- Curved Headboard (1)
- Rel Samping (2)
- Pijakan Kaki (1)
- Balok Penyangga Tengah (1)
- Support Legs (4-6, depending on model)
- Wooden Slats (approx. 12-14)
- Paket Perlengkapan (baut, ring, mur, kunci Allen)
Pengaturan dan Perakitan
Follow these steps carefully to assemble your platform bed. It is recommended to have two people for assembly.
Langkah 1: Pasang Kaki ke Kepala Tempat Tidur dan Pijakan Kaki
Carefully unbox the headboard and footboard. Attach the wooden support legs to the designated points on the headboard and footboard using the provided bolts and Allen wrench. Ensure they are tightened securely.
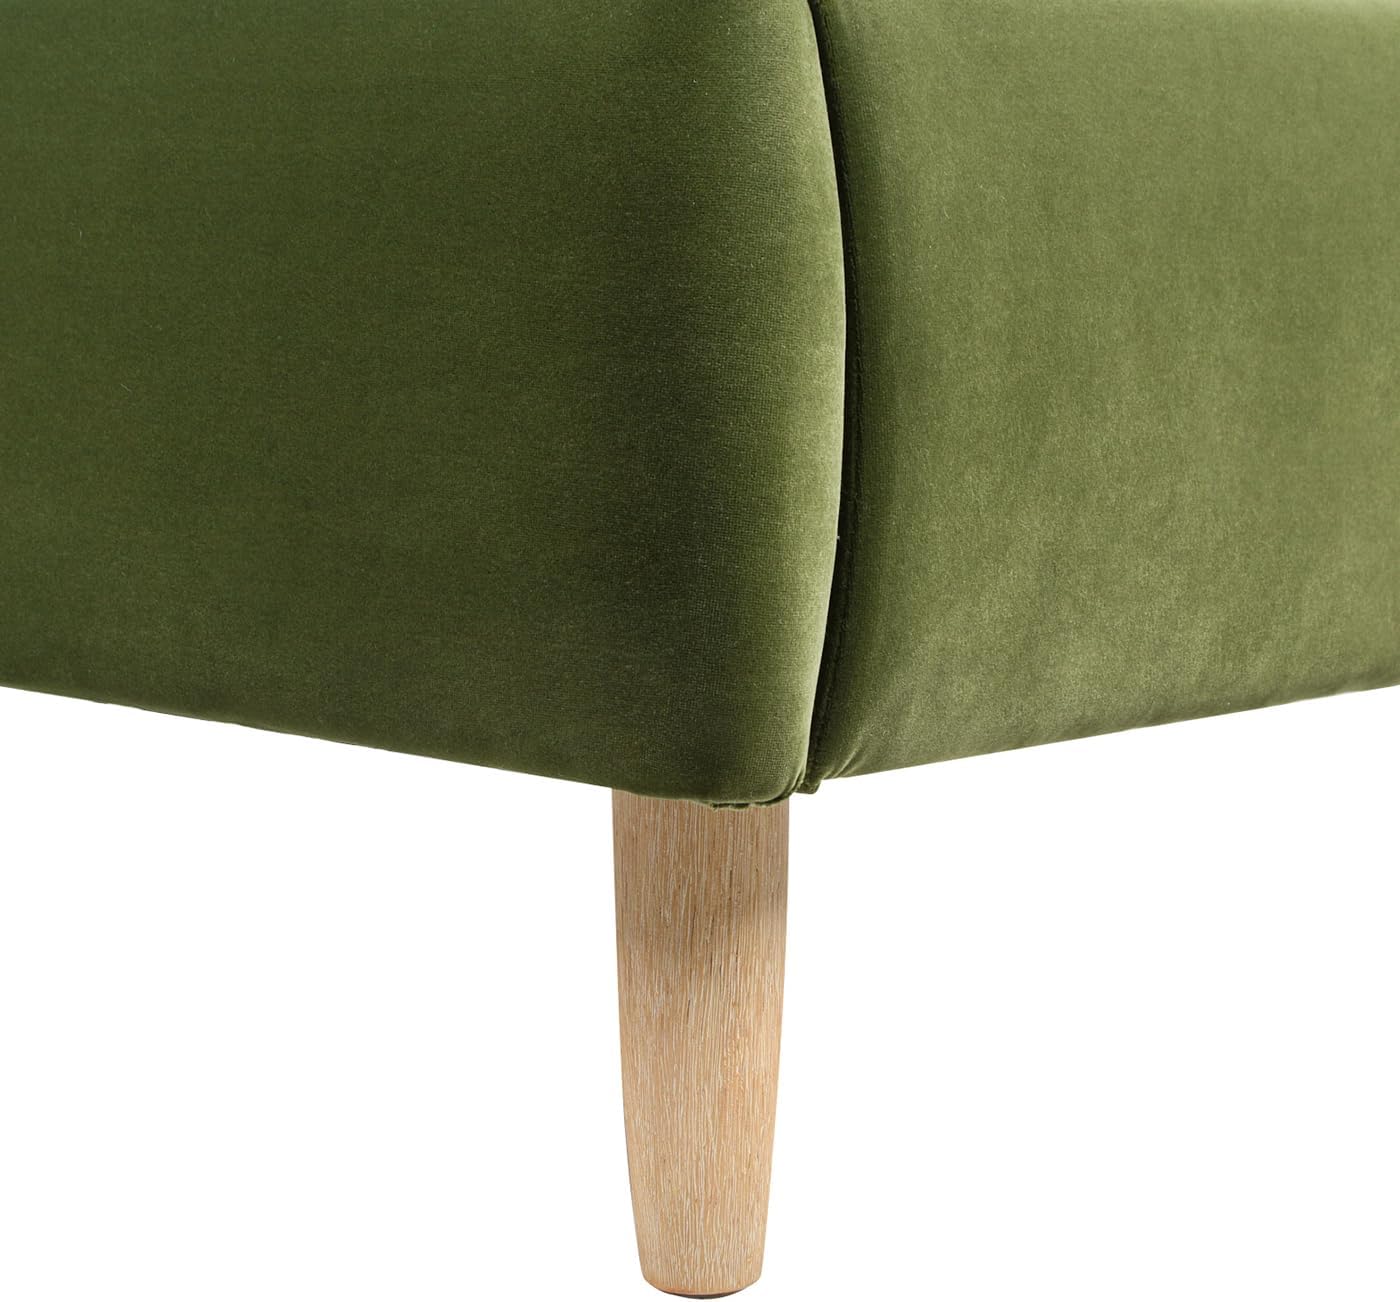
Image: Detail of a wooden leg attached to the upholstered frame.
Step 2: Connect Side Rails to Headboard and Footboard
Position the headboard and footboard upright. Align the side rails with the connection points on both the headboard and footboard. Secure them using the appropriate bolts and washers from the hardware pack. Do not fully tighten all bolts until the entire frame is assembled.
Gambar: Samping view of the bed frame, illustrating the connection points for the side rails.
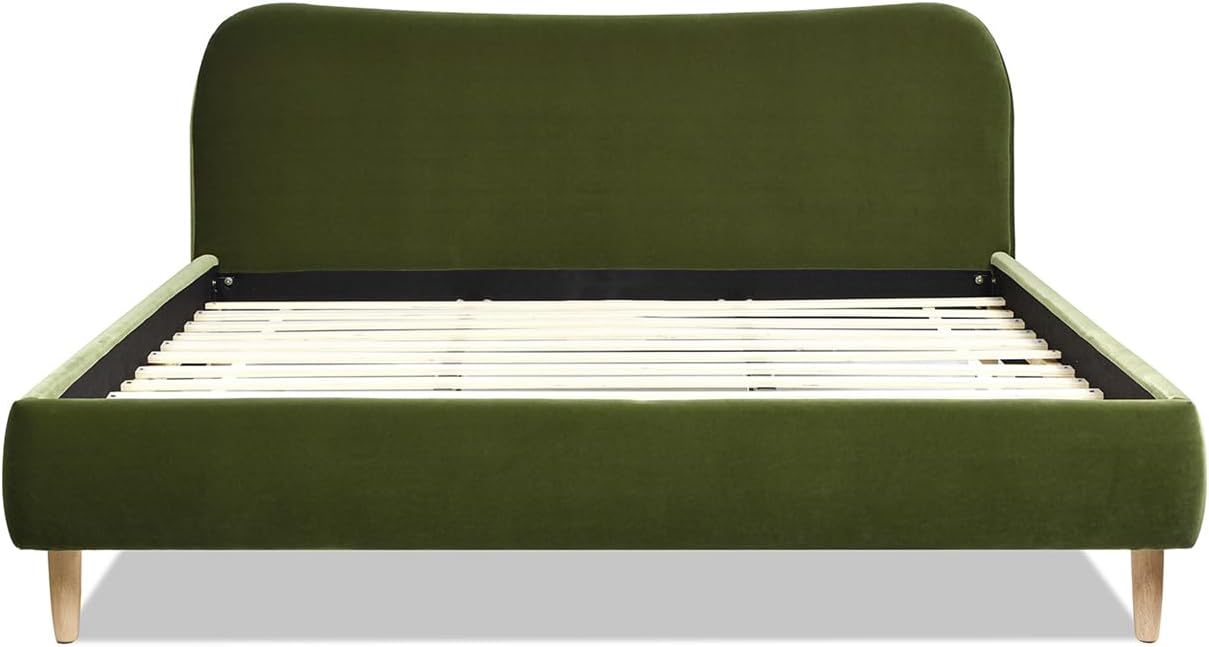
Gambar: Depan view of the assembled bed frame without slats or mattress.
Step 3: Install Center Support Beam
Place the center support beam down the middle of the bed frame. Attach it to the designated brackets on the headboard and footboard. Ensure any adjustable support legs on the beam are extended to touch the floor.
Langkah 4: Pasang Bilah Kayu
Distribute the wooden slats evenly across the side rails and center support beam. Many slats come with pre-drilled holes or Velcro strips to secure them in place. If applicable, use the provided screws to attach the slats to the frame. This step provides the necessary support for your mattress.

Gambar: Samping view of the bed frame with wooden slats in place.
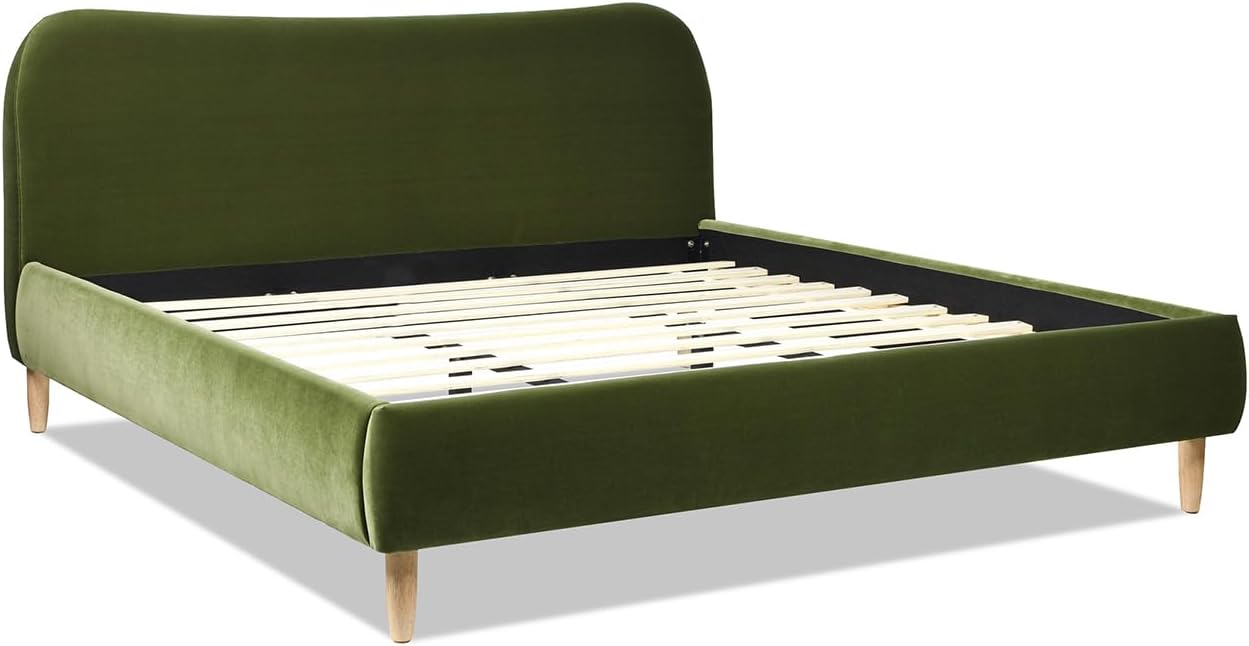
Gambar: Sudut view of the bed frame showcasing the wooden slat system.
Langkah 5: Pengetatan Terakhir
Once all components are in place, go back and fully tighten all bolts and screws. Do not overtighten. Ensure the frame is stable and level.
Petunjuk Pengoperasian
Your Roman Curved Headboard Upholstered Platform Bed is designed to support a mattress directly, eliminating the need for a box spring. Simply place your mattress on top of the assembled wooden slats.
- Penempatan Kasur: Carefully place your King-sized mattress onto the wooden slats.
- Kapasitas Berat: The bed frame is designed to support the weight of a standard King-sized mattress and two adults. Avoid excessive jumping or concentrated weight on specific areas.
Pemeliharaan
Upholstery Care (Olive Green Performance Velvet)
- Pembersihan Rutin: Bersihkan pelapis beludru dengan penyedot debu secara teratur menggunakan sikat lembut untuk menghilangkan debu dan kotoran.
- Pembersihan Tempat: For spills, blot immediately with a clean, dry cloth. Do not rub, as this can spread the stain and damage the pile. For stubborn stains, use a mild, water-free solvent or dry-cleaning product. Test on an inconspicuous area first.
- Hindari sinar matahari langsung: Paparan sinar matahari langsung dalam jangka waktu lama dapat menyebabkan pemudaran.
Perawatan Bingkai
- Pemeriksaan Pengikat: Periodically (every 3-6 months) check all bolts and screws and re-tighten them as necessary to maintain stability.
- Pembersihan: Wipe wooden legs with a soft, damp kain. Hindari bahan kimia keras.
Penyelesaian Masalah
| Masalah | Kemungkinan Penyebab | Larutan |
|---|---|---|
| Tempat tidur terasa goyah atau tidak stabil. | Pengencang longgar; perakitan tidak rata. | Ensure all bolts and screws are fully tightened. Check that the bed is on a level surface. Re-assemble if necessary, ensuring all parts are correctly aligned. |
| Suara mencicit | Sambungan longgar; gesekan antar bagian. | Re-tighten all bolts. If squeaking persists, disassemble and re-assemble, ensuring all connections are snug. Applying a small amount of wax or silicone spray to contact points (not on upholstery) can reduce friction. |
| Bilah-bilah jatuh dari tempatnya | Slats not properly secured; incorrect mattress size. | Ensure slats are correctly positioned and secured (if applicable, using screws or Velcro). Verify that your mattress is the correct King size for the frame. |
Spesifikasi
- Model: Tempat Tidur Platform Berlapis Kepala Lengkung Romawi
- Ukuran: Raja
- Warna: Hijau Zaitun
- Bahan Pelapis: Performance Polyester Velvet
- Bahan Bingkai: Pinewood and Rubberwood
- Dimensi Produk (P x L x T): 82" x 89" x 42"
- Berat Barang: 132 pon
- Fitur Khusus: Strong construction, no box spring required
- Gaya: Modern

Image: Dimensional diagram of the King-sized platform bed.
Garansi dan Dukungan
For any questions, missing parts, or concerns regarding your Roman Curved Headboard Upholstered Platform Bed, please contact the seller, SeeTruth, directly through your purchase platform. Refer to your purchase documentation for specific return and warranty policies. A 30-day easy return policy is typically offered.
Please have your order number and product model information ready when contacting support.


