1. Pendahuluan
This manual provides detailed instructions for the assembly, operation, and maintenance of your CELTICBIRD 70mm Aperture 400mm Astronomical Refracting Telescope. Designed for both beginners and students, this telescope offers clear views of celestial objects and terrestrial landscapes. Please read this manual thoroughly before using your telescope to ensure proper setup and safe operation.
Apa yang Termasuk:
- Tabung Teleskop
- Adjustable Aluminum Alloy Tripod
- K20mm Eyepiece (20x magnification)
- K12.5mm Eyepiece (32x magnification)
- Pencari objek 5x24
- Adaptor Smartphone
- Cermin Diagonal
- Manual Instruksi
2. Informasi Keselamatan
PERINGATAN: Never look directly at the sun through the telescope or finderscope without a professionally made solar filter. Permanent and irreversible eye damage, including blindness, can result. Always supervise children when using the telescope. Ensure all components are securely fastened before use to prevent accidental damage or injury.
3. Komponen Produk
Familiarize yourself with the various parts of your CELTICBIRD telescope:

Gambar 3.1: Lebihview of telescope components, highlighting the 70mm aperture, finderscope, adjustable tripod, eyepiece, quick flip locks, and diagonal mirror.
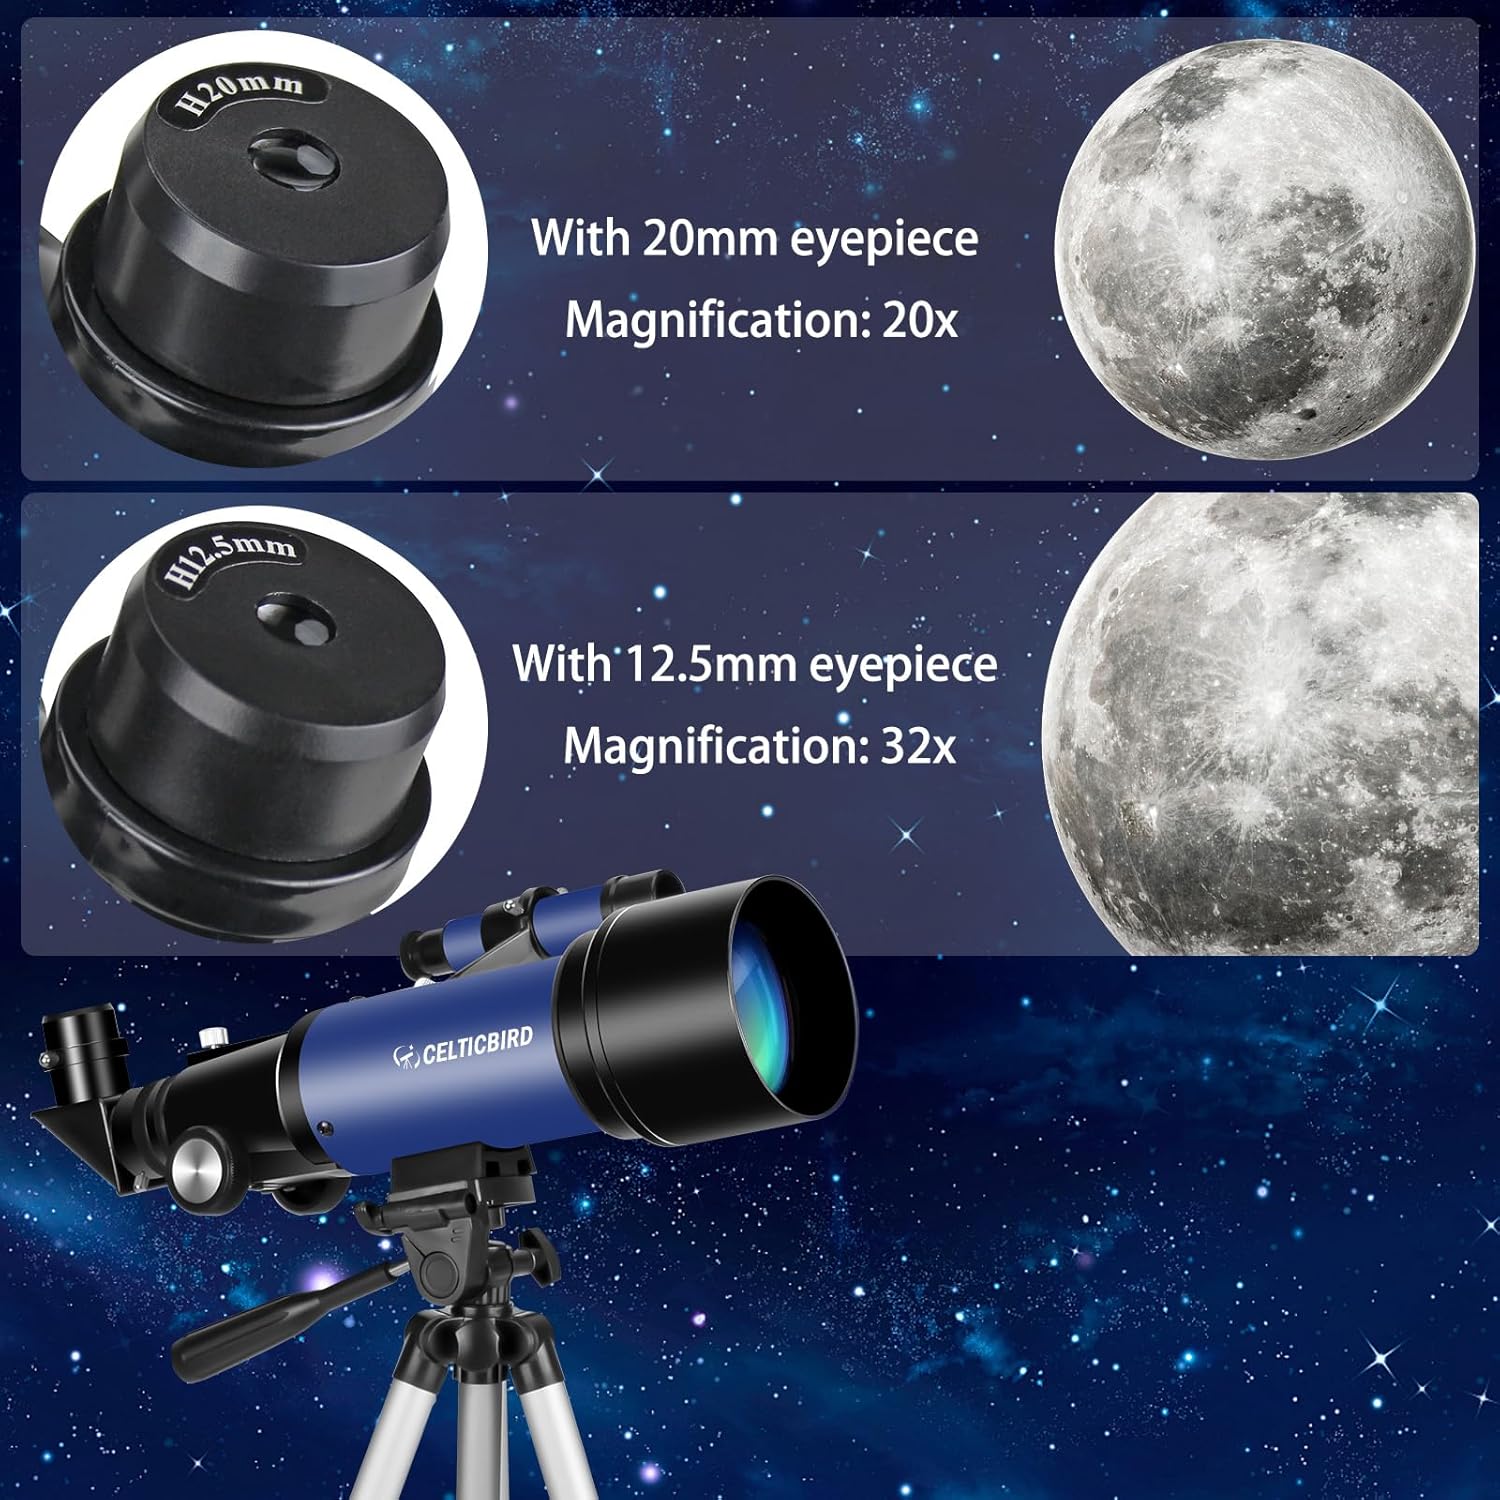
Gambar 3.2: Close-up of the K20mm eyepiece (20x magnification) and K12.5mm eyepiece (32x magnification), along with the main telescope tube.

Gambar 3.3: The complete telescope assembly including the phone adapter and both eyepieces.
4. Panduan Pengaturan
Ikuti langkah-langkah berikut untuk merakit teleskop Anda:
- Bongkar Komponen: Keluarkan semua bagian dari kemasan dengan hati-hati.
- Siapkan Tripod:
Spread the tripod legs apart until they are fully extended and stable. Adjust the height of the tripod legs using the quick flip locks to your desired viewing level. The tripod is adjustable from 15.7 inches to 49.2 inches.

Gambar 4.1: The adjustable tripod can be set to various heights and offers 360-degree horizontal and 180-degree vertical rotation.
Klip 4.1: This video demonstrates the easy setup of the tripod and attachment of the telescope tube. It shows how to adjust the tripod legs and secure the main telescope unit.
- Attach the Telescope Tube:
Mount the telescope tube onto the tripod's mounting platform. Secure it firmly using the provided screws or clamps. Ensure the tube is stable and does not wobble.
- Instal Finderscope:
Locate the finderscope and its bracket. Attach the finderscope to the designated slot on the main telescope tube. Tighten the screws to hold it in place. The finderscope helps in quickly locating objects before viewdengan melihatnya melalui lensa mata utama.
- Masukkan Cermin Diagonal:
Insert the diagonal mirror into the focuser of the telescope. This component redirects the light at a 90-degree angle, providing a more comfortable viewposisi ing.
- Masukkan Lensa Okuler:
Choose an eyepiece (K20mm for 20x magnification or K12.5mm for 32x magnification) and insert it into the diagonal mirror. Secure it with the small screw on the side of the diagonal mirror.
- Attach the Smartphone Adapter (Optional):
If you wish to capture photos or videos, attach the smartphone adapter to the eyepiece. Place your smartphone into the adapter and align its camera lens with the eyepiece. Adjust the adapter to ensure a secure fit and clear view.

Gambar 4.2: The smartphone adapter allows you to connect your phone to the telescope for photography and videography.
Klip 4.2: This video demonstrates the assembly of the telescope, including attaching the finderscope and eyepieces, and setting up the smartphone adapter.
5. Petunjuk Pengoperasian
5.1. Using the Finderscope
The 5x24 finderscope has a wider field of view than the main telescope, making it easier to locate objects. Look through the finderscope and center the desired object in its crosshairs. Once centered, the object should be visible in the main telescope's eyepiece.
5.2. Fokus
After locating an object with the finderscope, look through the main eyepiece. Slowly turn the focus knob located on the side of the telescope tube until the image appears sharp and clear. Fine-tune the focus for optimal viewing.
5.3. Changing Magnification
Your telescope comes with two eyepieces: K20mm (20x magnification) and K12.5mm (32x magnification). To change magnification, loosen the screw on the diagonal mirror, carefully remove the current eyepiece, and insert the desired one. Re-tighten the screw. Start with the lower magnification (K20mm) to locate objects, then switch to higher magnification (K12.5mm) for more detailed views.
5.4. Mengamati Benda-Benda Langit
- Bulan: The moon is an excellent first target. Its craters and features are easily visible.
- Planet: Brighter planets like Jupiter and Saturn can be observed, though details may vary depending on atmospheric conditions and magnification.
- Bintang: Individual stars will appear as points of light. The telescope is ideal for observing star clusters and some nebulae.

Gambar 5.1: Examplebih sedikit objek yang bisa viewed with the telescope, including celestial bodies like the Moon and nebulae, as well as terrestrial scenery, landscapes, animals, and birds.
5.5. Terestrial Viewsedang
Your telescope can also be used for daytime viewing of distant objects on Earth, such as wildlife, landscapes, or distant buildings. The diagonal mirror provides an upright image, suitable for terrestrial observation.
5.6. Using the Smartphone Adapter for Photography/Videography
Once your smartphone is securely attached and aligned with the eyepiece, open your phone's camera app. Adjust the focus on the telescope until the image is clear on your phone screen. You can then capture photos or record videos of your observations. Experiment with your phone's zoom features for closer views.
Klip 5.2: This video demonstrates a child using the telescope, showing how to adjust the tripod and view through the eyepiece. It also highlights the ease of use for young astronomers.
6. Pemeliharaan dan Perawatan
- Membersihkan Lensa: Use a soft, lint-free cloth specifically designed for optical lenses. Gently wipe the lens surfaces. For stubborn smudges, use a small amount of optical lens cleaning fluid on the cloth, not directly on the lens.
- Membersihkan Tubuh: Wipe the telescope tube and tripod with a soft, damp kain. Hindari penggunaan pembersih atau pelarut yang bersifat abrasif.
- Penyimpanan: When not in use, store the telescope in a dry, dust-free environment. Keep the lens caps on to protect the optics. If possible, store it in its original packaging or a protective case.
- Penanganan: Always handle the telescope with care. Avoid dropping it or subjecting it to harsh impacts, which can misalign the optics.
7. Penyelesaian masalah
- Gambar buram:
- Adjust the focus knob slowly until the image is sharp.
- Ensure the eyepiece is fully inserted and secured.
- Check for condensation on the lenses; allow the telescope to acclimate to the ambient temperature.
- Objek tidak ditemukan:
- Ensure the finderscope is properly aligned with the main telescope.
- Start with the lowest magnification eyepiece (K20mm) to get a wider field of view.
- Practice locating terrestrial objects during the day to familiarize yourself with the controls.
- Gambar redup:
- Ensure the lens caps are fully removed from both the main objective lens and the finderscope.
- Higher magnification eyepieces will naturally result in dimmer images.
- Observe from a location with minimal light pollution for celestial viewing.
- Teleskop tidak stabil:
- Ensure the tripod legs are fully extended and locked.
- Letakkan tripod di atas permukaan yang datar dan stabil.
- Tighten all knobs and screws on the tripod and telescope mount.
8. Spesifikasi
| Fitur | Detil |
|---|---|
| Model | 70400 |
| Bukaan | ukuran 70mm |
| Panjang Fokus | Lensa 400mm (f/5.7) |
| Lensa okuler | K20mm (20x), K12.5mm (32x) |
| lingkup pencari | Refleks 5x24 |
| Pemasangan Teleskop | Gunung Altazimuth |
| Bahan Tripod | Paduan Aluminium |
| Penyesuaian Tinggi Tripod | 15.7 inci hingga 49.2 inci |
| Tipe Fokus | Fokus Manual |
| Perangkat yang Kompatibel | Ponsel pintar (dengan adaptor yang disertakan) |
| Dimensi Produk | 16.9x10.8x4.3 inci |
| Berat Barang | 4.16 pon |
9. Garansi dan Dukungan
CELTICBIRD is committed to providing high-quality products and excellent customer service. If you have any questions about your telescope, require assistance with setup, operation, or encounter any issues, please do not hesitate to contact our reliable service team. We aim to respond to all inquiries within 24 hours.
For specific warranty details, please refer to the documentation included with your purchase or contact CELTICBIRD customer support directly.