1. Pendahuluan
Terima kasih sudah membeliasing the HASTHIP® XROW - 600A Mini Air Dehumidifier. This compact and portable device is designed to efficiently remove excess moisture, dampness, and mold from the air in small areas such as bedrooms, kitchens, offices, wardrobes, and storage rooms. Its silent operation and automatic shut-off feature ensure a comfortable and hassle-free experience. Please read this manual thoroughly before operation to ensure proper use and maintenance.
2. Informasi Keselamatan
Please observe the following safety precautions to prevent injury or damage to the unit:
- Selalu letakkan dehumidifier pada permukaan yang stabil dan rata.
- Do not block the air inlet or outlet. Ensure adequate space around the unit for proper airflow.
- Jangan merendam unit, kabel daya, atau steker dalam air atau cairan lainnya.
- Cabut unit dari stopkontak sebelum membersihkan atau melakukan perawatan apa pun.
- Jauhkan dari jangkauan anak-anak dan hewan peliharaan.
- Jangan mengoperasikan unit jika kabel atau steker listrik rusak.
- Gunakan hanya adaptor daya yang disediakan.
- Do not attempt to repair or disassemble the unit yourself. Contact qualified service personnel for repairs.
3. Produk Lebihview
Fitur:
- Efficient humidity control for dry air.
- Silent operation, suitable for bedrooms and offices.
- Portable and compact design for easy movement.
- Mati otomatis ketika tangki air penuh.
- LED indicator light for full water tank.
- Simple one On/Off button operation.
- 500ML water tank capacity with removable tray.
- Absorbs approximately 250ML of moisture per day (at 30°C, 80% RH).
Komponen:
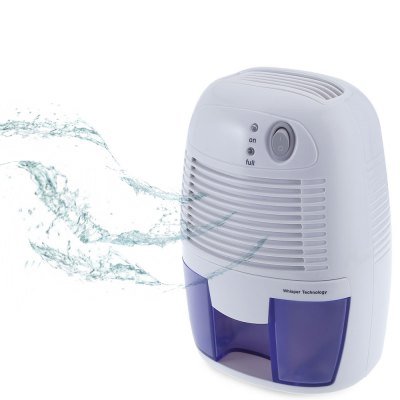
Gambar 3.1: Depan view of the HASTHIP XROW-600A Mini Air Dehumidifier, illustrating its compact design and the air purification process.
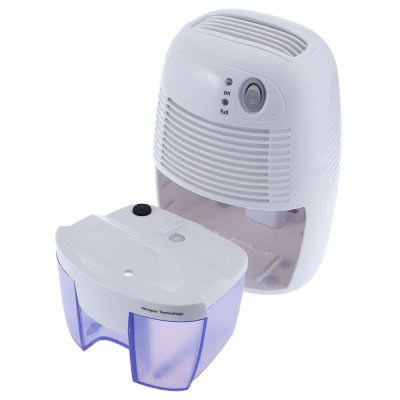
Figure 3.2: The dehumidifier with its 500ML water tank detached, demonstrating the easy removal for emptying.
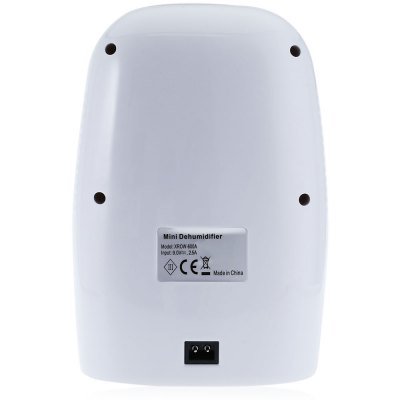
Gambar 3.3: Belakang view of the dehumidifier, highlighting the product label with model number XROW-600A and power specifications, along with the power input port.
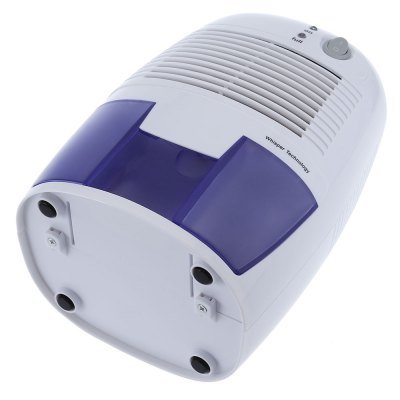
Figure 3.4: Underside of the dehumidifier, illustrating the four anti-slip feet for stable placement.
4. Pengaturan
- Buka Kemasan Dehumidifier: Keluarkan dehumidifier dan semua aksesorinya dengan hati-hati dari kemasannya. Simpan kemasannya untuk penyimpanan atau pengangkutan di kemudian hari.
- Pilih Lokasi: Place the dehumidifier on a firm, level surface in the desired area. Ensure there is at least 20 cm (8 inches) of space around the air inlet and outlet for optimal performance. Avoid placing it near heat sources or in direct sunlight.
- Hubungkan Daya: Insert the small end of the power adapter into the DC 9V input port on the back of the dehumidifier. Plug the other end of the power adapter into a suitable electrical outlet.
- Pemeriksaan Awal: Pastikan tangki air terpasang dengan benar di dalam unit.
5. Petunjuk Pengoperasian
- Nyalakan: Press the "On/Off" button located on the top of the unit. The "On" indicator light will illuminate, indicating that the dehumidifier is operating.
- Pematian Otomatis: The dehumidifier will automatically turn off when the water tank is full. The "Full" indicator light will illuminate.
- Mengosongkan Tangki Air:
- Tarik keluar tangki air dari bagian depan unit dengan hati-hati.
- Tuangkan air yang terkumpul.
- Slide the empty water tank back into the unit until it clicks into place. The "Full" indicator light will turn off, and the unit will resume operation automatically.
- Matikan: Press the "On/Off" button again to turn off the dehumidifier. The "On" indicator light will turn off.
6. Pemeliharaan
Perawatan rutin memastikan kinerja optimal dan memperpanjang umur dehumidifier Anda.
Membersihkan Unit:
- Before cleaning, always unplug the dehumidifier from the power outlet.
- Lap bagian luar unit dengan lembut, damp kain. Jangan gunakan pembersih atau pelarut yang bersifat abrasif.
- Clean the air inlet and outlet grilles regularly with a soft brush or vacuum cleaner to remove dust and debris.
Membersihkan Tangki Air:
- Lepaskan tangki air dari unit.
- Rinse the water tank with clean water. If necessary, use a mild detergent and a soft brush to clean any residue.
- Ensure the tank is thoroughly dry before reinserting it into the dehumidifier.
Penyimpanan:
- Jika menyimpan unit untuk jangka waktu lama, pastikan tangki air kosong dan bersih.
- Clean the entire unit as described above.
- Store the dehumidifier in a cool, dry place, preferably in its original packaging.
7. Penyelesaian masalah
| Masalah | Kemungkinan Penyebab | Larutan |
|---|---|---|
| Dehumidifier tidak menyala. |
|
|
| Alat pengering udara (dehumidifier) sedang beroperasi tetapi tidak mengumpulkan air. |
|
|
| "Full" indicator light is on, but tank is not full. |
|
|
| Unit berisik. |
|
|
8. Spesifikasi
| Spesifikasi | Detil |
|---|---|
| Model | XROW - 600A |
| Kapasitas Tangki Air | 500 ml |
| Penggemar | 80mm x 80mm Brushless Motor |
| Bahan Utama | ABS (Akrilonitril Butadiena Stirena) |
| Jil.tage | Tegangan DC9V |
| Kekuatan | 22W |
| Nilai Arus | 2.5A |
| Moisture Collection | Approx. 250ML per day (at 30°C, 80% RH) |
| Tingkat Kebisingan | Lebih rendah dari 35dB |
| Area Cakupan | 10 meter persegi |
| Panjang Kabel Pengisian Daya | 1.5 juta |
| Dimensi Produk (P x L x T) | 22.00 x 14.50 x 12.00 cm / 8.66 x 5.71 x 4.72 inci |
| Berat Barang | 1.2 kg (1200 Gram) |
9. Garansi dan Dukungan
This HASTHIP® product is designed for reliability and performance. For any questions, technical support, or warranty claims, please refer to the contact information provided with your purchase receipt or visit the official HASTHIP weblokasi.
Komponen yang Termasuk: 1 x Mini Dehumidifier, 1 x Power Adapter, 1 x English User Manual.


