1. Pendahuluan
Thank you for choosing the MAGIC SELECT B2222 Portable 4-in-1 Air Pump and Vacuum Cleaner. This versatile device combines a cordless air compressor, a car and home vacuum cleaner, a tire pressure detection system, and an integrated SOS LED flashlight. Designed for convenience and efficiency, it is ideal for inflating car, motorcycle, and bicycle tires, as well as balls and other inflatables, and for quick cleaning tasks.
Harap baca manual ini dengan saksama sebelum menggunakan produk untuk memastikan kinerja yang aman dan optimal. Simpan manual ini untuk referensi di masa mendatang.
2. Apa yang ada di dalam kotak
- 1 x Cordless Air Compressor / Vacuum Cleaner Unit
- 1 x Inflation Tube
- 1 x LED Emergency Light (integrated)
- 1 x Kabel Pengisian Tipe-C USB
- Various inflation nozzles/adapters
- Vacuum cleaner attachments (e.g., brush nozzle)

3. Fitur Produk
- Fungsionalitas 4-in-1: Air compressor, vacuum cleaner, tire pressure detection, and SOS LED light.
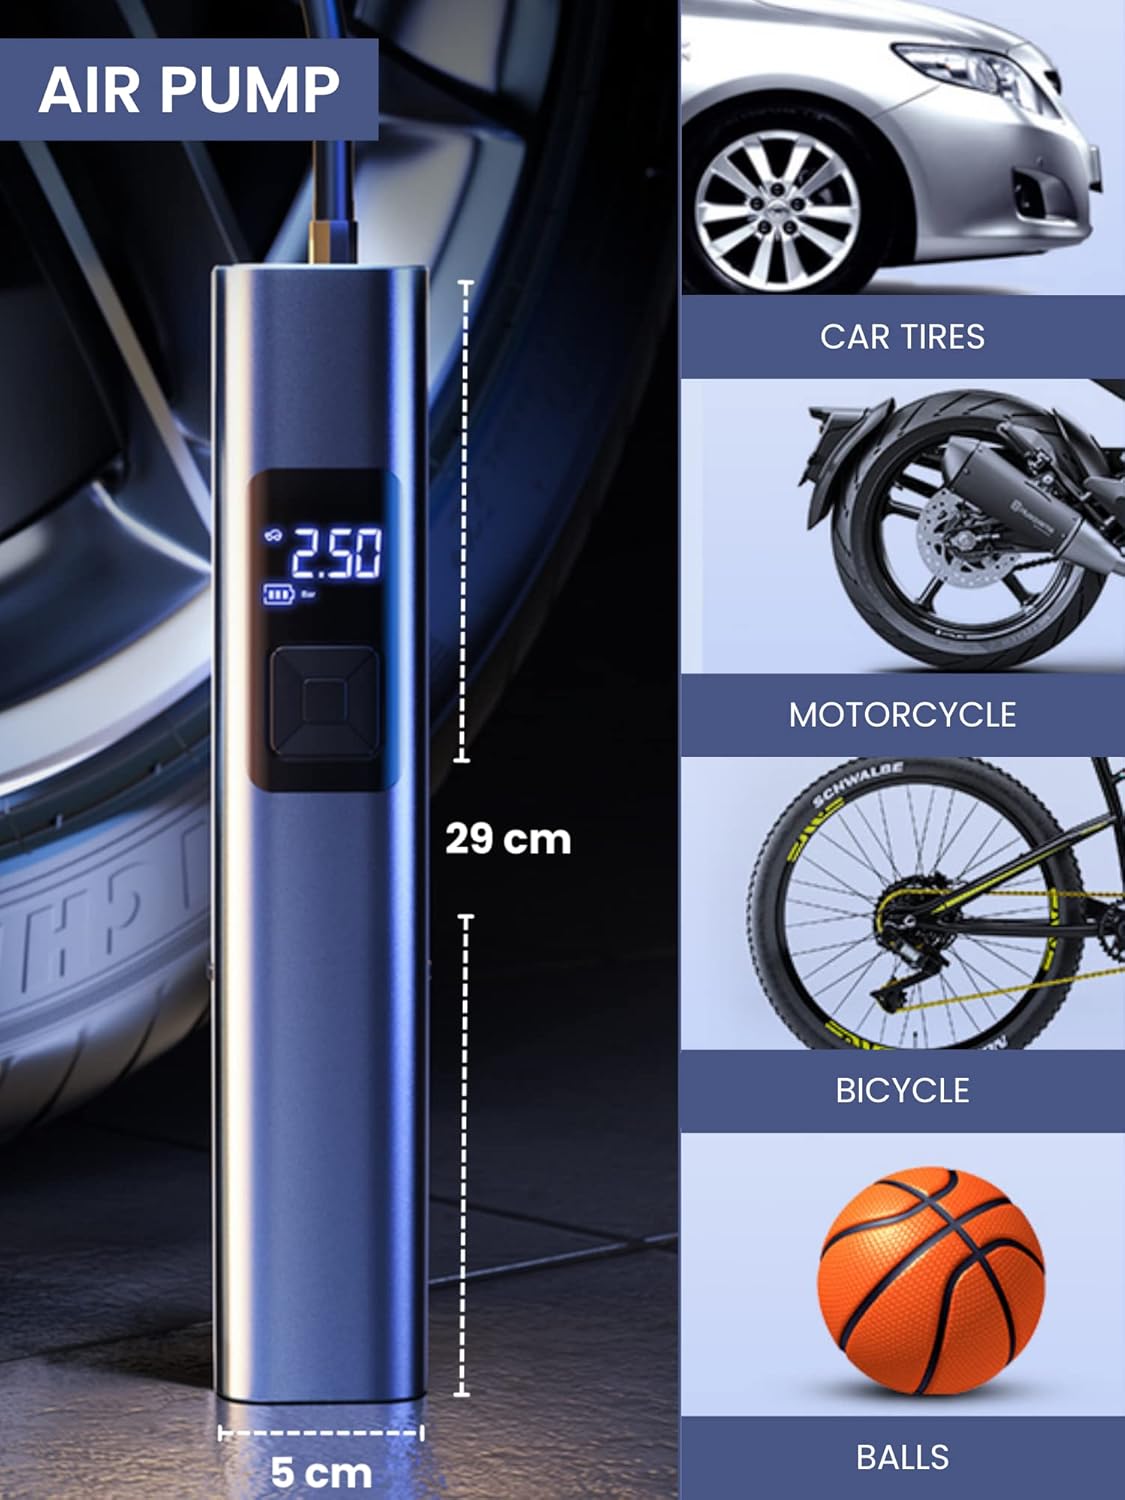
- Inflasi yang Kuat: Suitable for car, motorcycle, bicycle tires, and various balls/inflatables.
- Smart Induction Chip: Automatically stops inflation once the preset pressure is reached, ensuring safety and preventing over-inflation.
- Vakum Terintegrasi: Efficiently cleans car interiors and small areas in the home.
- Lampu Darurat LED: Features 3 lighting modes: steady light, medium-speed flashing, and alternating medium/high-speed flashing for emergency situations.
- Baterai Tahan Lama: Equipped with a 4400mAh lithium-ion battery, rechargeable via USB Type-C.
- Tampilan digital: Clear digital screen to monitor tire pressure and settings.
- Desain Kompak: Portabel dan mudah disimpan.


4. Pengaturan
4.1 Mengisi Daya Perangkat
- Locate the USB Type-C charging port on the upper side of the compressor.
- Hubungkan kabel USB Tipe-C yang disediakan ke perangkat.
- Colokkan ujung kabel USB lainnya ke adaptor daya USB yang kompatibel (tidak termasuk) atau port USB pada komputer.
- The digital display will indicate the charging status. Ensure the device is fully charged before first use for optimal battery life.
4.2 Memasang Aksesori
- Untuk Inflasi: Screw the inflation tube into the designated hole at the top of the unit. Attach the appropriate nozzle for your item (car tire, bicycle valve, ball needle, etc.) to the other end of the inflation tube.
- Untuk Menyedot Debu: Insert the vacuum attachment into the hole located at the bottom of the unit.

5. Petunjuk Pengoperasian
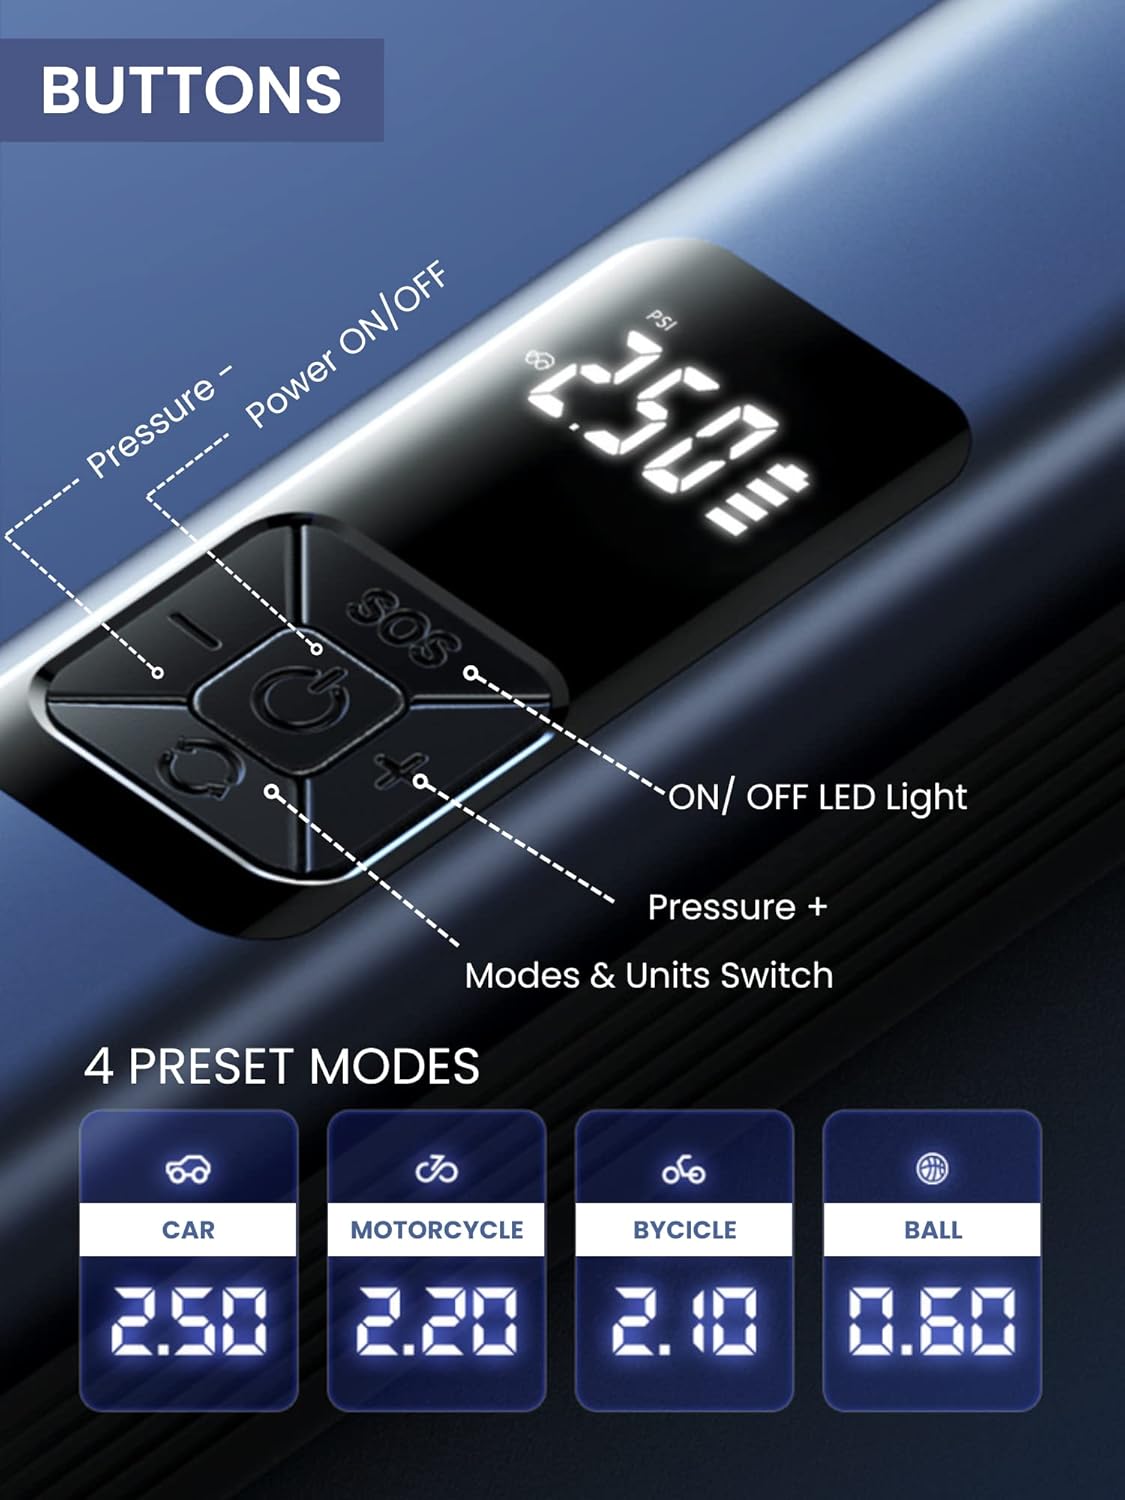
5.1 Panel Kontrol Selesaiview
The device features a digital display and 5 control buttons:
- Tombol Daya ON/OFF: Central button to turn the device on/off and start/stop inflation or vacuuming.
- Pressure - Button: Menurunkan tekanan target.
- Pressure + Button: Meningkatkan tekanan target.
- Tombol ON/OFF Lampu LED: Mengaktifkan dan berganti-ganti mode lampu LED.
- Mode & Units Switch Button: Changes between preset inflation modes (Car, Motorcycle, Bicycle, Ball) and switches pressure units (e.g., PSI, Bar).
5.2 Using the Air Compressor (Inflation)
- Menghubungkan: Screw the inflation tube onto the device and attach the correct nozzle to the item you wish to inflate.
- Nyalakan: Press the Power ON/OFF button to turn on the device. The digital display will show the current tire pressure.
- Pilih Modus: Press the Mode & Units Switch button to cycle through preset modes (Car, Motorcycle, Bicycle, Ball) or to change pressure units (PSI, Bar).
- Setel Tekanan: Use the Pressure + and Pressure - buttons to set your desired target pressure.
- Mulai Inflasi: Press the Power ON/OFF button again to begin inflation. The device will automatically stop when the preset pressure is reached.
- Memutuskan: Once inflation is complete, disconnect the nozzle from the item and then unscrew the inflation tube from the device.
5.3 Menggunakan Penyedot Debu
- Menempel: Insert the desired vacuum attachment into the vacuum port at the bottom of the device.
- Nyalakan: Press the Power ON/OFF button to activate the vacuum function.
- Membersihkan: Use the device to vacuum dust, crumbs, and small debris from car interiors (seats, trunk, center console) or small areas in your home (sofas, lamp tables, windowsills, keyboards).
- Matikan: Press the Power ON/OFF button again to turn off the vacuum.

5.4 Using the LED Emergency Light
- Mengaktifkan: Press the LED Light ON/OFF button to turn on the light.
- Mode Siklus: Press the LED Light ON/OFF button repeatedly to cycle through the three lighting modes:
- First press: Steady light
- Second press: Medium-speed flashing light
- Third press: Alternating medium/high-speed flashing light (SOS signal)
- Mematikan: Continue pressing the LED Light ON/OFF button until the light turns off, or hold the button for a few seconds.
6. Pemeliharaan
6.1 Membersihkan Perangkat
- Lap bagian luar perangkat dengan lembut, damp kain. Jangan gunakan bahan kimia keras atau pembersih abrasif.
- For the vacuum function, regularly empty the dust collection bin and clean the filter to maintain optimal suction power. The filter is washable; ensure it is completely dry before reinserting.
6.2 Penyimpanan
- Simpan perangkat dan aksesorinya di tempat yang sejuk dan kering, jauh dari sinar matahari langsung dan suhu ekstrem.
- Pastikan perangkat terisi penuh sebelum penyimpanan jangka panjang untuk menjaga kesehatan baterai.
7. Penyelesaian masalah
| Masalah | Kemungkinan Penyebab | Larutan |
|---|---|---|
| Perangkat tidak menyala. | Baterai lemah. | Isi daya perangkat menggunakan kabel USB Type-C yang telah disediakan. |
| Kompresor udara tidak mengembang. | Inflation tube or nozzle not properly connected. Incorrect pressure setting. | Ensure all connections are secure. Check and adjust the target pressure. |
| Vacuum suction is weak. | Dust bin full. Filter clogged. | Kosongkan tempat penampung debu. Bersihkan atau ganti filternya. |
| Perangkat berhenti secara tiba-tiba selama pengoperasian. | Overheat protection activated. Battery low. | Allow the device to cool down. Recharge the battery. |
8. Spesifikasi
| Fitur | Detil |
|---|---|
| Nomor Model | B2222 |
| Merek | PILIH AJAIB |
| Kapasitas Baterai | 4400mAh Lithium-ion |
| Motor Speed (Vacuum) | 30000r/menit |
| Dimensi (P x L x T) | 29 x 6 x 5.5 cm (kurang lebih) |
| Berat | 850 gram |
| Port Pengisian Daya | USB Tipe-C |
| Fitur Khusus | LED Emergency Light, Digital Display, Automatic Shut-off (Inflation) |
9. Garansi dan Dukungan
For warranty information and customer support, please refer to the documentation provided with your purchase or contact MAGIC SELECT customer service directly. Keep your proof of purchase for warranty claims.
For further assistance or inquiries, please visit the official MAGIC SELECT website or contact their support team through the contact details provided on their packaging or product page.


