1. Informasi Keselamatan
Please read and understand all safety information before operating this multimeter. Failure to follow these instructions may result in electric shock, fire, or damage to the meter.
- Always ensure the multimeter is in good working condition and that the test leads are not damaged.
- Jangan gunakan lebih dari volume terukurtage, as marked on the meter, between the terminals or between any terminal and earth ground. The maximum voltage between measurement end and ground is 1000V DC or 750V AC.
- Berhati-hatilah saat bekerja dengan voltages above 60V DC or 30V AC RMS, as these present a shock hazard.
- Selalu lepaskan kabel uji dari sirkuit sebelum mengubah fungsi atau rentang.
- Do not operate the meter if the battery cover is open or not properly secured.
- Ganti baterai segera setelah indikator baterai lemah muncul untuk memastikan pembacaan yang akurat.
- Adhere to the specified pollution grade (Grade 2) and operating environment conditions.
2. Produk Lebihview
The Irfora T58D is a 60000 counts digital multimeter designed for accurate measurement of various electrical parameters. It features a large LCD display with backlight, flashlight, NCV (Non-Contact Voltage) detection, and automatic shutdown.

Gambar 2.1: Depan view of the T58D Multimeter with labeled components.
Komponen Utama:
- Display LED: 60000 counts display for readings.
- Penerangan: Flashlight for dark environments.
- Area Sensor NCV: Untuk non-kontak voltagdeteksi.
- NCV and Buzzer Indicator Light: Visual alerts for NCV and continuity.
- Tombol MAKSIMUM MENIT: For maximum and minimum value switching.
- Tombol PUNCAK: For peak to peak measurement.
- Tombol RANGE: For manual range switching.
- Tombol FUNC: For function switching within a rotary switch position.
- Lighting/Backlight Button: Activates display backlight and flashlight.
- AREL HOLD Button: For data hold and relative value measurement.
- Gear Rotary Switch: Memilih fungsi pengukuran utama.
- Input Sockets: μA mA L, 10A, VΩHz°C, and COM for test lead connections.

Figure 2.2: Physical dimensions of the T58D Multimeter.
3. Pengaturan
3.1 Pemasangan Baterai
The T58D multimeter requires three (3) 1.5V AAA batteries (not included) for operation. Ensure the batteries are installed correctly according to polarity markings.
- Temukan tempat baterai di bagian belakang multimeter.
- Buka penutup baterai.
- Masukkan tiga baterai AAA 1.5V, perhatikan polaritas yang benar (+ dan -).
- Tutup penutup baterai dengan rapat.
3.2 Menghubungkan Kabel Uji
Penyambungan kabel uji yang tepat sangat penting untuk pengukuran yang akurat dan aman.
- Selalu hubungkan kabel uji hitam ke DAPAT Soket input (umum).
- Untuk sebagian besar volumetage, resistance, frequency, capacitance, and temperature measurements, connect the red test lead to the VΩHz°C jack masukan.
- Untuk pengukuran arus hingga 600mA, hubungkan kabel uji merah ke μA mA L jack masukan.
- For current measurements up to 10A, connect the red test lead to the 10A jack masukan.

Figure 3.1: Multimeter with support stand and test lead storage.
4. Petunjuk Pengoperasian
Turn the rotary switch to the desired function to begin measurements.
4.1 AC/DC Voltage Pengukuran
- Hubungkan kabel tes merah ke VΩHz°C Tes Jack dan Black mengarah ke DAPAT mendongkrak.
- Putar sakelar ke V~ (AC Voltage) atau V- (DC Jiltage) posisi.
- Sentuhkan probe penguji ke titik-titik sirkuit di mana tegangantage harus diukur.
- Baca vol.tagnilai e pada layar.
4.2 Pengukuran Arus AC/DC
To measure current, the multimeter must be connected in series with the circuit. Ensure the circuit is de-energized before connecting the meter.
- Hubungkan kabel uji hitam ke DAPAT mendongkrak.
- For current up to 600mA, connect the red test lead to the μA mA L jack. For current up to 10A, connect the red test lead to the 10A mendongkrak.
- Putar sakelar ke μA mA~ (AC Current), μA mA- (DC Current), A~ (AC Current), or A- (DC Current) position, matching the input jack used.
- Open the circuit where current is to be measured and connect the test probes in series.
- Nyalakan kembali rangkaian dan baca nilai arusnya.
4.3 Pengukuran Resistansi
- Hubungkan kabel tes merah ke VΩHz°C Tes Jack dan Black mengarah ke DAPAT mendongkrak.
- Putar sakelar ke Ω posisi.
- Pastikan rangkaian atau komponen tersebut telah dimatikan dayanya sebelum mengukur resistansi.
- Sentuhkan probe penguji pada komponen yang akan diukur.
- Baca nilai resistansi di layar.
4.4 Pengukuran Kapasitansi
- Hubungkan kabel tes merah ke VΩHz°C Tes Jack dan Black mengarah ke DAPAT mendongkrak.
- Putar sakelar ke Kapasitansi position (often shared with Ω or Hz). Use the FUNC button if necessary to select capacitance.
- Pastikan kapasitor benar-benar kosong muatannya sebelum pengukuran untuk mencegah kerusakan pada alat ukur.
- Sentuhkan probe penguji ke terminal kapasitor.
- Baca nilai kapasitansi pada layar.
4.5 Pengukuran Frekuensi
- Hubungkan kabel tes merah ke VΩHz°C Tes Jack dan Black mengarah ke DAPAT mendongkrak.
- Putar sakelar ke Hz% posisi.
- Touch the test probes to the circuit points where frequency is to be measured.
- Bacalah nilai frekuensi yang ditampilkan.
4.6 Pengukuran Suhu
- Connect the thermocouple to the VΩHz°C Dan DAPAT jack, mengamati polaritas.
- Putar sakelar ke ° C / ° F posisi.
- Letakkan ujung termokopel di atas atau di dekat objek yang suhunya akan diukur.
- Bacalah nilai suhu yang ditampilkan.
4.7 Uji Dioda
- Hubungkan kabel tes merah ke VΩHz°C Tes Jack dan Black mengarah ke DAPAT mendongkrak.
- Putar sakelar ke Dioda position (often shared with continuity). Use the FUNC tombol jika perlu.
- Sentuhkan probe merah ke anoda dan probe hitam ke katoda dioda. Tegangan majutage drop akan ditampilkan.
- Reverse the probes. An open circuit (OL) should be displayed for a good diode.
4.8 Tes Buzzer (Kontinuitas)
- Hubungkan kabel tes merah ke VΩHz°C Tes Jack dan Black mengarah ke DAPAT mendongkrak.
- Putar sakelar ke Bel position (often shared with diode). Use the FUNC tombol jika perlu.
- Touch the test probes to the component or circuit path.
- Jika resistansi berada di bawah ambang batas tertentu (biasanya 50Ω), bel akan berbunyi, menandakan adanya kontinuitas.
4.9 NCV (Volume Non-Kontak)tage) Tes
Fungsi NCV memungkinkan deteksi tegangan AC.tage tanpa kontak langsung.
- Putar sakelar putar ke NCV posisi.
- Place the top of the meter (NCV sensing area) close to the conductor.
- Jika tegangan ACtage is detected, the corresponding signal strength indicator (low-yellow, high-red) will light up, and the buzzer will emit alarms of varying frequency.

Gambar 4.1: NCV Voltage Measurement in progress.
4.10 Lampu Latar dan Lampu Senter
Tekan tombol Lighting/Backlight button to activate the display backlight for improved visibility in low-light conditions. Press it again to activate the flashlight located at the top of the meter for illuminating the work area.
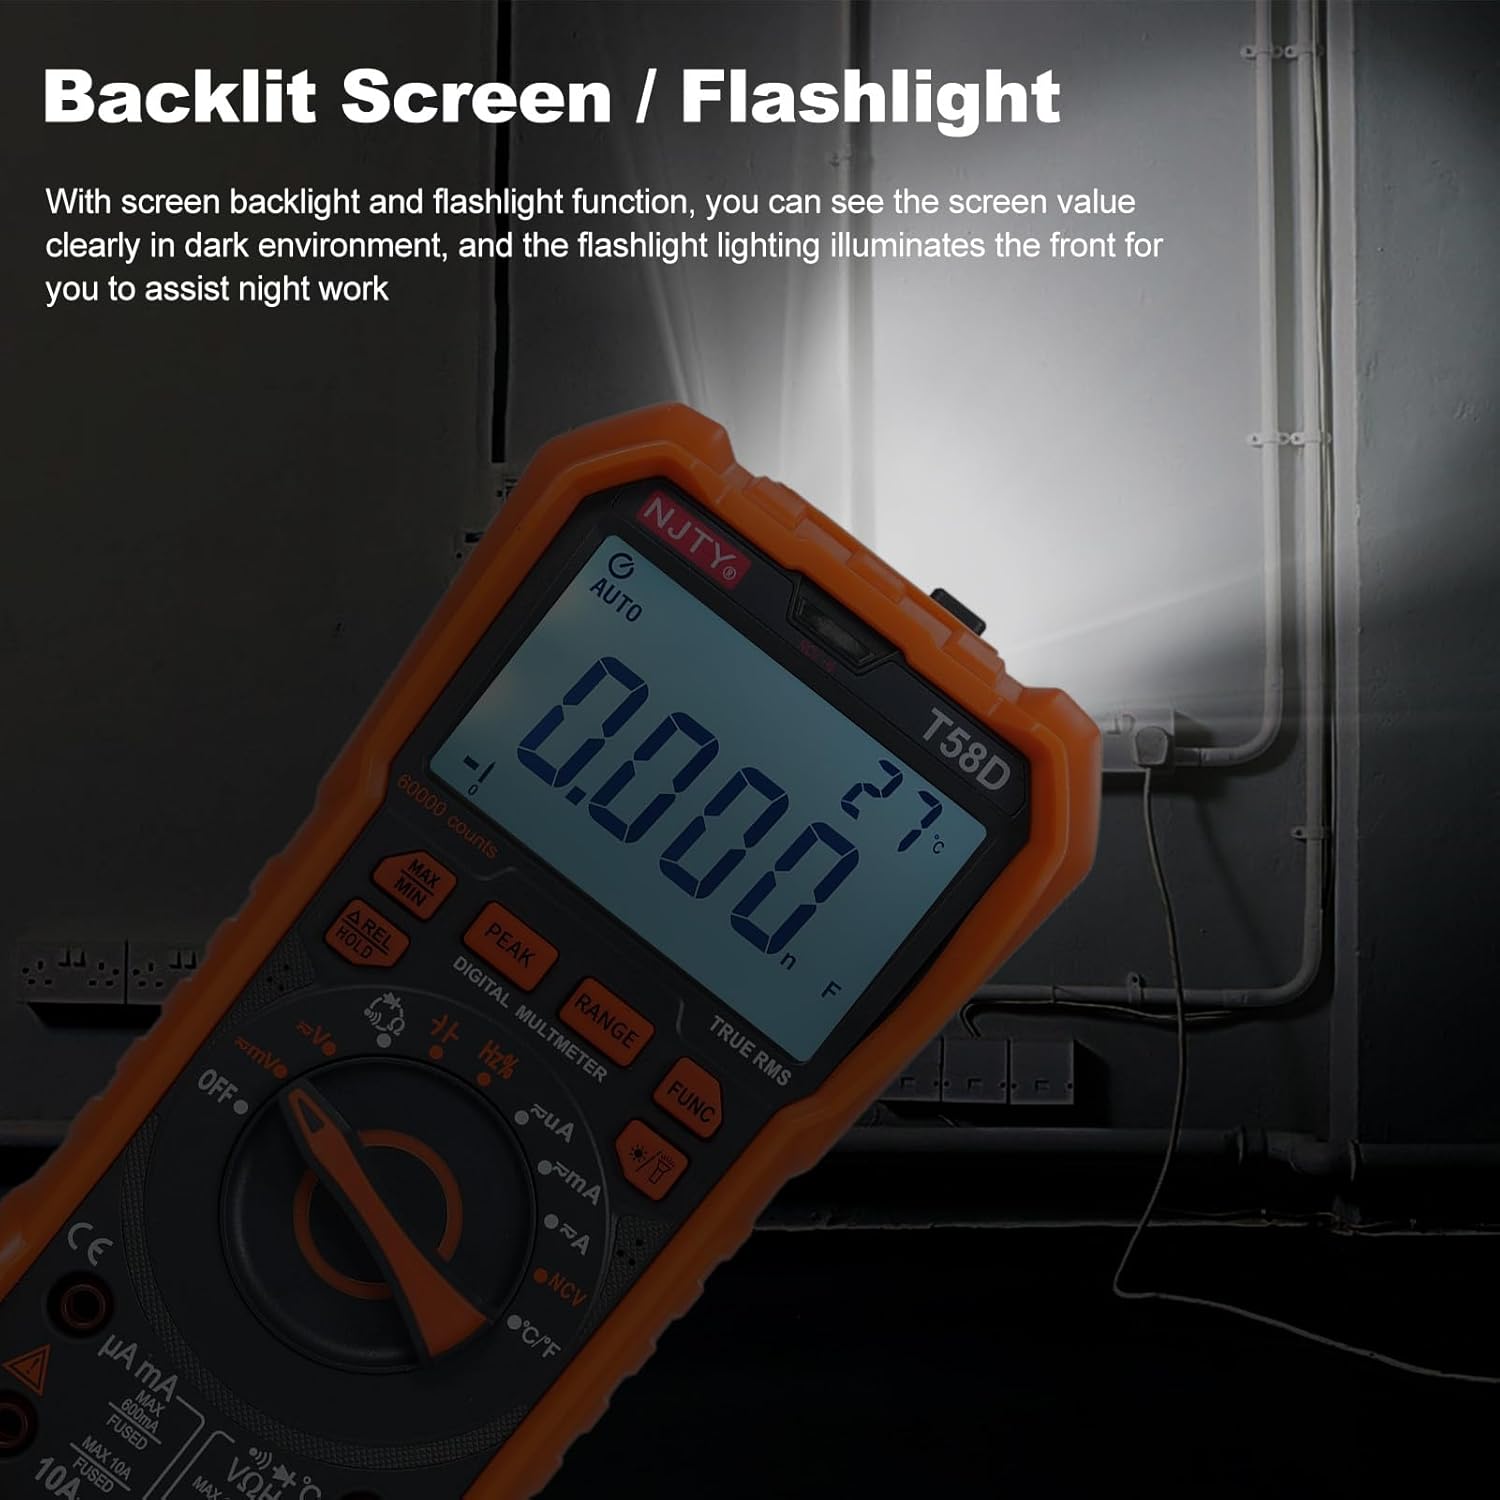
Figure 4.2: Backlit screen and flashlight in use.
4.11 Shutdown Otomatis
To conserve battery life, the multimeter features an automatic shutdown function. If there is no operation for approximately 15 minutes after power-on, the instrument will emit audible prompts and then automatically power off, entering hibernation mode. Any button press will restart the meter.

Gambar 4.3: Mati otomatis setelah 15 menit tidak aktif.
5. Pemeliharaan
5.1 Pembersihan
Usap meteran dengan iklanamp kain dan deterjen ringan. Jangan gunakan bahan abrasif atau pelarut.
5.2 Penggantian Baterai
When the low battery indicator appears on the display, replace the batteries promptly to ensure accurate readings and proper operation. Refer to Section 3.1 for battery installation steps.
5.3 Penggantian Sekring
If the current measurement function fails, the fuse may need replacement. Always use fuses of the specified type and rating.
- For mA current measurements, use a fuse rated F 600mA/250V.
- For 10A current measurements, use a fuse rated F10A/250V.
Fuse replacement should only be performed by qualified personnel. Disconnect all test leads and power before opening the meter casing.
6. Penyelesaian masalah
If the multimeter does not function correctly, check the following common issues:
- Tidak ada tampilan atau tampilan redup: Periksa level baterai dan ganti jika perlu. Pastikan baterai dipasang dengan polaritas yang benar.
- Pembacaan yang salah: Verify that the correct function and range are selected. Ensure test leads are properly connected and not damaged. Check for blown fuses if measuring current.
- "OL" ditampilkan: This indicates an overload or out-of-range measurement. Select a higher range or ensure the measured value is within the meter's capabilities.
- Tidak ada bunyi bip kontinuitas: Ensure the continuity function is selected and the circuit resistance is below the threshold.
Jika masalah berlanjut, hubungi dukungan pelanggan atau teknisi yang berkualifikasi.
7. Spesifikasi
The following table details the technical specifications of the Irfora T58D Digital Multimeter.

Figure 7.1: T58D Parameters Table.
| Parameter | Rentang/Nilai |
|---|---|
| DC Jiltage | 100mV, 600mV, 1V, 60V, 600V, 1000V |
| AC Jiltage | 100mV, 600mV, 1V, 60V, 600V, 750V |
| Arus DC | 600μA, 6mA, 60mA, 600mA, 6A, 10A |
| AC Saat Ini | 600μA, 6mA, 60mA, 600mA, 6A, 10A |
| Frekuensi | 100Hz, 1KHz, 10KHz, 100KHz, 1MHz, 10MHz, 25MHz |
| Perlawanan | 600Ω, 6kΩ, 60kΩ, 600kΩ, 6MΩ, 60MΩ |
| Kapasitansi | 6nF, 60nF, 600nF, 6μF, 60μF, 600μF, 6mF, 60mF |
| Suhu | -50℃~1000 / -58℉~1832℉ |
| Tes Dioda | Ya |
| Bel (Kontinuitas) | Ya |
| Catu Daya | 3 * 1.5V AAA batteries (Not included) |
| Menampilkan | 60000 counts LED display |
| Tampilan Overload | 'OL' ditampilkan |
| Tingkat Konversi | About 3 readings/second |
| Peringkat Keamanan | 600V CAT III and 1000V CAT II |
| Tingkat Polusi | 2 |
| Ketinggian Operasional | Di bawah 2000 m |
| Suhu Kerja | 0-40℃ (<80%RH, not considered <10℃) |
| Suhu Penyimpanan | -10~60℃ (<80%RH, remove battery) |
| Ukuran Barang | 187*95*55mm / 7.36*3.74*2.16 inci |
| Berat Barang | 331 gram / 11.67 ons |