Perkenalan
The GAMDIAS Aura GC10m V2 WH is a micro-tower computer case designed for Micro-ATX and Mini-ITX motherboards. It features a dual-chamber design, panoramic tempered glass panels, and comes equipped with three Addressable RGB (ARGB) fans to enhance system aesthetics and cooling. This manual provides essential information for the proper installation, operation, and maintenance of your computer case.
Gambar: Depan view of the GAMDIAS Aura GC10m V2 WH Micro-Tower Computer Case, showcasindengan panel kaca tempered dan kipas ARGB yang sudah terpasang.
Pengaturan dan Instalasi
Before beginning installation, ensure you have all necessary components and tools. Refer to your motherboard and component manuals for specific installation instructions.
1. Mempersiapkan Kasus
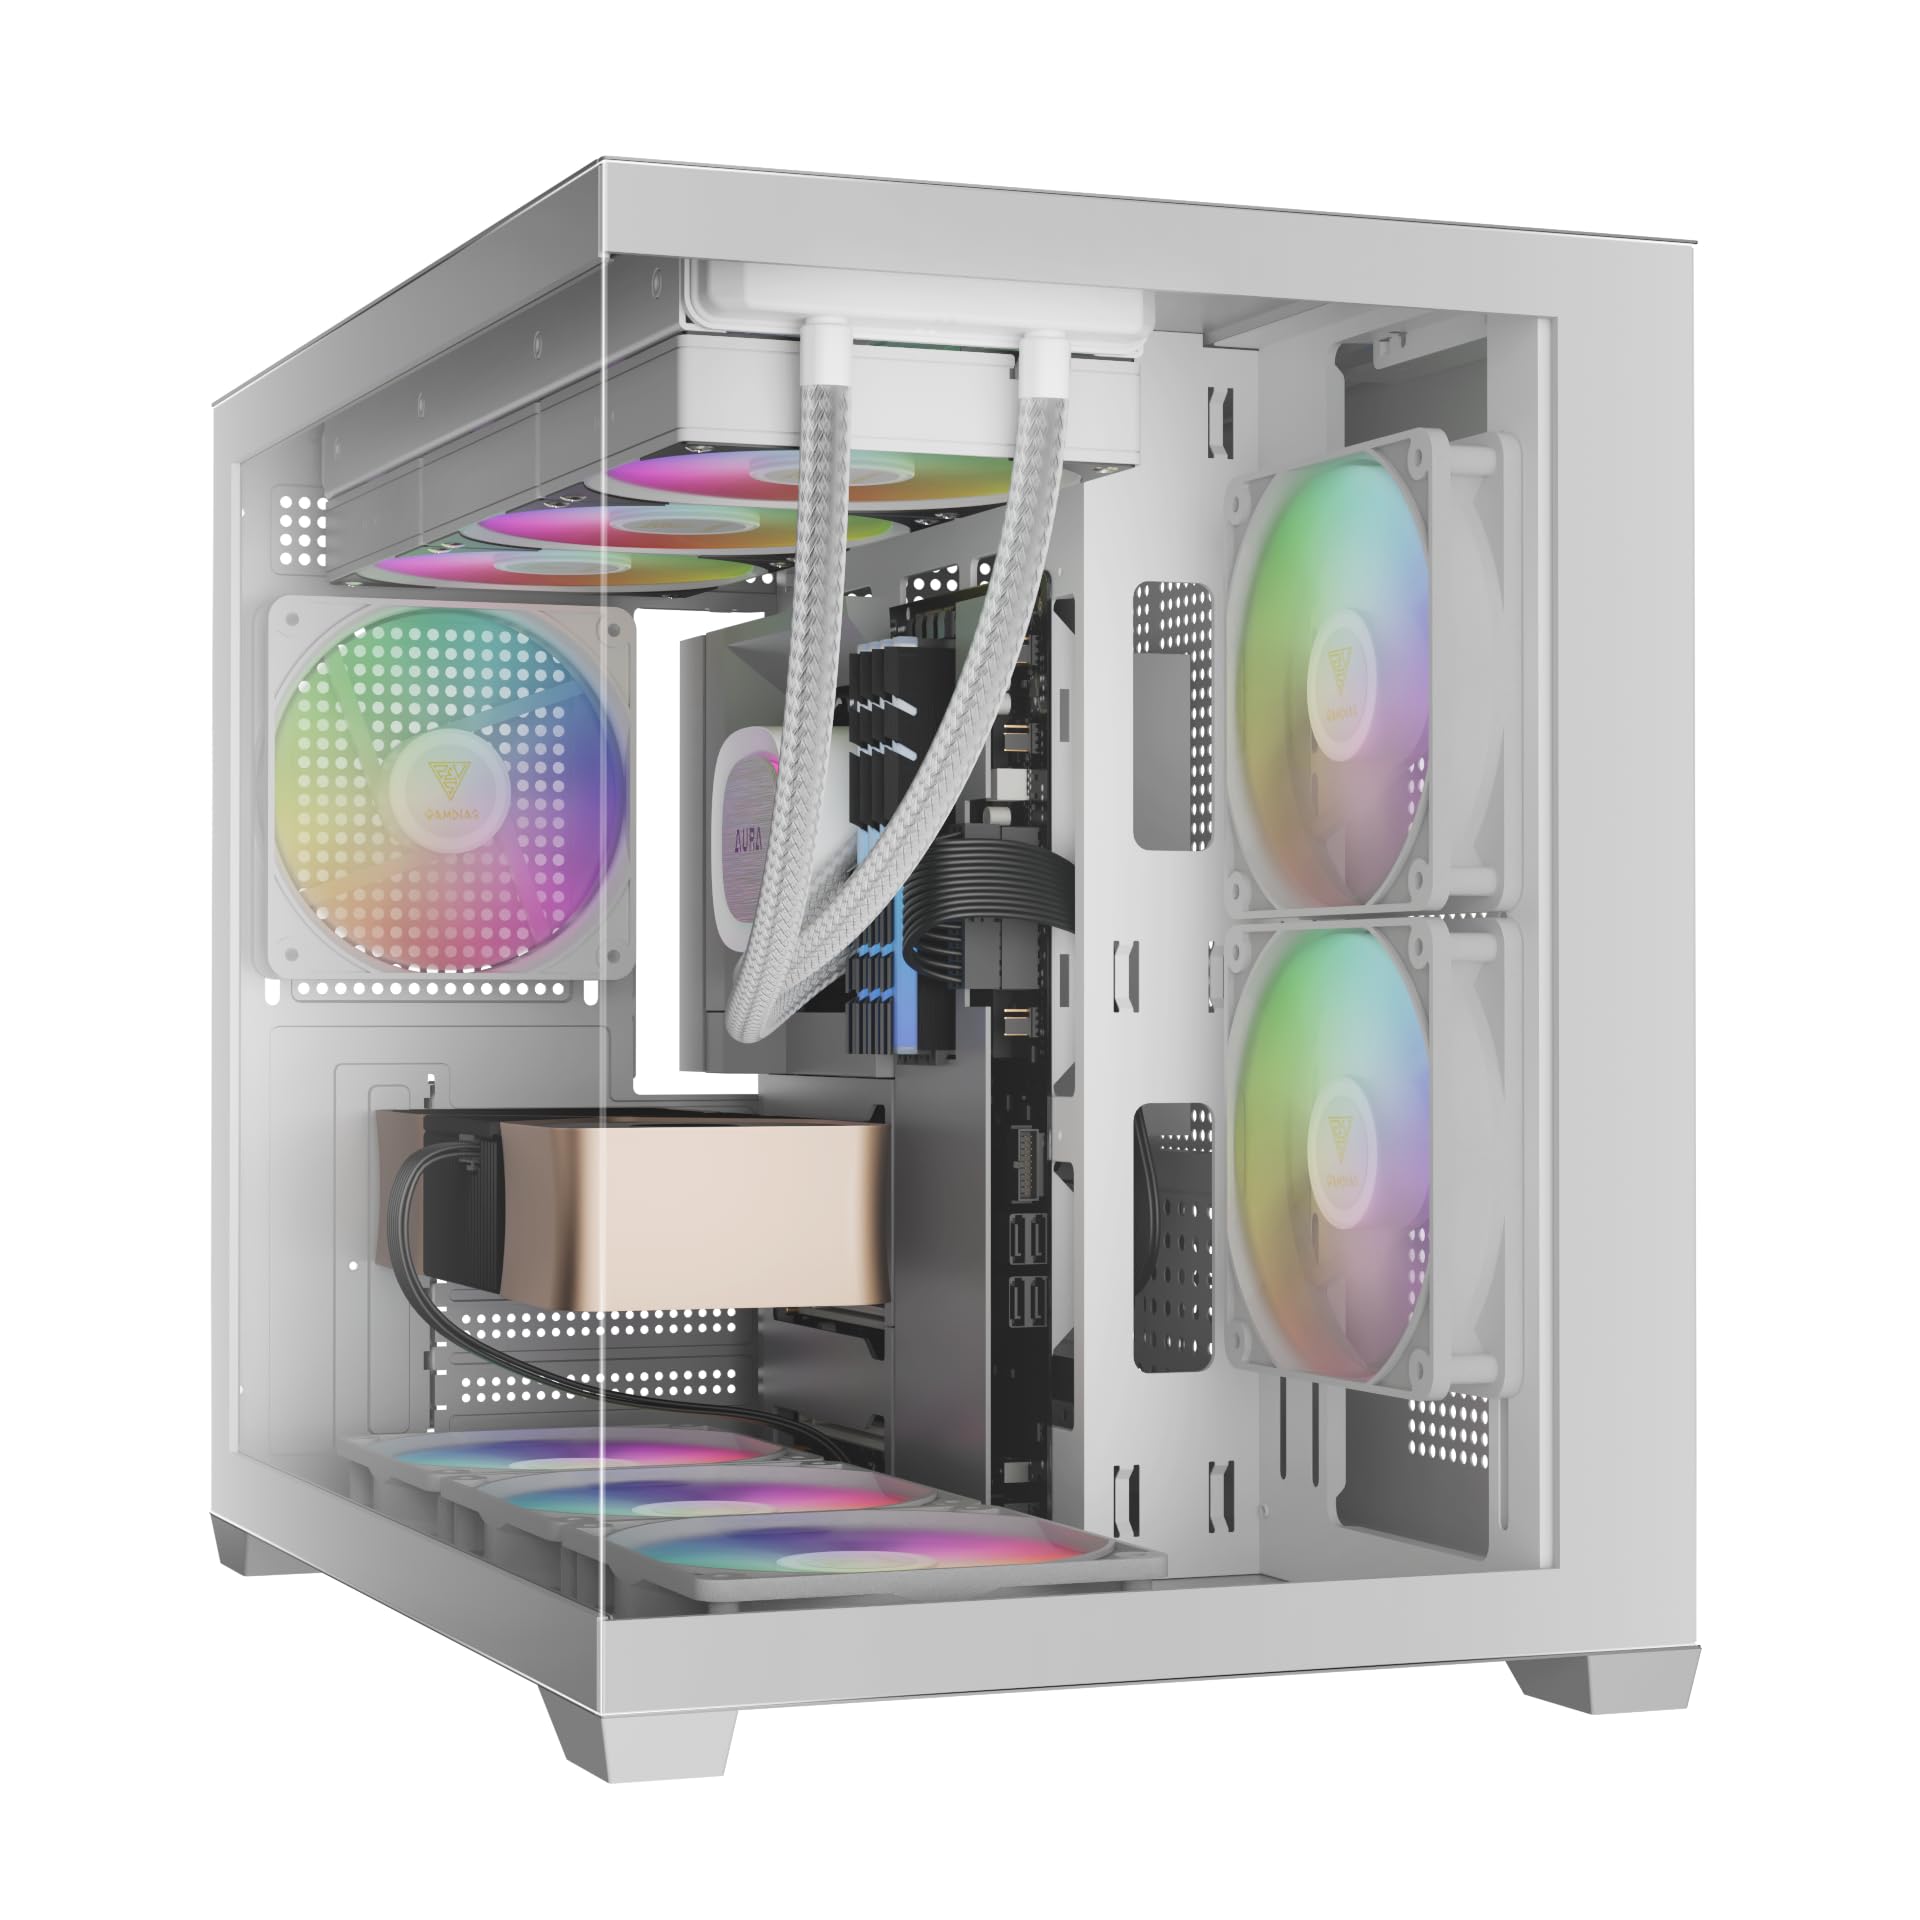
Carefully remove the tempered glass side and front panels. These are typically secured with thumbscrews or a latch mechanism. Place them on a soft, flat surface to prevent scratches.

Gambar: Sudut view of the case with the tempered glass side panel removed, showing the internal structure and fan mounts.
2. Instalasi Motherboard
- Pasang pelindung I/O (jika belum terpasang pada motherboard Anda) ke lubang belakang casing.
- Align your Micro-ATX or Mini-ITX motherboard with the standoffs inside the case.
- Amankan motherboard menggunakan sekrup yang disediakan.

Gambar: Internal view of the case, highlighting the motherboard tray area and fan mounting points.
3. Instalasi Unit Catu Daya (PSU)
- Install your PSU into its designated compartment, typically at the rear bottom of the case.
- Kencangkan PSU dengan sekrup dari bagian belakang casing.
- Ensure the PSU fan faces the correct direction for optimal airflow (usually downwards if there's a vent, or upwards if not).

Image: Rear internal view of the case, showing the PSU mounting area and cable routing options.
4. Instalasi Drive
- 3.5" / 2.5" Drive Bay (HDD Cage): Locate the HDD cage. Install one 3.5" HDD or one 2.5" SSD/HDD.
- 2.5" Drive Bays: The case supports three additional 2.5" SSDs/HDDs. Mount these drives to the designated brackets or locations within the case.
5. Pemasangan Kipas dan Radiator
The case comes with three pre-installed ARGB fans (two side, one rear). Additional fans or radiators can be installed in the following locations:
- Atas: Supports 3 x 120mm or 2 x 140mm fans; 360mm or 280mm radiators.
- Samping: Supports 2 x 120mm or 2 x 140mm fans; 240mm radiators. (Pre-installed 2 x 120mm ARGB fans)
- Dasar: Mendukung 3 kipas 120mm atau 2 kipas 140mm.
- Belakang: Supports 1 x 120mm or 1 x 140mm fan; 120mm radiators. (Pre-installed 1 x 120mm ARGB fan)

Gambar: Internal view showing the pre-installed ARGB fans on the side and rear, illustrating fan placement.
6. Connecting Front I/O Ports and ARGB
Connect the following cables from the case to your motherboard:
- USB 2.0: Connect the USB 2.0 header cable.
- Ketik-C: Connect the USB Type-C header cable (if your motherboard supports it).
- Audio HD: Connect the HD Audio header cable.
- Power/Reset/LEDs: Connect the front panel power, reset, HDD LED, and power LED cables according to your motherboard manual.
- Penggemar ARGB: Connect the ARGB fan cables to your motherboard's 5V ARGB header or to the integrated ARGB controller (if applicable). The case includes an LED Switch Button for controlling ARGB lighting if connected to the case's internal controller.

Gambar: Atas view of the case, showing the front I/O panel with USB ports and the LED switch button.
Operasi
Menyalakan
Once all components are installed and connected, close the side panels. Connect your monitor, keyboard, mouse, and power cable. Press the power button on the front panel of the case to start your system.
Kontrol Pencahayaan ARGB
Kipas ARGB yang sudah terpasang dapat dikontrol dengan dua cara:
- Tombol Sakelar LED: If the ARGB fans are connected to the case's internal controller, press the dedicated LED Switch Button on the front I/O panel to cycle through various lighting effects and colors.
- Perangkat Lunak Motherboard: If the ARGB fans are connected directly to a compatible 5V ARGB header on your motherboard, you can control the lighting effects using your motherboard's proprietary RGB software (e.g., ASUS Aura Sync, MSI Mystic Light, Gigabyte RGB Fusion, ASRock Polychrome Sync).
Pemeliharaan
Perawatan rutin membantu memastikan kinerja optimal dan umur panjang komponen komputer Anda.
- Filter Debu: The case features removable dust filters (e.g., on the top and bottom). Periodically remove and clean these filters with compressed air or water (ensure they are completely dry before reinstallation).
- Pembersihan Kasus: Gunakan yang lembut, damp cloth to clean the exterior surfaces of the case. For tempered glass panels, use a glass cleaner and a microfiber cloth. Avoid abrasive cleaners.
- Penghilangan Debu Internal: Every few months, open the case and use compressed air to remove dust from internal components, especially fan blades and heatsinks.
Penyelesaian Masalah
Jika Anda mengalami masalah, pertimbangkan solusi umum berikut:
- Sistem Tidak Menyala:
- Pastikan catu daya (PSU) dalam keadaan menyala dan terhubung dengan benar ke stopkontak.
- Verify all power cables (24-pin ATX, CPU, GPU, drives) are securely connected.
- Check that the front panel power button cable is correctly connected to the motherboard.
- ARGB Fans Not Lighting Up/Spinning:
- Confirm ARGB cables are securely connected to a 5V ARGB header on the motherboard or the case's controller.
- Ensure fan power cables are connected to appropriate fan headers on the motherboard or PSU.
- If using motherboard software, verify it is installed and configured correctly.
- Port I/O Depan Tidak Berfungsi:
- Check that the USB and HD Audio cables from the front panel are correctly connected to their respective headers on the motherboard.
For persistent issues, consult your motherboard manual or contact GAMDIAS support.
Spesifikasi
| Model | AURA GC10 V2 WH |
| Jenis Kasus | Micro-Tower |
| Dukungan Motherboard | Micro-ATX, Mini-ITX |
| Dimensi (P x L x T) | Ukuran 42x29x37 cm |
| Berat | 5 kg |
| Ruang Penggerak | 1 x 3.5" or 1 x 2.5" (HDD Cage), 3 x 2.5" |
| Port masukan/keluaran | 1 x Type-C, 1 x USB 2.0, 1 x HD Audio, 1 x LED Switch Button |
| Kipas yang sudah terpasang sebelumnya | 2 x 120mm ARGB (Samping), 1 x 120mm ARGB (Belakang) |
| Dukungan Penggemar |
|
| Dukungan Radiator |
|
| Batas Ketinggian Pendingin CPU | ukuran 165mm |
| VGA Length Limit | ukuran 400mm |
| Batas Panjang PSU | ukuran 160mm |
Informasi Garansi
For detailed warranty terms and conditions, please refer to the official GAMDIAS webLihat situs web atau kartu garansi yang disertakan dengan produk Anda. Simpan bukti pembelian Anda untuk klaim garansi.
Dukungan Pelanggan
If you require further assistance or have questions regarding your GAMDIAS Aura GC10m V2 WH computer case, please contact GAMDIAS customer support.
- Pabrikan: GAMDIAS TAIWAN
- Alamat: No. 113, Jian 2nd Rd., Zhonghe, Dist., New Taipei City 235, Taiwan
- Importir (India): Allway Distributions Pvt Ltd, No-49, H.B. Samajha Road, Baswangudi , Bengaluru- 560004
- Importer Contact (India): 8904307700
- Resmi Weblokasi: www.gamdias.com (Silakan periksa situs resmi website for the most up-to-date support contact information and resources.)


