1. Pendahuluan
This user manual provides detailed instructions for the proper installation, operation, and maintenance of your RAVEMEN FR500 Front Bike Light and TR250 Tail Bike Light Set. Please read this manual thoroughly before using the product to ensure safe and optimal performance. Keep this manual for future reference.
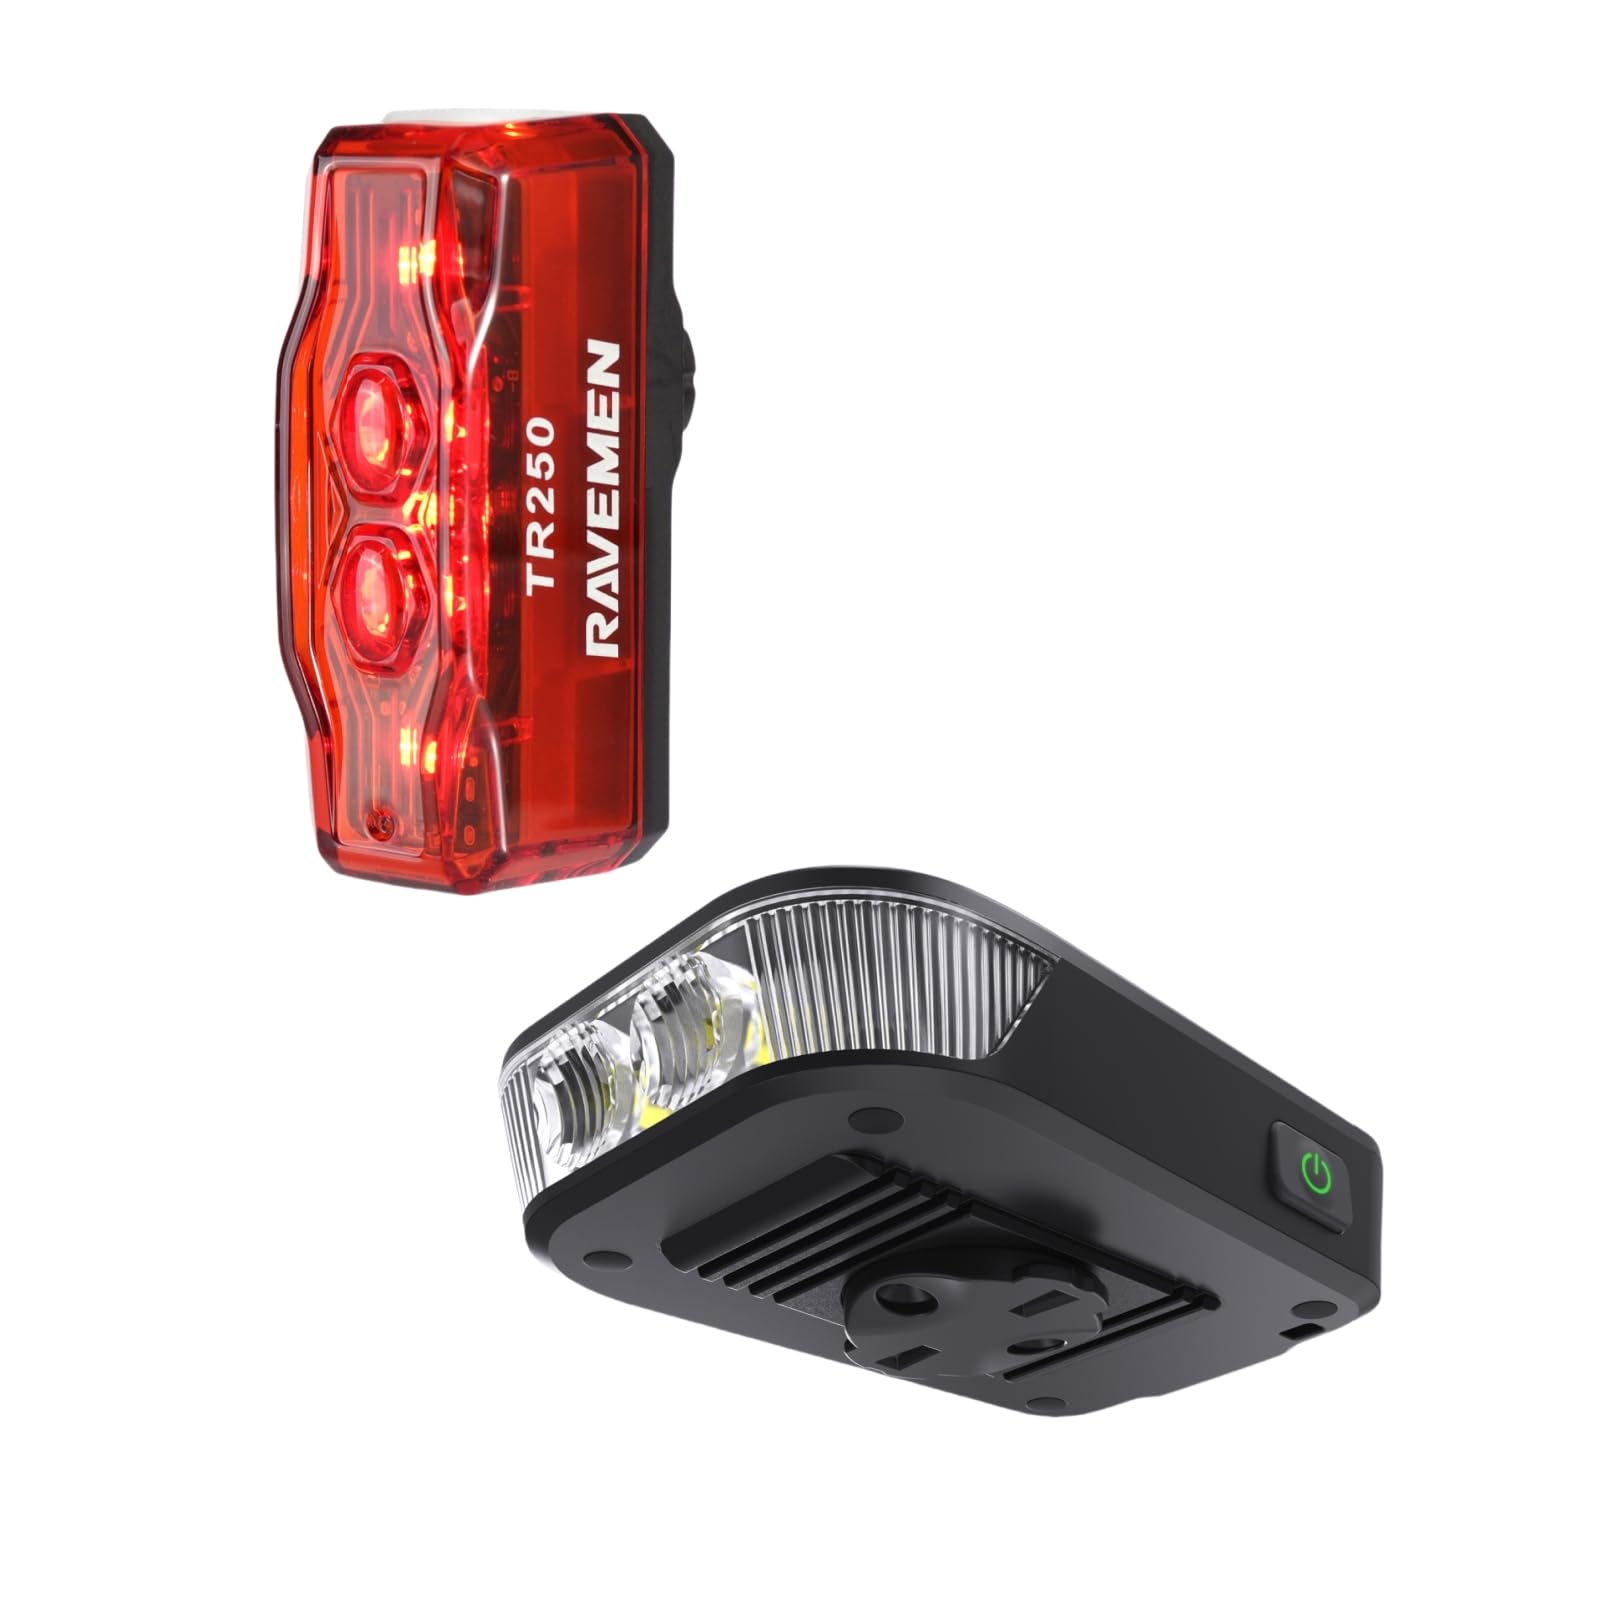
Gambar 1: RAVEMEN FR500 Front Light and TR250 Tail Light Bundle. This image displays both the FR500 front light and the TR250 tail light, along with their respective mounting brackets and charging cables, as they appear in the product packaging.
2. Informasi Keselamatan
- Jangan melihat langsung ke berkas cahaya when the front light is on, as it can cause temporary vision impairment or eye damage.
- Ensure the lights are securely mounted before each ride to prevent detachment.
- Jauhkan lampu dari jangkauan anak-anak.
- Do not disassemble or modify the lights. This will void the warranty and may cause damage or injury.
- Use only the provided charging cables or certified equivalents.
- Operating temperature range: -10°C to 40°C (14°F to 104°F).
- Simpan lampu di tempat sejuk dan kering bila tidak digunakan.
3. Isi Paket
Verifikasi bahwa semua item ada dalam paket Anda:
- 1 x Lampu Sepeda Depan RAVEMEN FR500
- 1 x RAVEMEN TR250 Tail Bike Light
- 1 x Handlebar Mount for FR500
- 1 x Seatpost Mount for TR250
- 2 x USB Charging Cables (Type-C for FR500, Micro-USB for TR250)
- 1 x Panduan Pengguna (dokumen ini)
4. Pengaturan dan Instalasi
4.1. FR500 Front Light Installation
- Select a suitable position on your handlebar, ensuring the light beam is unobstructed and points forward.
- Attach the handlebar mount to your handlebar using the provided strap. Ensure it is tight and stable.
- Slide the FR500 front light onto the mount until it clicks securely into place.
- Sesuaikan sudut lampu untuk menerangi jalan di depan tanpa menyilaukan lalu lintas yang datang dari arah berlawanan.
Gambar 2: FR500 Front Light mounted on a bicycle handlebar. This image illustrates the FR500 front light securely attached to a bicycle handlebar, demonstrating the correct orientation and positioning for optimal visibility.
4.2. TR250 Tail Light Installation
- Choose a position on your seatpost that provides maximum rear visibility.
- Attach the seatpost mount to your seatpost using the rubber strap. Ensure it is firm and does not rotate.
- Slide the TR250 tail light onto the mount until it locks securely.
- Verify the tail light is facing directly backward.
Gambar 3: TR250 Tail Light mounted on a bicycle seatpost. This image shows the TR250 tail light attached to a bicycle seatpost, highlighting its rear-facing orientation for enhanced safety.
5. Petunjuk Pengoperasian
5.1. FR500 Front Light Operation
- Daya Hidup/Mati: Tekan dan tahan tombol daya selama 1 detik.
- Ubah Mode Kecerahan: With the light on, short press the power button to cycle through High, Medium, Low, and Eco modes.
- Flash Mode: Double-press the power button to activate flash mode. Short press to cycle through different flash patterns. Double-press again to return to constant mode.
- Mode Memori: The light will remember the last used constant mode when turned off and on again.
- Indikator Baterai: The power button illuminates to indicate battery level:
- Green: 100% - 75%
- Blue: 75% - 50%
- Yellow: 50% - 25%
- Red: 25% - 10%
- Flashing Red: Below 10% (Charge immediately)
5.2. TR250 Tail Light Operation
- Daya Hidup/Mati: Tekan dan tahan tombol daya selama 1 detik.
- Ubah Mode: With the light on, short press the power button to cycle through various constant and flashing modes.
- Mode Memori: The light will remember the last used mode.
- Indikator Baterai: The power button illuminates to indicate battery level:
- Green: 100% - 75%
- Blue: 75% - 50%
- Yellow: 50% - 25%
- Red: 25% - 10%
- Flashing Red: Below 10% (Charge immediately)
6. Mengisi Daya Lampu
It is recommended to fully charge both lights before first use.
- FR500 Front Light:
- Locate the USB Type-C charging port on the FR500.
- Connect the provided USB Type-C cable to the light and a USB power source (e.g., computer, wall adapter).
- The power button will flash red during charging and turn solid green when fully charged.
- TR250 Tail Light:
- Locate the Micro-USB charging port on the TR250.
- Connect the provided Micro-USB cable to the light and a USB power source.
- The power button will flash red during charging and turn solid green when fully charged.
- Charging time typically ranges from 2-4 hours depending on the power source.
7. Pemeliharaan
- Pembersihan: Bersihkan badan lampu dan lensa dengan kain lembut dan kering.amp kain. Jangan gunakan pembersih atau pelarut yang bersifat abrasif.
- Penyimpanan: If storing for an extended period, charge the lights to approximately 50% every 3 months to prolong battery life. Store in a cool, dry place.
- Tahan Air: The lights are designed to be water-resistant. Avoid submerging them in water. Ensure charging port covers are securely closed.
8. Penyelesaian masalah
| Masalah | Kemungkinan Penyebab | Larutan |
|---|---|---|
| Lampu tidak menyala. | Baterai lemah atau benar-benar habis. | Isi daya lampu hingga penuh. |
| Lampu mati tiba-tiba. | Baterai lemah. | Isi ulang lampu. |
| Lampu berkedip atau redup. | Baterai lemah atau sambungan longgar. | Charge the light. Ensure the light is securely mounted. |
| Tidak dapat mengubah mode. | Button malfunction or light is in a specific locked mode. | Ensure the button is pressed correctly. If issue persists, contact customer support. |
| Mount is not secure. | Mounting strap not tightened sufficiently or incorrect size. | Re-tighten the strap. Ensure the correct mount is used for your handlebar/seatpost diameter. |
9. Spesifikasi
Lampu Depan FR500
- Keluaran Maksimum: 500 lumen cahaya
- Baterai: Baterai Li-ion yang dapat diisi ulang
- Port Pengisian Daya: USB Tipe-C
- Waktu Berjalan: Bervariasi berdasarkan mode
- Ukuran: (Dimensi spesifik tidak diberikan)
- Berat: (Specific weight not provided)
- Tahan Air: Tingkat IPX6
Lampu Belakang TR250
- Keluaran Maksimum: 250 lumen cahaya
- Baterai: Baterai Li-ion yang dapat diisi ulang
- Port Pengisian Daya: Mikro USB
- Waktu Berjalan: Bervariasi berdasarkan mode
- Ukuran: (Dimensi spesifik tidak diberikan)
- Berat: (Specific weight not provided)
- Tahan Air: Tingkat IPX4
Note: Specific run times, battery capacities, dimensions, and weights may vary slightly. Refer to product packaging or official Ravemen website for the most accurate details.
10. Garansi dan Dukungan
RAVEMEN products are manufactured to high-quality standards. This product comes with a limited warranty against defects in materials and workmanship from the date of purchase. Please retain your proof of purchase for warranty claims.
For detailed warranty information, technical support, or service inquiries, please visit the official RAVEMEN website or contact your local distributor. Do not attempt to repair the product yourself, as this may void the warranty.
RAVEMEN Official Weblokasi: www.ravemen.com


